


-
Posts
478 -
Joined
-
Last visited
-
Days Won
54
Content Type
Profiles
Forums
Articles
Store
Blogs
Downloads
Events
Gallery
Posts posted by Lisi4ka
-
-
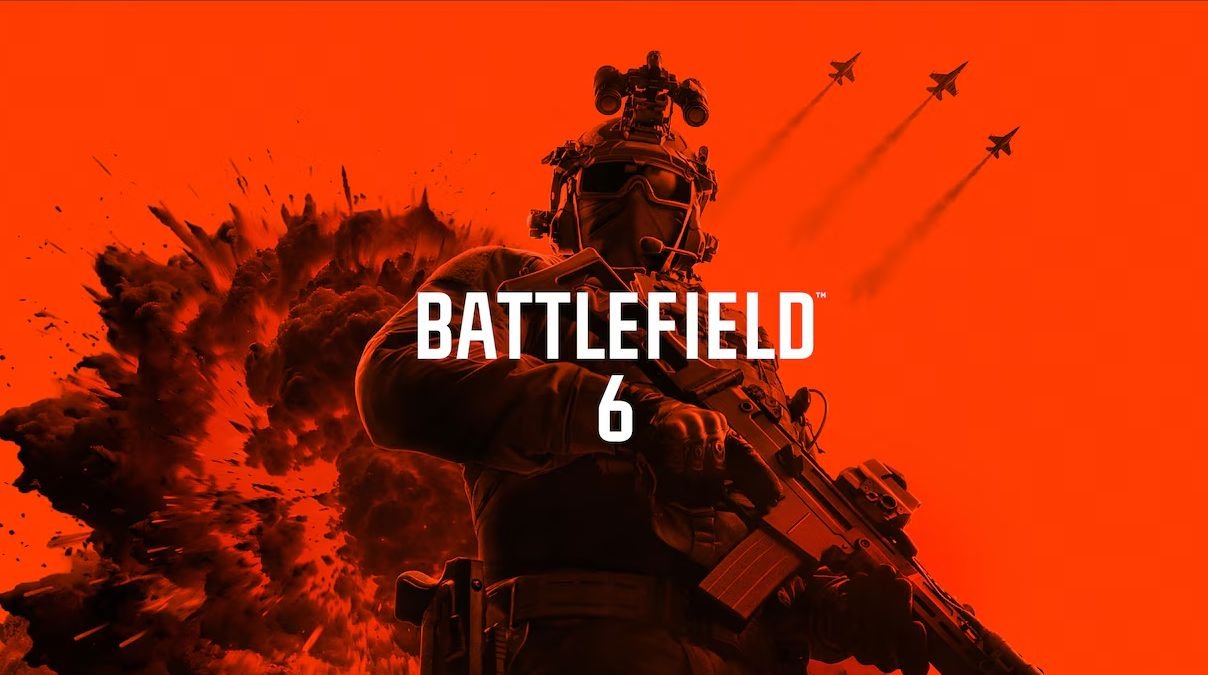
Players
Only visible (Только видимые)
Friends (Друзья)
Name (Имя)
Line (Линии)
Health (Здоровье)
Box type:(Боксы тип)
Disabled
2D
3D
Skeleton (Скелеты(с учетом видимости)
Size line skeleton: (Размер скелета(1-3))
Skeleton draw distance: (Дальность рисования скелета)
Distance (Дистанция)
Backlight distance:(Дальность подсветки (от 10м до 1000м))Radar
Enable radar
Backlight distance:
Position by X:
Position by Y:
Size:
Alpha:Objects
Enemy shields
Enemy mines
Enemy attack turretsAim
Enable aimbot(Аим (срабатывает при удержании указанной клавиши)
Lock target (Зафиксировать цель)
Do not aim at friends (Не целитесь на друзей)
Visibility check (Учет стен)
Aim priority: (Приоритет аима)
Distance (Дистанция)
Crosshair (Прицел)
Control radius: область в которой вы можете свободно двигать мышкой когда аим прилипнет к игроку (чем больше значение тем больше область)
Draw fov circle (Включение и отключение визуального круга FoV)
Fov: (Угол обзора(FOV)(зона срабатывания аима))
Distance: (Дистанция срабатывания аима)
Bones selection:( Выбор кости . вы можете выбрать 1 кость или несколько костей)
Head (голова)
Neck (шея)
Left elbow (левая рука)
Right elbow (правая рука)
Body (тело)
Pelvis (пах)
Left knee (левое колено)
Right knee (правое колено)
Bone change time: (Частота смены кости)
Key selection:( Выбор клавиши для работы аима) (ЛЮБАЯ НА ВАШ ВЫБОР)Colors
Visible players color
Invisible players color
My team players color
Target player color
Misc
Disable weapon recoilSetting
Open menu key: (Клавиша открытия меню)
-
Software price for HWID Spoofer for games with BattlEye
1 day: 300 rubles 31 days: 1200 rubles[English] Information and technical requirementsСпойлерWe remind you that you must understand what you are doing when playing with the software !!!
- You acquire and use the software at your own risk.
- The Undetected status does not guarantee 100% protection against blocking (with any cheat in any game, a ban is possible).
- If the update is in the game, wait for the software update.
- By purchasing this software, you agree to the rule that if the project is detected or completely closed, you will not receive a refund!
- By purchasing this software, you agree to the rule that if you block your game account, you will not receive a refund!
- By purchasing this software, you agree to the rule that it is impossible to exchange a key for another software (game)!
- By purchasing this software, you agree to the rule that if you bought the wrong product you will not receive a refund!
- By purchasing this software, you agree to the rule that if the characteristics of the PC do not match our description, you will not receive a refund!
- By purchasing this software, you agree to the rule that if you do not comply with the technical requirements written by us, you will not receive a refund!
System Requirements:
Supported processors: Intel, AMD
Supported OS: Windows 10-11 x64
Supported Builds: 1903(18362), 1909(18363), 2004(19041), 20H2 (19042), 21H1(19043), 21H2(19044), 22H2 (19045), 21H2 (22000), 22H2 (22621), 23H2 (22631), 24Н2 (26100)** How to find it ... Press the key combination Win + R, insert the WINVER command into the field, and press Ok.
Additional information:
Works in games:
- EFT
- DayZ
If you use Spoofer and cheat at the same time.. first run the cheat, and then run Spoofer (requires a PC reboot before that)
- The spoofer only needs to be started once before the next PС reboot.
- Spoofer does not remove the ban from your account, it removes the ban from your PC for the duration of Spoofer
- Before using the spoofer on a new account, be sure to create a new user in Windows, change the name of your PC in the system
- properties ** (provided that it continues to ban)
[Русский] Информация и технические требования
СпойлерНапоминаем что вы должны понимать на что идете играя с софтом!!!
-
Софт вы приобретаете и используете на свой страх и риск.
- Статус Undetected не гарантирует 100% защиту от блокировок (с любым читом в любой игре возможен бан).
- Если обновление в игре дождитесь обновления софта.
- Покупая данное ПО, вы соглашаетесь с правилом, что при детекте или полном закрытии проекта вы не получите возврат денежных средств!
- Покупая данное ПО, вы соглашаетесь с правилом, что при блокировке игрового аккаунта вы не получите возврат денежных средств!
- Покупая данное ПО, вы соглашаетесь с правилом, что обмен ключа на другой софт (игру) невозможен!
- Покупая данное ПО, вы соглашаетесь с правилом, что если вы купили не тот продукт вы не получите возврат денежных средств!
- Покупая данное ПО, вы соглашаетесь с правилом, что если характеристики пк не соответствуют нашему описанию вы не получите возврат денежных средств!
- Покупая данное ПО, вы соглашаетесь с правилом, что если при не соблюдении технических требований написанных нами вы не получите возврат денежных средств!
Требования к системе:
Поддерживаемые процессоры: Intel, AMD
Поддерживаемые ОС: Windows 10-11 х64
Поддерживаемые сборки: 1903(18362), 1909(18363), 2004(19041), 20H2 (19042), 21H1(19043), 21H2(19044), 22H2 (19045), 21H2 (22000), 22H2 (22621), 23H2 (22631), 24Н2 (26100)**Как ее узнать.... Нажимаем сочетание клавиш Win+R, вставляем в поле команду WINVER , и нажимаем Ok.
Дополнительная информация:
- Работает в играх:
- EFT
- DayZ
Eсли вы используете Spoofer и чит одновременно.. сначала запускаете чит, а потом запускаете Spoofer( требуется перед этим перезагрузка пк)
- Снимает бан по железу до перезагрузки пк, после перезагрузки исходные данные пк возвращаются в первоначальное значение
- Spoofer не снимает бан с аккаунта, он снимает бан с вашего пк на время действия Spoofer
- Спуфер требуется запускать лишь раз до следующей перезагрузки ПК.
- Перед тем как использовать спуфер на новом аккаунте, обязательно создайте нового пользователя в Windows, измените имя вашего ПК в свойствах системы*( при условии если продолжает банить)
🛒 Наши магазины / Our Stores
Методы оплаты / Payment Methods:
-
FK, СБП, Карта, WebMoney, UnionPay, Alipay, Turkish Bank Card, PIX, BTC, Litecoin и множество других способов оплаты / and many other payment options
-
Методы оплаты / Payment Methods: BTC, Litecoin
⚠️ Если у вас возникнут вопросы по оплате или нужны другие варианты оплаты, не представленные на сайтах — обращайтесь к нам через создание тикета в канале.
⁉️ If you have any questions about payment or need other payment options not listed on the sites, please contact us by creating a ticket in the channel.Создайте тикет в discord в разделе ( 🎫-𝙎𝘼𝙇𝙀𝙎-𝙏𝙄𝘾𝙆𝙀𝙏𝙎) | Create a ticket in the discord section ( 🎫-𝙎𝘼𝙇𝙀𝙎-𝙏𝙄𝘾𝙆𝙀𝙏𝙎)
💬 Наш Discord / Our Discord: Войти в Discord / Join Discord
⁉️ После покупки вы получите ключ и ссылку на инструкцию, которая содержит все рекомендации и пошаговые инструкции.
⁉️ After purchase, you will receive a key and a link to the instructions, which include all recommendations and step-by-step guidance.
📞 По вопросам сотрудничества / For Partnership Inquiries
Telegram: lisi4ka138
-
Инструкция на двух языках (русская и английская) | Instructions in two languages (Russian and English)
[English] Launch Instructions
СпойлерWe remind you that you must understand what you are doing when playing with the software !!!
This software uses unique identifiers of your " hardware"
- 1 account =1 PC ( Example: when you first start the program, your account is linked to the current PC, further use of the same account on another PC is not possible)
- if you do use a spuffer.. first log in to the launcher, and then launch the spoofer( you need to restart your PC before that)
- If you are using a spoofer, disable it and restart the computer
- Error "Hardware component has changed"
System requirements:
- Supported processors: Intel, AMD
- Supported OS: Windows 10- 11 x64
- Supported builds: 1903(18362), 1909(18363), 2004(19041), 20H2(19042), 21H1(19043), 21H2(19044), 22H2(19045), 21H2(22000), 22H2(22621), 23H2(22631), 24H2(26100), 25H2(26200)
** How to find it ... Press the key combination Win + R, insert the WINVER command into the field, and press Ok.
Additional Information:
- Works in games: EFT, DayZ
- Run from flash drive: Yes
-
If you use Spoofer and software at the same time... first run the cheat, and then launch Spoofer
**If you use both products from us, the order in which they are launched does not matter. - Removes the iron ban until the PC is restarted, after the reboot, the original PC data returns to its original value.
- Spoofer works until the PC is restarted.
- Spoofer does not remove the ban from the account, it removes the ban from your PC for the duration of the Spoofer.
- The functioning of the spoofer is guaranteed provided that the account has not been previously blocked. For this reason, we strongly recommend that you create a new account.
MANDATORY!!!!*(provided that it continues to ban)
- Before using the spoofer on a new account, be sure to create a new user in Windows, change the name of your PC in the system properties, and also discharge the network in the new user *(provided it continues to ban)
- In rare cases, it is necessary to reinstall Windows *(provided that it continues to ban)
How to do it:
-
Change the PC name.
-
Restart the PC (make sure to restart the computer for the changes to take effect).
-
Create a new user account in Windows and log in with it.
-
In the new user account, perform a network reset:
-
Press Win + I → Network & Internet.
-
Scroll down and select Network reset, then confirm the reset.
-
-
Restart the PC.
-
After that, you can proceed with further actions: register a new game account, launch the software, and use the spoofer.
For the software to work correctly, you need to install and remove a number of programs
It is recommended to install
- Redistributable packages Visual C++ 2008-2019
- DirectX
DISABLE or REMOVE MANDATORY
- Disable antivirus ( Remove!!! )
- Disable SmartScreen How to disable
- Disable Windows Defender How to disable
Additionally
- Remove FaceIt and Vanguard How to disable
FaceIt this is anti-cheat CS:GO Vanguard this is anti-cheat ValorantAdditionally (if an error occurs)
- Enable VT-x, SVM in BIOS
- Disable Hyper-V
LAUNCH INSTRUCTIONS
IMPORTANT ignoring these actions will lead to a ban!!!
- Before starting the cheat, close the Game and the game launcher!
- If you have previously run any cheats, restart your PC! (restart pc before using another cheat)
- Close the software launcher before launching the game!
- If you neglect one of the actions, you can get banned!
- Running the software, you need a flash drive (virtual or physical)
Please read this entire guide carefully before starting!
🔽 Step 1. Downloading and Preparing the Launcher
- 📥 Download Launcher
- 💾 Place the launcher on a USB flash drive (we strongly recommend running it from the USB drive — this is important for your safety).
If the launcher does not start
• If an error log is created when launching the launcher, enable a VPN and start the launcher again.
🚀 Step 2. Running the Launcher and Registration
- ▶️ Launch the launcher from the USB drive.
- 📝 Register in the launcher.
- 🔑 Activate your key.
🎮 Step 3. Launching the Purchased Project
- ▶️ Launch the launcher from the USB drive.
- 🕹 Select the project (for which you have a purchased key) and click Launch.
- ✅ If the launch is successful, the Launched button will appear and you will see the message Successfully launched (focus on the “Launched” button).
⚠️ Important!
- ❌ If an error occurs — the software will not load!
- ❎ In this case, close the launcher and check the “Common Errors and Solutions” section [read here]. There you can find your specific error and step-by-step solution.
🔒 Step 4. Final Preparation
- ❌ Close the software Launcher
- 🔌 Disconnect the USB flash drive and make sure it is removed.
- 🕹 Start the game
🎉 Enjoy the game!
[Русский] Инструкция по запуску
СпойлерНапоминаем что вы должны понимать на что идете играя с софтом!!!
Данное ПО использует уникальные идентификаторы вашего "железа"
- 1 учетка =1 пк ( Пример: при первом запуске программы ваша учетная запись привязывается к текущему ПК, дальнейшее использование той же учетной записи на другом ПК не возможно)
- Если вы используете спуфер отключите его и перезапустите компьютер
- Если вы всё-таки используете спуфер.. сначала авторизовываетесь в лаунчере, а потом запускаете спуфер ( требуется перед этим перезагрузка пк)
- Ошибка "Hardware component has changed"
Требования к системе:
Поддерживаемые процессоры: Intel, AMD
Поддерживаемые ОС: Windows 10-11 х64
Поддерживаемые сборки: 1903(18362), 1909(18363), 2004(19041), 20H2(19042), 21H1(19043), 21H2(19044), 22H2(19045), 21H2(22000), 22H2(22621), 23H2(22631), 24H2(26100), 25H2(26200)**Как ее узнать.... Нажимаем сочетание клавиш Win+R, вставляем в поле команду WINVER , и нажимаем Ok.
Дополнительная информация
Совместимость: Работает в играх EFT, DayZ
Необходимо: Включить виртуализацию в BIOS (SVM, VT-x, VT-d)
Необходимо: Отключить Hyper-V — читайте здесь
Запуск с флешки: ДаВажно!
- Если вы используете Spoofer и софт одновременно... сначала запустите софт, а затем запустите Spoofer
**Если вы используете оба наших продукта, порядок их запуска не имеет значения.
- Spoofer работает только до перезагрузки ПК., после перезагрузки исходные данные пк возвращаются в первоначальное значение
- Spoofer не снимает бан с аккаунта — он временно снимает бан с вашего ПК на время его работы.
- Спуфер требуется запускать лишь раз до следующей перезагрузки ПК.
- Работоспособность Spoofer гарантируется только в том случае, если аккаунт ранее не был заблокирован. По этой причине мы настоятельно рекомендуем создавать новый аккаунт.
ОБЯЗАТЕЛЬНО!!!!*( при условии если продолжает банить)
- Перед тем как использовать спуфер на новом аккаунте, обязательно создайте нового пользователя в Windows, измените имя вашего ПК в свойствах системы , а также выполните сброс сети в новом пользователе*( при условии если продолжает банить)
- В редких случаях необходима переустановка Windows *( при условии если продолжает банить)
Как это сделать:
-
Смените имя ПК.
-
Перезагрузите ПК (обязательно перезагрузите компьютер, чтобы изменения вступили в силу).
-
Создайте нового пользователя в Windows и войдите под ним.
-
В новой учетной записи выполните сброс сети:
-
Нажмите Win + I → Сеть и Интернет.
-
Прокрутите вниз и выберите Сброс сети, подтвердите выполнение сброса.
-
-
Перезагрузите ПК.
После этого можно выполнять дальнейшие действия: регистрировать новый аккаунт в игре, запускать софт и спуффер
Для корректной работы софт необходимо установить и удалить ряд программ
Рекомендуется установить
- Распространяемые пакеты Visual C++ 2008-2019
- DirectX
ОТКЛЮЧИТЬ или УДАЛИТЬ ОБЯЗАТЕЛЬНО
-
Отключить антивирус ( Удалить!!! )
-
Отключить SmartScreen
-
Отключить защитник Windows
Дополнительно
- Удалить FaceIt и Vanguard подробнее
FaceIt - это отдельный античит игры CS:GO Vanguard - это античит игры ValorantДополнительно (при возникновении ошибки!!!)
- Включить VT-x , SVM в BIOS
- Отключить Hyper-V
ВАЖНО Пренебрежение данных действий может привести к бану!!!
- Перед запуском софта закройте Игру и лаунчер игры!
- Если вы ранее запускали какие-либо софты, перезагрузите свой компьютер!(перезагрузите компьютер перед использованием другого чита)
- В случае пренебрежения одного из действий вы можете получить бан!
- Закрыть лаунчер софта перед запуском игры!
- Запуск софта с флешки (виртуальной или физической)
- **удалите старый лаунчер софта с ПК
ИНСТРУКЦИЯ ПО ЗАПУСКУ
Внимательно прочтите всю инструкцию перед началом!
🔽 Шаг 1. Скачивание и подготовка лаунчера
-
💾 Поместите лаунчер на флешку (мы настоятельно рекомендуем запускать именно с флешки — это важно для вашей безопасности).
Если лаунчер не запускается
-
Или при запуске лаунчера создаётся error log, включите VPN и запустите лаунчер повторно.
🚀 Шаг 2. Запуск лаунчера и регистрация
-
▶️ Запустите лаунчер с флешки.
-
📝 Зарегистрируйтесь в лаунчере.
-
🔑 Активируйте свой ключ.
🎮 Шаг 3. Запуск приобретённого проекта
-
▶️ Запустите лаунчер с флешки.
-
🕹 Выберите проект (на который у вас есть купленный ключ) и нажмите Launch.
-
✅ Если запуск прошёл успешно, появится кнопка Launched и ниже сообщение Successfully launched ( ориентируйтесь на кнопку Launched )
⚠️ Важное!
-
❌ Если возникнет ошибка — спуффер не загрузится!
-
❎ В этом случае закройте лаунчер и ознакомьтесь с разделом «Популярные ошибки и их решения» [читайте здесь]. Там вы сможете найти свою ошибку и пошаговое решение.
🔒 Шаг 4. Завершение подготовки
-
❌ Закройте Launcher софта
-
🔌 Отсоедините флешку и убедитесь, что она отключена.
-
🕹 Запустите игру
🎉 Приятной игры!
Еrror | Ошибки
-
 1
1
-
Инструкция на двух языках (русская и английская) | Instructions in two languages (Russian and English)
The video shows a demo view of the launch and so on
A more detailed launch is spelled out in the text instructions below the videoВ видеоролике продемонстрирован демонстрационный вид запуска и прочее Более детальный запуск прописан в текстовой инструкции ниже видео[English] Launch Instructions
СпойлерWe remind you that you must understand what you are doing when playing with the software !!!
- You purchase and use the software at your own risk.
- The Undetected status does not guarantee 100% protection from blocking (with any software in any game, a ban is possible).
- If there is an update in the game, wait for the software update.
- By purchasing this software, you agree with the rule that in case of detection or complete closure of the project, you will not receive a refund!, as well as an exchange for another product!
- By purchasing this software, you agree to the rule that if you block your gaming account, you will not receive a refund!
- By purchasing this software, you agree to the rule that the key exchange for another program (game) is impossible under any circumstances!
- By purchasing this software, you agree with the rule that if you bought the wrong product, you will not receive a refund, as well as an exchange for another product!
- By purchasing this software, you agree with the rule that if the characteristics of the PC (system) do not match our description, you will not receive a refund!
- By purchasing this software, you agree to the rule that in case of non-compliance with the technical requirements written by us, you will not receive a refund!
- By purchasing this software, you agree to the rule that if you change (delete) the functions of the software, you will not receive a refund!
- By purchasing this software, you agree with the rule that there is no freezing of subscription time at your request! (freezing is provided only for the time of software updates)
This software uses unique identifiers of your " hardware"
- 1 account =1 PC ( Example: when you first start the program, your account is linked to the current PC, further use of the same account on another PC is not possible)
- if you do use a spuffer.. first log in to the launcher, and then launch the spoofer( you need to restart your PC before that)
- If you are using a spoofer, disable it and restart the computer
- Error "Hardware component has changed"
System requirements:
- Supported processors: Intel, AMD
- Supported OS: Windows 10- 11 x64
- Supported builds: 1903(18362), 1909(18363), 2004(19041), 20H2(19042), 21H1(19043), 21H2(19044), 22H2(19045), 21H2(22000), 22H2(22621), 23H2(22631), 24H2(26100), 25H2(26200)
** How to find it ... Press the key combination Win + R, insert the WINVER command into the field, and press Ok.
Additional Information:
- Works in games: Call of Duty: Modern Warfare II | Warzone | Modern Warfare III | Call of Duty: Black Ops 6 | Call of Duty: Black Ops 7
- Run from flash drive: Yes
- If you use Spoofer and cheat at the same time.. first run the cheat, and then run Spoofer (requires a PC reboot before that)
- The spoofer only needs to be started once before the next PС reboot.
- Spoofer does not remove the ban from your account, it removes the ban from your PC for the duration of Spoofer
- Before using the spoofer on a new account, be sure to create a new user in Windows, change the name of your PC in the system properties .** (provided that it continues to ban)
MANDATORY!!!!
- Before using the spoofer on a new account, be sure to create a new user in Windows, change the name of your PC in the system properties, and also discharge the network in the new user *(provided it continues to ban)
- In rare cases, it is necessary to reinstall Windows *(provided that it continues to ban)
How to do it:
-
Change the PC name.
-
Restart the PC (make sure to restart the computer for the changes to take effect).
-
Create a new user account in Windows and log in with it.
-
In the new user account, perform a network reset:
-
Press Win + I → Network & Internet.
-
Scroll down and select Network reset, then confirm the reset.
-
-
Restart the PC.
-
After that, you can proceed with further actions: register a new game account, launch the software, and use the spoofer.
For the software to work correctly, you need to install and remove a number of programs
It is recommended to install
- Redistributable packages Visual C++ 2008-2019
- DirectX
DISABLE or REMOVE MANDATORY
- Disable antivirus ( Remove!!! )
- Disable SmartScreen How to disable
- Disable Windows Defender How to disable
Additionally
- Remove FaceIt and Vanguard How to disable
FaceIt this is anti-cheat CS:GO Vanguard this is anti-cheat ValorantAdditionally (if an error occurs)
- Enable VT-x, SVM in BIOS
- Disable Hyper-V
** Links are clickabl
LAUNCH INSTRUCTIONS
IMPORTANT ignoring these actions will lead to a ban!!!
- Before starting the cheat, close the Game and the game launcher!
- If you have previously run any cheats, restart your PC! (restart pc before using another cheat)
- Close the software launcher before launching the game!
- If you neglect one of the actions, you can get banned!
- Running the software, you need a flash drive (virtual or physical)
Please read this entire guide carefully before starting!
🔽 Step 1. Downloading and Preparing the Launcher
- 📥 Download Launcher
- 💾 Place the launcher on a USB flash drive (we strongly recommend running it from the USB drive — this is important for your safety).
If the launcher does not start
• If an error log is created when launching the launcher, enable a VPN and start the launcher again.
🚀 Step 2. Running the Launcher and Registration
- ▶️ Launch the launcher from the USB drive.
- 📝 Register in the launcher.
- 🔑 Activate your key.
🎮 Step 3. Launching the Purchased Project
- ▶️ Launch the launcher from the USB drive.
- 🕹 Select the project (for which you have a purchased key) and click Launch.
- ✅ If the launch is successful, the Launched button will appear and you will see the message Successfully launched (focus on the “Launched” button).
⚠️ Important!
- ❌ If an error occurs — the software will not load!
- ❎ In this case, close the launcher and check the “Common Errors and Solutions” section [read here]. There you can find your specific error and step-by-step solution.
🔒 Step 4. Final Preparation
- ❌ Close the software Launcher
- 🔌 Disconnect the USB flash drive and make sure it is removed.
- 🕹 Start the game
🎉 Enjoy the game!
[Русский] Инструкция по запуску
СпойлерНапоминаем что вы должны понимать на что идете играя с софтом!!!
Данное ПО использует уникальные идентификаторы вашего "железа"
- 1 учетка =1 пк ( Пример: при первом запуске программы ваша учетная запись привязывается к текущему ПК, дальнейшее использование той же учетной записи на другом ПК не возможно)
- Если вы используете спуфер отключите его и перезапустите компьютер
- Если вы всё-таки используете спуфер.. сначала авторизовываетесь в лаунчере, а потом запускаете спуфер ( требуется перед этим перезагрузка пк)
- Ошибка "Hardware component has changed"
Требования к системе:
Поддерживаемые процессоры: Intel, AMD
Поддерживаемые ОС: Windows 10-11 х64
Поддерживаемые сборки: 1903(18362), 1909(18363), 2004(19041), 20H2(19042), 21H1(19043), 21H2(19044), 22H2(19045), 21H2(22000), 22H2(22621), 23H2(22631), 24H2(26100), 25H2(26200)**Как ее узнать.... Нажимаем сочетание клавиш Win+R, вставляем в поле команду WINVER , и нажимаем Ok.
Дополнительная информация
Работает в играх: Call of Duty: Modern Warfare II | Warzone | Modern Warfare III | Call of Duty: Black Ops 6 | Call of Duty: Black Ops 7
Необходимо: Включить виртуализацию в BIOS (SVM, VT-x, VT-d)
Необходимо: Отключить Hyper-V — читайте здесь
Запуск с флешки: ДаВажно!
- Eсли вы используете Spoofer и чит одновременно.. сначала запускаете чит, а потом запускаете Spoofer (требуется перед этим перезагрузка пк)
- Снимает бан по железу до перезагрузки пк, после перезагрузки исходные данные пк возвращаются в первоначальное значение
- Spoofer не снимает бан с аккаунта, он снимает бан с вашего пк на время действия Spoofer
- Спуфер требуется запускать лишь раз до следующей перезагрузки ПК.
ОБЯЗАТЕЛЬНО!!!!( при условии если продолжает банить)
- Перед тем как использовать спуфер на новом аккаунте, обязательно создайте нового пользователя в Windows, измените имя вашего ПК в свойствах системы , а также выполните сброс сети в новом пользователе*( при условии если продолжает банить)
- В редких случаях необходима переустановка Windows *( при условии если продолжает банить)
Как это сделать:
-
Смените имя ПК.
-
Перезагрузите ПК (обязательно перезагрузите компьютер, чтобы изменения вступили в силу).
-
Создайте нового пользователя в Windows и войдите под ним.
-
В новой учетной записи выполните сброс сети:
-
Нажмите Win + I → Сеть и Интернет.
-
Прокрутите вниз и выберите Сброс сети, подтвердите выполнение сброса.
-
-
Перезагрузите ПК.
После этого можно выполнять дальнейшие действия: регистрировать новый аккаунт в игре, запускать софт и спуффер
Для корректной работы софт необходимо установить и удалить ряд программ
Рекомендуется установить
- Распространяемые пакеты Visual C++ 2008-2019
- DirectX
ОТКЛЮЧИТЬ или УДАЛИТЬ ОБЯЗАТЕЛЬНО
-
Отключить антивирус ( Удалить!!! )
-
Отключить SmartScreen
-
Отключить защитник Windows
Дополнительно
- Удалить FaceIt и Vanguard подробнее
FaceIt - это отдельный античит игры CS:GO Vanguard - это античит игры ValorantДополнительно (при возникновении ошибки)
- Включить VT-x , SVM в BIOS
- Отключить Hyper-V
**Ссылки кликабельны
ВАЖНО Пренебрежение данных действий может привести к бану!!!
- Перед запуском софта закройте Игру и лаунчер игры!
- Если вы ранее запускали какие-либо софты, перезагрузите свой компьютер!(перезагрузите компьютер перед использованием другого чита)
- В случае пренебрежения одного из действий вы можете получить бан!
- Закрыть лаунчер софта перед запуском игры!
- Запуск софта с флешки (виртуальной или физической)
- **удалите старый лаунчер софта с ПК
ИНСТРУКЦИЯ ПО ЗАПУСКУ
Внимательно прочтите всю инструкцию перед началом!
🔽 Шаг 1. Скачивание и подготовка лаунчера
-
💾 Поместите лаунчер на флешку (мы настоятельно рекомендуем запускать именно с флешки — это важно для вашей безопасности).
Если лаунчер не запускается
-
Или при запуске лаунчера создаётся error log, включите VPN и запустите лаунчер повторно.
🚀 Шаг 2. Запуск лаунчера и регистрация
-
▶️ Запустите лаунчер с флешки.
-
📝 Зарегистрируйтесь в лаунчере.
-
🔑 Активируйте свой ключ.
🎮 Шаг 3. Запуск приобретённого проекта
-
▶️ Запустите лаунчер с флешки.
-
🕹 Выберите проект (на который у вас есть купленный ключ) и нажмите Launch.
-
✅ Если запуск прошёл успешно, появится кнопка Launched и ниже сообщение Successfully launched ( ориентируйтесь на кнопку Launched )
⚠️ Важное!
-
❌ Если возникнет ошибка — спуффер не загрузится!
-
❎ В этом случае закройте лаунчер и ознакомьтесь с разделом «Популярные ошибки и их решения» [читайте здесь]. Там вы сможете найти свою ошибку и пошаговое решение.
🔒 Шаг 4. Завершение подготовки
-
❌ Закройте Launcher софта
-
🔌 Отсоедините флешку и убедитесь, что она отключена.
-
🕹 Запустите игру
🎉 Приятной игры!
Еrror | Ошибки
-
Software price for HWID Spoofer Call of Duty: CoD: MWII | MWIII | WZ | BO6 | BO7
1 day: 4 USD 31 days: 14 USD[English] Information and technical requirementsСпойлерSystem requirements:
Supported Processors: AMD, INTEL
Supported OS: Windows 10–11 x64
Supported Builds:1903(18362), 1909(18363), 2004(19041), 20H2(19042), 21H1(19043), 21H2(19044), 22H2(19045), 21H2(22000), 22H2(22621), 23H2(22631), 24H2(26100), 25H2(26200)Check your Windows build: Press Win + R Type WINVER → Press OK
Additional Information:
Compatibility: Works in games Call of Duty: Black Ops 6, Call of Duty: Black Ops 7, Call of Duty: Warzone, Call of Duty: Modern Warfare III , Call of Duty: Modern Warfare II
Required: Enable virtualization in BIOS (SVM, VT-x, VT-d)
Required: Disable Hyper-V — read here
Run from flash drive: Yes-
If you use Spoofer and software at the same time... first run the cheat, and then launch Spoofer
**If you use both products from us, the order in which they are launched does not matter. - Removes the iron ban until the PC is restarted, after the reboot, the original PC data returns to its original value.
- Spoofer works until the PC is restarted.
- Spoofer does not remove the ban from the account, it removes the ban from your PC for the duration of the Spoofer.
- The functioning of the spoofer is guaranteed provided that the account has not been previously blocked. For this reason, we strongly recommend that you create a new account.
MANDATORY!!!!
Before using a spoofer on a new account, it is absolutely necessary to:
- Create a new Windows user account
- Change your PC name in system settings
- Perform a network reset under the new user account (if you’re still getting banned)
⚠️ In rare cases, a full Windows reinstall may be required (if bans continue even after following all the steps above)
Other
The performance of the spoofer with other software is not guaranteed!!!
[Русский] Информация и технические требования
СпойлерТребования к системе:
Поддерживаемые процессоры: Intel, AMD
Поддерживаемые ОС: Windows 10-11 х64
Поддерживаемые сборки: 1903(18362), 1909(18363), 2004(19041), 20H2(19042), 21H1(19043), 21H2(19044), 22H2(19045), 21H2(22000), 22H2(22621), 23H2(22631), 24H2(26100), 25H2(26200)**Как ее узнать.... Нажимаем сочетание клавиш Win+R, вставляем в поле команду WINVER , и нажимаем Ok.
Дополнительная информация:
Совместимость: Работает в играх Call of Duty: Black Ops 6, Call of Duty: Black Ops 7, Call of Duty: Warzone, Call of Duty: Modern Warfare III , Call of Duty: Modern Warfare II
Требуется: Включить виртуализацию в BIOS (SVM, VT-x, VT-d)
Требуется: Отключить Hyper-V — read here
Запуск с флеш-накопителя: ДаДополнительная информация:
-
Eсли вы используете Spoofer и софт одновременно.. сначала запускаете чит, а потом запускаете Spoofer
**Если же вы используете оба продукта от нас, порядок их запуска не имеет значения. - Снимает бан по железу до перезагрузки пк, после перезагрузки исходные данные пк возвращаются в первоначальное значение.
- Spoofer работает до перезагрузки ПК.
- Spoofer не снимает бан с аккаунта, он снимает бан с вашего пк на время действия Spoofer.
- Функционирование спуфера гарантировано при условии, если аккаунт не был заблокирован ранее. В связи с этим настоятельно рекомендуем создать новый аккаунт.
ОБЯЗАТЕЛЬНО( при условии если продолжает банить)!!!!
Прежде чем использовать Spoofer на новом аккаунте, обязательно выполните следующее:
- Создайте нового пользователя Windows
- Измените имя вашего ПК в настройках системы
- Выполните сброс сети под новым пользователем (если вы всё ещё получаете бан)
⚠️ В редких случаях может потребоваться полная переустановка Windows (если блокировки продолжаются даже после выполнения всех вышеперечисленных шагов)
Прочее
Работоспособность спуффера c другими софтами не гарантируется!!!
🛒 Наши магазины / Our Stores
Методы оплаты / Payment Methods:
-
FK, СБП, Карта, WebMoney, UnionPay, Alipay, Turkish Bank Card, PIX, BTC, Litecoin и множество других способов оплаты / and many other payment options
-
Методы оплаты / Payment Methods: BTC, Litecoin
⚠️ Если у вас возникнут вопросы по оплате или нужны другие варианты оплаты, не представленные на сайтах — обращайтесь к нам через создание тикета в канале.
⁉️ If you have any questions about payment or need other payment options not listed on the sites, please contact us by creating a ticket in the channel.Создайте тикет в discord в разделе ( 🎫-𝙎𝘼𝙇𝙀𝙎-𝙏𝙄𝘾𝙆𝙀𝙏𝙎) | Create a ticket in the discord section ( 🎫-𝙎𝘼𝙇𝙀𝙎-𝙏𝙄𝘾𝙆𝙀𝙏𝙎)
💬 Наш Discord / Our Discord: Войти в Discord / Join Discord
⁉️ После покупки вы получите ключ и ссылку на инструкцию, которая содержит все рекомендации и пошаговые инструкции.
⁉️ After purchase, you will receive a key and a link to the instructions, which include all recommendations and step-by-step guidance.
📞 По вопросам сотрудничества / For Partnership Inquiries
Telegram: lisi4ka138
-
If you use Spoofer and software at the same time... first run the cheat, and then launch Spoofer
-
Инструкция на двух языках (русская и английская) | Instructions in two languages (Russian and English)
Please,change boot mode to UEFI in BIOS
[Русский]
СпойлерКомпьютер может загружаться в двух режимах:
- Современный режим «UEFI»: поддерживается практически всеми компьютерами после 2010 года выпуска;
- «Legacy»: для старых компьютеров под управлением
Как изменить в биосе с Legacy на UEFI ?
в интернете много описаний, инструкций как это сделать
Пример: https://docs.microsoft.com/ru-ru/windows/deployment/mbr-to-gpt?source=recommendations
1. Открыть командную строку.
2. В окне "Выполнить" наберите команду cmd ( так же можно это выполнить через диспетчер задач.** открываем cmd (командную строку) от имени администратора.
3. Копируем и вставляем следующую команду: mbr2gpt.exe /convert /allowfullOS
4. После выключаем ПК и заходим в BIOS.
Как зайти в BIOS?
- необходимо нажать на клавиатуре определенную клавишу, или сочетание клавиш, это зависит от производителя компьютера.
5. Чтобы перейти к меню BOOT на стационарном компьютере, при загрузке нужно нажать клавишу Del, в редких случаях — F2.
Параметры которые нам нужны, находятся в разделе BOOT, сверху в списке. Переходим в этот раздел, и ищем параметр "Storage Boot Option" - ставим на "UEFI". Тут же должен быть параметр "Other PCI devices" - тоже ставим на "UEFI".
Примечание: если вы не нашли в этом разделе этих настроек, скорее всего у производителя вашей материнской платы эти пункты куда-либо перемещены или имеют другое название. В этом случае не стоит переживать, просто идём в гугл и пишем следующий запрос: ("название производителя платы/модель" legacy to UEFI)[English]
СпойлерThe computer can boot in two modes:
- Modern "UEFI" mode: supported by almost all computers after 2010 release;
- "Legacy": for older computers running
How to change BIOS from Legacy to UEFI?
there are many descriptions on the Internet, instructions on how to do this
Example: https://docs.microsoft.com/ru-ru/windows/deployment/mbr-to-gpt?source=recommendations
1. Open command line.
2. In the "Run" window, type the cmd command (you can also do this through the task manager.** open cmd (command prompt) as administrator.
3. Copy and paste the following command: mbr2gpt.exe /convert /allowfullOS
4. After we turn off the PC and go into the BIOS.
How to enter the BIOS?- you need to press a certain key on the keyboard, or a combination of keys, it depends on the computer manufacturer.
5. To go to the BOOT menu on a desktop computer, press the Del key at boot, in rare cases - F2.
The parameters we need are in the BOOT section, at the top of the list. We go to this section, and look for the "Storage Boot Option" parameter - set it to "UEFI". There should also be a parameter "Other PCI devices" - also set to "UEFI".
Note: if you did not find these settings in this section, most likely the manufacturer of your motherboard has moved these items somewhere or have a different name. In this case, do not worry, just go to Google and write the following query: ("name of the manufacturer of the board / model" legacy to UEFI)
-
Инструкция на двух языках (русская и английская) | Instructions in two languages (Russian and English)
This error means that you need to disable Hyper-V on your PC
[Русская инструкция]
СпойлерДанная ошибка означает, что на вашем ПК включён Hyper-V. Его нужно отключить.
Сделайте следующие шаги:
Отключите Hyper-V и перезагрузите компьютер.
(Вы можете использовать прилагаемый файлdisable_hyper-v.ps1или отключить вручную.)Скачайте файл disable_hyper-v.ps1 на компьютер.
Нажмите Правой кнопкой по файлу Пуск → выберите запустить Windows PowerShell (Администратор).
Перезагрузите компьютер.
Готово — Hyper-V будет отключён.
Откройте Компоненты Windows:
Win + R → optionalfeatures
Снимите ВСЕ галочки с:
-
✅ Hyper-V
-
✅ Платформа виртуальной машины
-
✅ Подсистема Windows для Linux (WSL)
-
✅ Песочница Windows
-
✅ Microsoft Defender Application Guard
-
✅ Virtual Machine Platform
-
✅ Windows Hypervisor Platform
Перезагрузите компьютер.
Отключите “Изоляцию ядра” (Core Isolation / Memory Integrity):
-
Пуск → Параметры → Обновление и безопасность → Безопасность Windows
→ Безопасность устройства → Изоляция ядра → Выключить
1️⃣ Запустите PowerShell от имени администратора и выполните следующую команду:
2️⃣ Выполните команды по очереди:
👉 Нажимайте Enter после каждой команды (или вставьте всё сразу)
bcdedit /set hypervisorlaunchtype offдалее введите введите команду:
reg add "HKLM\SYSTEM\CurrentControlSet\Control\DeviceGuard" /v EnableVirtualizationBasedSecurity /t REG_DWORD /d 0 /f
reg add "HKLM\SYSTEM\CurrentControlSet\Control\DeviceGuard\Scenarios\SystemGuard" /v Enabled /t REG_DWORD /d 0 /f
reg add "HKLM\SYSTEM\CurrentControlSet\Control\DeviceGuard\Scenarios\HypervisorEnforcedCodeIntegrity" /v Enabled /t REG_DWORD /d 0 /f
далее введите введите команду:
dism.exe /online /disable-feature /featurename:Microsoft-Windows-Subsystem-Linux
dism.exe /online /disable-feature /featurename:VirtualMachinePlatform
dism.exe /online /disable-feature /featurename:Microsoft-Hyper-V-AllПосле выполнения всех этих шагов рекомендуется перезагрузить компьютер, чтобы изменения вступили в силу.
✅ Проверка (если ошибка остаётся)- После перезагрузки откройте окно PowerShell от имени администратора .
- Выполните следующую команду, чтобы убедиться, что Hyper-V полностью отключен:
- bcdedit /set hypervisorlaunchtype off
- Перезагрузите компьютер.
⚠ Дополнительные шаги (если всё ещё не работает)
- После перезагрузки откройте окно PowerShell от имени администратора .
- Выполните следующую команду, чтобы убедиться, что Hyper-V полностью отключен:
- Disable-WindowsOptionalFeature -Online -FeatureName Microsoft-Hyper-V-Hypervisor
- Перезагрузите компьютер.
Удалите антивирусы и защитники
* после удаления антивируса перезагрузите компьютер (проверьте наличие следов антивируса и удалите их)Если после выполнения шагов ошибка сохраняется, проверьте:
- Использование сторонних софтов — возможна несовместимость.
Соответствие сборки Windows — проблема возникает при не поддерживаемой сборки Windows.
Остатки защитников, антивирусов и прочих программ безопасности — даже после удаления могут оставаться их следы в системе.
Примечание
Вы также можете посмотреть в интернете варианты решений или спросить GPT, если проблема сохраняется.🚨 Обязательный шаг для Windows 11 24H2–25H2
Спойлер1️⃣ Запустите PowerShell от имени администратора и выполните следующую команду:
2️⃣ Выполните команды по очереди:
👉 Нажимайте Enter после каждой команды (или вставьте всё сразу)
bcdedit /set hypervisorlaunchtype off
reg add "HKLM\SYSTEM\CurrentControlSet\Control\DeviceGuard" /v EnableVirtualizationBasedSecurity /t REG_DWORD /d 0 /f
reg add "HKLM\SYSTEM\CurrentControlSet\Control\DeviceGuard\Scenarios\SystemGuard" /v Enabled /t REG_DWORD /d 0 /f
reg add "HKLM\SYSTEM\CurrentControlSet\Control\DeviceGuard\Scenarios\HypervisorEnforcedCodeIntegrity" /v Enabled /t REG_DWORD /d 0 /f
dism.exe /online /disable-feature /featurename:Microsoft-Windows-Subsystem-Linux
dism.exe /online /disable-feature /featurename:VirtualMachinePlatform
dism.exe /online /disable-feature /featurename:Microsoft-Hyper-V-AllПосле выполнения всех этих шагов рекомендуется перезагрузить компьютер, чтобы изменения вступили в силу.
⚠️ Обязательный шаг для Windows 11 24H2-25H2, который необходимо выполнить.
Для вашего удобства этот шаг можно посмотреть в видео и повторить:
1️⃣ Скачайте инструмент от Microsoft👉 Перейдите по ссылке: https://www.microsoft.com/en-us/download/details.aspx?id=53337
👉 Скачайте и распакуйте ZIP-файл в любую папку
2️⃣ Откройте PowerShell (Администратор)
3️⃣ Перейдите в папку с инструментом
Введите команду
cd, указав путь к папке:
cd C:\Users\ИмяПользователя\Downloads\DG_Readiness_Tool_v3.6👉 У вас путь может отличаться — укажите свой
4️⃣ Разрешите выполнение скрипта
Set-ExecutionPolicy Unrestricted -Scope Process
5️⃣ Запустите инструмент
.\DG_Readiness_Tool_v3.6.ps1 -Disable👉 Важно:
- используйте точное имя файла
-
обязательно указывайте
.\в начале - если версия отличается (например v3.7) — замените в команде
🔄 6️⃣ Перезагрузка
После выполнения команды перезагрузите компьютер
👉 При загрузке Windows может запросить подтверждение (например, нажать F3) — просто следуйте инструкции на экране
✅ Проверка
- После перезагрузки откройте окно PowerShell от имени администратора .
- Выполните следующую команду, чтобы убедиться, что Hyper-V полностью отключен:
- bcdedit /set hypervisorlaunchtype off
- Перезагрузите компьютер.
⚠ Дополнительные шаги (если всё ещё ошибка сохраняется)
- После перезагрузки откройте окно PowerShell от имени администратора .
- Выполните следующую команду, чтобы убедиться, что Hyper-V полностью отключен:
- Disable-WindowsOptionalFeature -Online -FeatureName Microsoft-Hyper-V-Hypervisor
- Перезагрузите компьютер.
Удалите антивирусы и защитники
* после удаления антивируса перезагрузите компьютер (проверьте наличие следов антивируса и удалите их)Если после выполнения шагов ошибка сохраняется, проверьте:
- Использование сторонних софтов — возможна несовместимость.
Соответствие сборки Windows — проблема возникает при не поддерживаемой сборки Windows.
Остатки защитников, антивирусов и прочих программ безопасности — даже после удаления могут оставаться их следы в системе.
Примечание
Вы также можете посмотреть в интернете варианты решений или спросить GPT, если проблема сохраняется.[English Instruction]
СпойлерThis error means that Hyper-V is enabled on your PC. You need to disable it.
Follow these steps:
Disable Hyper-V and restart your PC.
(You can use the provideddisable_hyper-v.ps1file or disable it manually.)Download the file disable_hyper-v.ps1 to your PC.
Right-click on the Start button → select Windows PowerShell (Administrator).
Restart your computer.
Done — Hyper-V will be disabled.
Disable "Core Isolation" / “Memory Integrity”:
-
Start → Settings → Windows Security → Device Security
→ Core Isolation → Turn Off
Uninstall any antivirus and security software.
After uninstalling, restart your computer (make sure to remove any remaining files or leftovers from the antivirus).
1️⃣ Open PowerShell as Administrator
2️⃣ Run the following commands one by one:
👉 Press Enter after each command (or paste them all at once)bcdedit /set hypervisorlaunchtype off
reg add "HKLM\SYSTEM\CurrentControlSet\Control\DeviceGuard" /v EnableVirtualizationBasedSecurity /t REG_DWORD /d 0 /f
reg add "HKLM\SYSTEM\CurrentControlSet\Control\DeviceGuard\Scenarios\SystemGuard" /v Enabled /t REG_DWORD /d 0 /f
reg add "HKLM\SYSTEM\CurrentControlSet\Control\DeviceGuard\Scenarios\HypervisorEnforcedCodeIntegrity" /v Enabled /t REG_DWORD /d 0 /fdism.exe /online /disable-feature /featurename:Microsoft-Windows-Subsystem-Linux
dism.exe /online /disable-feature /featurename:VirtualMachinePlatform
dism.exe /online /disable-feature /featurename:Microsoft-Hyper-V-AllAfter completing all these steps, it is recommended to restart your computer so the changes can take effect.
⚠️ Mandatory step for Windows 11 (24H2–25H2) that must be completed.
СпойлерFor your convenience, you can watch and follow this step in the video:
🎥 Watch the video
In Windows 11 version 24H2 or 25H2, there is a known issue where Hyper-V may continue to affect the system even after completing the previous steps. To fully eliminate this behavior, you need to temporarily disable Device Guard and Credential Guard using the official Microsoft tool.
Use the Microsoft Device Guard Readiness Tool
This tool disables Device Guard and Credential Guard, which are often the root cause in recent builds.
Download the official tool from Microsoft: Device Guard and Credential Guard hardware readiness tool.
https://www.microsoft.com/en-us/download/details.aspx?id=53337- Open PowerShell window as an administrator.
- Navigate to the folder where you extracted the tool.
- Firs run this command to get Execution Policy:
- Set-ExecutionPolicy Unrestricted -Scope Process
- Now run the script with the -disable parameter to disable Device and Credential Guard
- .\DG_Readiness_Tool_v3.6.ps1 -Disable
During boot, Windows may ask for confirmation (e.g., press F3 to proceed)—follow the on-screen instructions.
After completing all steps, confirm once again that Hyper-V is fully disabled.
- After rebooting, open a PowerShell window as an administrator.
- Run the following command to ensure Hyper-V is fully disabled:
- bcdedit /set hypervisorlaunchtype off
- Reboot your computer again.
If the error persists after completing the steps:
- After restarting, open a PowerShell window as Administrator.
- Run the following command to make sure that Hyper-V is completely disabled:
- Disable-WindowsOptionalFeature -Online -FeatureName Microsoft-Hyper-V-Hypervisor
-
Restart your computer.
If the error still persists after completing the steps, check the following:
- Use of third-party software — incompatibility may cause the issue.
Windows build compatibility — the problem may occur on unsupported Windows builds.Remnants of security tools, antivirus software, or system defenders — traces may remain in the system even after uninstallation.
Use a VPN
Sometimes, the software launch may be blocked by Discord bypass tools, YouTube, streaming software, or other background applications. We recommend temporarily disabling them before launch.
Note
You can also search online for additional solutions or ask GPT if the problem persists.
🚨Fix: Disable Hyper-V on Windows 11 24H2–25H2
СпойлерDisabling Hyper-V, Windows 11 24h2 and 25h2
Run PowerShell as Administrator and enter the following command:
- bcdedit /set hypervisorlaunchtype off
Press enter Enter
the following command:reg add "HKLM\SYSTEM\CurrentControlSet\Control\DeviceGuard" /v EnableVirtualizationBasedSecurity /t REG_DWORD /d 0 /f
reg add "HKLM\SYSTEM\CurrentControlSet\Control\DeviceGuard\Scenarios\SystemGuard" /v Enabled /t REG_DWORD /d 0 /f
reg add "HKLM\SYSTEM\CurrentControlSet\Control\DeviceGuard\Scenarios\HypervisorEnforcedCodeIntegrity" /v Enabled /t REG_DWORD /d 0 /f
Press enter
Enter the following command:dism.exe /online /disable-feature /featurename:Microsoft-Windows-Subsystem-Linux
dism.exe /online /disable-feature /featurename:VirtualMachinePlatform
dism.exe /online /disable-feature /featurename:Microsoft-Hyper-V-AllPress enter
Now follow these steps:
Download the official tool from Microsoft: Device Guard and Credential Guard hardware readiness tool: Download
Extract the folder to your desktop, and copy the file path (simply open the folder and copy the entire path from the file explorer).
Open PowerShell as Administrator. Navigate to the folder where you extracted the tool.
- Use the command:
-
cd (PASTE THE PATH YOU COPIED)
Use the following command to allow execution:
- Set-ExecutionPolicy Unrestricted -Scope Process
Allow all execution.
Now use the command:- ./DG_Readiness_Tool_v3.6.ps1 -Disable
Restart your PC.
During boot, Windows may ask for confirmation (e.g., press F3 to proceed)—follow the on-screen instructions.
After rebooting, open a PowerShell window as an administrator again.
Run the following command to ensure Hyper-V is fully disabled:- bcdedit /set hypervisorlaunchtype off
Reboot your computer again.
If the error persists after completing the steps:
- After restarting, open a PowerShell window as Administrator.
- Run the following command to make sure that Hyper-V is completely disabled:
- Disable-WindowsOptionalFeature -Online -FeatureName Microsoft-Hyper-V-Hypervisor
- Restart your computer.
Check if it worked!
⚠️For your convenience, you can watch and follow this step in the video:
🎥 Watch the video -
-
Инструкция на двух языках (русская и английская) | Instructions in two languages (Russian and English)
для русской версии прокрутите вниз | for the Russian version, scroll down
[Русский]
СпойлерДанная ошибка означает что нужно отключить Secure boot в BIOS на своем ПК
Необходимо зайти в биос, найти опцию Secure Boot и отключить её, т.е. перевести в состояние Disabled.
Находится она в разных местах, в зависимости от модели компьютера: меню «Boot», «System Configuration», «Security», «Authentication», «BIOS Features».
как это сделать??
- в интернете много описаний,инструкций как это сделать.
https://www.gigabyte.com/us/Support/FAQ/3001
[English]
СпойлерThis error means that you need to disable Secure boot in BIOS on your PC
how to do it??
There are many descriptions on the Internet, instructions on how to do this.
https://www.gigabyte.com/us/Support/FAQ/3001
-
Инструкция на двух языках (русская и английская) | Instructions in two languages (Russian and English
Software price for HWID Spoofer PUBG
3 days: 4 USD 31 days: 14 USDRead Purchase Agreement
System requirements:Supported Processors: AMD, INTEL
Supported OS: Windows 10–11 x64
Supported Builds:1903(18362), 1909(18363), 2004(19041), 20H2(19042), 21H1(19043), 21H2(19044), 22H2(19045), 21H2(22000), 22H2(22621), 23H2(22631), 24H2(26100), 25H2(26200)Check your Windows build: Press Win + R Type WINVER → Press OK
Additional Information:
Compatibility: Works in games PUBG
Supported game versions: Steam
Required: Enable virtualization in BIOS (SVM, VT-x, VT-d)
Required: Disable Hyper-V — read here
Run from flash drive: Yes-
If you use Spoofer and software at the same time... first run the cheat, and then launch Spoofer
**If you use both products from us, the order in which they are launched does not matter. - Removes the iron ban until the PC is restarted, after the reboot, the original PC data returns to its original value.
- Spoofer works until the PC is restarted.
- Spoofer does not remove the ban from the account, it removes the ban from your PC for the duration of the Spoofer.
- The functioning of the spoofer is guaranteed provided that the account has not been previously blocked. For this reason, we strongly recommend that you create a new account.
MANDATORY!!!!
Before using a spoofer on a new account, it is absolutely necessary to:
- Create a new Windows user account
- Change your PC name in system settings
- Perform a network reset under the new user account (if you’re still getting banned)
⚠️ In rare cases, a full Windows reinstall may be required (if bans continue even after following all the steps above)
Other
The performance of the spoofer with other software is not guaranteed!!!
[Русский] Информация и технические требования
СпойлерТребования к системе:
Поддерживаемые процессоры: Intel, AMD
Поддерживаемые ОС: Windows 10-11 х64
Поддерживаемые сборки: 1903(18362), 1909(18363), 2004(19041), 20H2(19042), 21H1(19043), 21H2(19044), 22H2(19045), 21H2(22000), 22H2(22621), 23H2(22631), 24H2(26100), 25H2(26200)**Как ее узнать.... Нажимаем сочетание клавиш Win+R, вставляем в поле команду WINVER , и нажимаем Ok.
Дополнительная информация:
Совместимость: Работает в игре PUBG
Поддерживаемые версии игры: Steam
Требуется: Включить виртуализацию в BIOS (SVM, VT-x, VT-d)
Требуется: Отключить Hyper-V — read here
Запуск с флеш-накопителя: ДаДополнительная информация:
-
Eсли вы используете Spoofer и софт одновременно.. сначала запускаете чит, а потом запускаете Spoofer
**Если же вы используете оба продукта от нас, порядок их запуска не имеет значения. - Снимает бан по железу до перезагрузки пк, после перезагрузки исходные данные пк возвращаются в первоначальное значение.
- Spoofer работает до перезагрузки ПК.
- Spoofer не снимает бан с аккаунта, он снимает бан с вашего пк на время действия Spoofer.
- Функционирование спуфера гарантировано при условии, если аккаунт не был заблокирован ранее. В связи с этим настоятельно рекомендуем создать новый аккаунт.
ОБЯЗАТЕЛЬНО( при условии если продолжает банить)!!!!
Прежде чем использовать Spoofer на новом аккаунте, обязательно выполните следующее:
- Создайте нового пользователя Windows
- Измените имя вашего ПК в настройках системы
- Выполните сброс сети под новым пользователем (если вы всё ещё получаете бан)
⚠️ В редких случаях может потребоваться полная переустановка Windows (если блокировки продолжаются даже после выполнения всех вышеперечисленных шагов)
Прочее
Работоспособность спуффера c другими софтами не гарантируется!!!
🛒 Наши магазины / Our Stores
Методы оплаты / Payment Methods:
-
FK, СБП, Карта, WebMoney, UnionPay, Alipay, Turkish Bank Card, PIX, BTC, Litecoin и множество других способов оплаты / and many other payment options
-
Методы оплаты / Payment Methods: BTC, Litecoin
⚠️ Если у вас возникнут вопросы по оплате или нужны другие варианты оплаты, не представленные на сайтах — обращайтесь к нам через создание тикета в канале.
⁉️ If you have any questions about payment or need other payment options not listed on the sites, please contact us by creating a ticket in the channel.Создайте тикет в discord в разделе ( 🎫-𝙎𝘼𝙇𝙀𝙎-𝙏𝙄𝘾𝙆𝙀𝙏𝙎) | Create a ticket in the discord section ( 🎫-𝙎𝘼𝙇𝙀𝙎-𝙏𝙄𝘾𝙆𝙀𝙏𝙎)
💬Наш Discord / Our Discord: Войти в Discord / Join Discord
⁉️ После покупки вы получите ключ и ссылку на инструкцию, которая содержит все рекомендации и пошаговые инструкции.
⁉️ After purchase, you will receive a key and a link to the instructions, which include all recommendations and step-by-step guidance.
📞 По вопросам сотрудничества / For Partnership Inquiries
Telegram: lisi4ka138
-
If you use Spoofer and software at the same time... first run the cheat, and then launch Spoofer
-
Инструкция на двух языках (русская и английская) | Instructions in two languages (Russian and English)
[English] Launch Instructions
СпойлерWe remind you that you must understand what you are doing when playing with the software !!!
This software uses unique identifiers of your " hardware"
- 1 account =1 PC ( Example: when you first start the program, your account is linked to the current PC, further use of the same account on another PC is not possible)
- if you do use a spuffer.. first log in to the launcher, and then launch the spoofer( you need to restart your PC before that)
- If you are using a spoofer, disable it and restart the computer
- Error "Hardware component has changed"
System requirements:
- Supported processors: Intel, AMD
- Supported OS: Windows 10- 11 x64
- Supported builds: 1903(18362), 1909(18363), 2004(19041), 20H2(19042), 21H1(19043), 21H2(19044), 22H2(19045), 21H2(22000), 22H2(22621), 23H2(22631), 24H2(26100), 25H2(26200)
** How to find it ... Press the key combination Win + R, insert the WINVER command into the field, and press Ok.
Additional Information:
- Works in games: PUBG
- Run from flash drive: Yes
- If you use Spoofer and cheat at the same time.. first run the cheat, and then run Spoofer (requires a PC reboot before that)
- The spoofer only needs to be started once before the next PС reboot.
- Spoofer does not remove the ban from your account, it removes the ban from your PC for the duration of Spoofer
- Before using the spoofer on a new account, be sure to create a new user in Windows, change the name of your PC in the system properties .** (provided that it continues to ban)
MANDATORY!!!!*(provided that it continues to ban)
- Before using the spoofer on a new account, be sure to create a new user in Windows, change the name of your PC in the system properties, and also discharge the network in the new user *(provided it continues to ban)
- In rare cases, it is necessary to reinstall Windows *(provided that it continues to ban)
How to do it:
-
Change the PC name.
-
Restart the PC (make sure to restart the computer for the changes to take effect).
-
Create a new user account in Windows and log in with it.
-
In the new user account, perform a network reset:
-
Press Win + I → Network & Internet.
-
Scroll down and select Network reset, then confirm the reset.
-
-
Restart the PC.
-
After that, you can proceed with further actions: register a new game account, launch the software, and use the spoofer.
For the software to work correctly, you need to install and remove a number of programs
It is recommended to install
- Redistributable packages Visual C++ 2008-2019
- DirectX
DISABLE or REMOVE MANDATORY
- Disable antivirus ( Remove!!! )
- Disable SmartScreen How to disable
- Disable Windows Defender How to disable
Additionally
- Remove FaceIt and Vanguard How to disable
FaceIt this is anti-cheat CS:GO Vanguard this is anti-cheat ValorantAdditionally (if an error occurs)
- Enable VT-x, SVM in BIOS
- Disable Hyper-V
LAUNCH INSTRUCTIONS
IMPORTANT ignoring these actions will lead to a ban!!!
- Before starting the cheat, close the Game and the game launcher!
- If you have previously run any cheats, restart your PC! (restart pc before using another cheat)
- Close the software launcher before launching the game!
- If you neglect one of the actions, you can get banned!
- Running the software, you need a flash drive (virtual or physical)
Please read this entire guide carefully before starting!
🔽 Step 1. Downloading and Preparing the Launcher
- 📥 Download Launcher
- 💾 Place the launcher on a USB flash drive (we strongly recommend running it from the USB drive — this is important for your safety).
If the launcher does not start
• If an error log is created when launching the launcher, enable a VPN and start the launcher again.
🚀 Step 2. Running the Launcher and Registration
- ▶️ Launch the launcher from the USB drive.
- 📝 Register in the launcher.
- 🔑 Activate your key.
🎮 Step 3. Launching the Purchased Project
- ▶️ Launch the launcher from the USB drive.
- 🕹 Select the project (for which you have a purchased key) and click Launch.
- ✅ If the launch is successful, the Launched button will appear and you will see the message Successfully launched (focus on the “Launched” button).
⚠️ Important!
- ❌ If an error occurs — the software will not load!
- ❎ In this case, close the launcher and check the “Common Errors and Solutions” section [read here]. There you can find your specific error and step-by-step solution.
🔒 Step 4. Final Preparation
- ❌ Close the software Launcher
- 🔌 Disconnect the USB flash drive and make sure it is removed.
- 🕹 Start the game
🎉 Enjoy the game!
[Русский] Инструкция по запуску
СпойлерНапоминаем что вы должны понимать на что идете играя с софтом!!!
Данное ПО использует уникальные идентификаторы вашего "железа"
- 1 учетка =1 пк ( Пример: при первом запуске программы ваша учетная запись привязывается к текущему ПК, дальнейшее использование той же учетной записи на другом ПК не возможно)
- Если вы используете спуфер отключите его и перезапустите компьютер
- Если вы всё-таки используете спуфер.. сначала авторизовываетесь в лаунчере, а потом запускаете спуфер ( требуется перед этим перезагрузка пк)
- Ошибка "Hardware component has changed"
Требования к системе:
Поддерживаемые процессоры: Intel, AMD
Поддерживаемые ОС: Windows 10-11 х64
Поддерживаемые сборки: 1903(18362), 1909(18363), 2004(19041), 20H2(19042), 21H1(19043), 21H2(19044), 22H2(19045), 21H2(22000), 22H2(22621), 23H2(22631), 24H2(26100), 25H2(26200)**Как ее узнать.... Нажимаем сочетание клавиш Win+R, вставляем в поле команду WINVER , и нажимаем Ok.
Дополнительная информация
Совместимость: Работает в играх PUBG
Необходимо: Включить виртуализацию в BIOS (SVM, VT-x, VT-d)
Необходимо: Отключить Hyper-V — читайте здесь
Запуск с флешки: ДаВажно!
- Eсли вы используете Spoofer и чит одновременно.. сначала запускаете чит, а потом запускаете Spoofer (требуется перед этим перезагрузка пк)
- Снимает бан по железу до перезагрузки пк, после перезагрузки исходные данные пк возвращаются в первоначальное значение
- Spoofer не снимает бан с аккаунта, он снимает бан с вашего пк на время действия Spoofer
- Спуфер требуется запускать лишь раз до следующей перезагрузки ПК.
ОБЯЗАТЕЛЬНО!!!!*( при условии если продолжает банить)
- Перед тем как использовать спуфер на новом аккаунте, обязательно создайте нового пользователя в Windows, измените имя вашего ПК в свойствах системы , а также выполните сброс сети в новом пользователе*( при условии если продолжает банить)
- В редких случаях необходима переустановка Windows *( при условии если продолжает банить)
Как это сделать:
-
Смените имя ПК.
-
Перезагрузите ПК (обязательно перезагрузите компьютер, чтобы изменения вступили в силу).
-
Создайте нового пользователя в Windows и войдите под ним.
-
В новой учетной записи выполните сброс сети:
-
Нажмите Win + I → Сеть и Интернет.
-
Прокрутите вниз и выберите Сброс сети, подтвердите выполнение сброса.
-
-
Перезагрузите ПК.
После этого можно выполнять дальнейшие действия: регистрировать новый аккаунт в игре, запускать софт и спуффер
Для корректной работы софт необходимо установить и удалить ряд программ
Рекомендуется установить
- Распространяемые пакеты Visual C++ 2008-2019
- DirectX
ОТКЛЮЧИТЬ или УДАЛИТЬ ОБЯЗАТЕЛЬНО
-
Отключить антивирус ( Удалить!!! )
-
Отключить SmartScreen
-
Отключить защитник Windows
Дополнительно
- Удалить FaceIt и Vanguard подробнее
FaceIt - это отдельный античит игры CS:GO Vanguard - это античит игры ValorantДополнительно (при возникновении ошибки!!!)
- Включить VT-x , SVM в BIOS
- Отключить Hyper-V
ВАЖНО Пренебрежение данных действий может привести к бану!!!
- Перед запуском софта закройте Игру и лаунчер игры!
- Если вы ранее запускали какие-либо софты, перезагрузите свой компьютер!(перезагрузите компьютер перед использованием другого чита)
- В случае пренебрежения одного из действий вы можете получить бан!
- Закрыть лаунчер софта перед запуском игры!
- Запуск софта с флешки (виртуальной или физической)
- **удалите старый лаунчер софта с ПК
ИНСТРУКЦИЯ ПО ЗАПУСКУ
Внимательно прочтите всю инструкцию перед началом!
🔽 Шаг 1. Скачивание и подготовка лаунчера
-
💾 Поместите лаунчер на флешку (мы настоятельно рекомендуем запускать именно с флешки — это важно для вашей безопасности).
Если лаунчер не запускается
-
Или при запуске лаунчера создаётся error log, включите VPN и запустите лаунчер повторно.
🚀 Шаг 2. Запуск лаунчера и регистрация
-
▶️ Запустите лаунчер с флешки.
-
📝 Зарегистрируйтесь в лаунчере.
-
🔑 Активируйте свой ключ.
🎮 Шаг 3. Запуск приобретённого проекта
-
▶️ Запустите лаунчер с флешки.
-
🕹 Выберите проект (на который у вас есть купленный ключ) и нажмите Launch.
-
✅ Если запуск прошёл успешно, появится кнопка Launched и ниже сообщение Successfully launched ( ориентируйтесь на кнопку Launched )
⚠️ Важное!
-
❌ Если возникнет ошибка — спуффер не загрузится!
-
❎ В этом случае закройте лаунчер и ознакомьтесь с разделом «Популярные ошибки и их решения» [читайте здесь]. Там вы сможете найти свою ошибку и пошаговое решение.
🔒 Шаг 4. Завершение подготовки
-
❌ Закройте Launcher софта
-
🔌 Отсоедините флешку и убедитесь, что она отключена.
-
🕹 Запустите игру
🎉 Приятной игры!
Еrror | Ошибки
- Hardware component has changed
- Ошибки и их решения /Errors and their solutions
- Your IP address has beens blocked
- Failed to launch #2
- Restart your system and try again Hyper-V
-
5 часов назад, Titan9192 сказал:
Привет, может кто-нибудь дать мне законную конфигурацию для конфигурации зоны боевых действий?
it is individual for everyone. the control radius is higher and that 's it .
-
Многие люди спрашивают, как сделать программное обеспечение видимым на записи, и сделать снимок экрана
если вы используете другие программы, то вам так же нужно включить захват рабочего стола (гуглите уже под свою программу)
Many people ask how to make the software visible on the recording and you can take a screenshot
if you use other programs, then you also need to enable desktop capture (google already for your program)
Для открытия GeForce Experience используется комбинация клавиш Alt+Z.
- заходим в настройки( шестеренка)
- настройки конфиденциальности
- Включаем запись рабочего стола
-
Приветствуем
Все настройки индивидуальны!!!
Разберем более подробно вкладку АИМ:
- Enable aimbot (Включить aimbot)
- Key selection ( Выбор клавиши для работы аима)
назначить клавишу при удержании которой будет срабатывать аим (ЛЮБАЯ НА ВАШ ВЫБОР)
Draw fov circle (Отключение визуального круга FoV)
Fov: (Угол обзора(FOV)(зона срабатывания аима))
Distance: (Дистанция срабатывания аима)Aim priority: (Приоритет аима)
- Distance (Дистанция)
- Crosshair (Прицел)
настраиваете Control radius (Радиус контроля(свободная зона перемещения прицела с учетом захваченной цели))
- чем больше значение тем более легитно будет захватывать цель
- чем меньше тем лучше прилипать к цели
Для проверки видимости врага нужно не забыть включить
- Visibility check (Учет стен)
Bones selection: ( выбор кости . вы можете выбрать 1 кость или несколько костей)
Head ( голова)
Neck ( шея)
Left elbow ( левая рука)
Right elbow (Правая рука)
Body ( тело)
Pelvis ( пах)
Left knee ( левое колено)
Right knee ( провое колено)Bone change time: (Частота смены кости)
Дальше уже более мелкие настройки ( уже зависит от вас что вы хотите включить)
- No sway (Контролировать дыхание)
- No recoil (Компенсирует отдачу при использовании аима)
No recoil отдельно не работает , только в связке с аимом
Если вы включили аим на голову и не включать No recoil,то возможно пуля будет лететь выше головы
- Do not aim at friends (Не целитесь на друзей)
- Do not aim at knocked players (Не целитесь на нокаутированных)
- Enable prediction (Включение и отключение прогнозирование выстрела)
Учитывает направление игрока и стреляет на перед, что бы пули в него попадали
-
Draw aim prediction (Big frame delay) (Прогнозирование цели (большая задержка кадра)
Чувствительность мыши в игре стандарт (без дополнительных макросов)- это может повлиять на работу аима
В софте нет сохранения настроек!!!
-
2 часа назад, MotoMoroz сказал:
Не понимаю в чем может быть причина, силуэт чита смещен от игрока. На фото начало гулага... справа силуэт в игре , слева силуэт чита...
Масштаб в системе и в игре: 100%
Формат экрана: Авто -
Инструкция на двух языках (русская и английская) | Instructions in two languages (Russian and English)
The video shows a demo view of the launch and so on
A more detailed launch is spelled out in the text instructions below the videoВ видеоролике продемонстрирован демонстрационный вид запуска и прочее Более детальный запуск прописан в текстовой инструкции ниже видеоВерсия 2
Спойлер[English] Launch Instructions
СпойлерWe remind you that you must understand what you are doing when playing with the software !!!
- You purchase and use the software at your own risk.
- The Undetected status does not guarantee 100% protection against blocking (with any cheat in any game, a ban is possible).
- If the update is in the game, wait for the software update.
- By purchasing this software, you agree with the rule that in case of a defect or complete closure of the project, you will not receive a refund!
- By purchasing this software, you agree to the rule that if you block the game account, you will not receive a refund!
This software uses unique identifiers of your " hardware"
- 1 account =1 PC ( Example: when you first start the program, your account is linked to the current PC, further use of the same account on another PC is not possible)
- if you do use a spuffer.. first log in to the launcher, and then launch the spoofer( you need to restart your PC before that)
- If you are using a spoofer, disable it and restart the computer
- Error "Hardware component has changed"
System requirements:
- Supported processors: Intel, AMD
- Supported OS: Windows 10- 11 x64
- Supported builds: 1903(18362), 1909(18363), 2004(19041), 20H2(19042), 21H1(19043), 21H2(19044), 22H2(19045), 21H2(22000), 22H2(22621), 23H2(22631), 24H2(26100), 25H2(26200)
** How to find it ... Press the key combination Win + R, insert the WINVER command into the field, and press Ok.
Additional Information:
Project type: External
Game mode: Windowed*
*How to run in fullscreen — read here
Scale in system and game: 100%
Screen format: Auto
Supported game versions: Steam
Support for invisibility in video/screenshots/screen sharing,demonstrations: Yes
Required: Enable virtualization in BIOS (SVM, VT-x, VT-d)
Required: Disable Hyper-V — read here
Run from flash drive: YesImportant!
HWID Spoofer is not included — must be purchased separately.
Compatibility of this software with other spoofers is not guaranteed.For the software to work correctly, you need to install and remove a number of programs
СпойлерIt is recommended to install
- Redistributable packages Visual C++ 2008-2019
- DirectX
DISABLE or REMOVE MANDATORY
- Disable antivirus( Remove!!! )
- Disable SmartScreen How to disable
- Disable Windows Defender How to disable
Additionally
- Remove FaceIt and Vanguard How to disable
FaceIt this is anti-cheat CS:GO Vanguard this is anti-cheat ValorantAdditionally (if an error occurs)
- Enable VT-x, SVM in BIOS
- Disable Hyper-V
LAUNCH INSTRUCTIONS
IMPORTANT ignoring these actions will lead to a ban!!!
- Before starting the cheat, close the Game and the game launcher!
- If you have previously run any cheats, restart your PC! (restart pc before using another cheat)
- Close the software launcher before launching the game!
- If you neglect one of the actions, you can get banned!
- Running the software, you need a flash drive (virtual or physical)
Please read this entire guide carefully before starting!
🔽 Step 1. Downloading and Preparing the Launcher
- 📥 Download Launcher
- 💾 Place the launcher on a USB flash drive (we strongly recommend running it from the USB drive — this is important for your safety).
If the launcher does not start
• If an error log is created when launching the launcher, enable a VPN and start the launcher again.
🚀 Step 2. Running the Launcher and Registration
- ▶️ Launch the launcher from the USB drive.
- 📝 Register in the launcher.
- 🔑 Activate your key.
🎮Step 3. Launching the Purchased Project
- ▶️ Launch the launcher from the USB drive.
- 🕹 Select the project (for which you have a purchased key) and click Launch.
- ✅ If the launch is successful, the Launched button will appear and you will see the message Successfully launched (focus on the “Launched” button).
⚠️ Important!
❌ If an error occurs — the software will not load!
❎ In this case, close the launcher and check the “Common Errors and Solutions” section [read here]. There you can find your specific error and step-by-step solution.
🔒 Step 4. Final Preparation
- ❌ Close the software Launcher
- 🔌 Disconnect the USB flash drive and make sure it is removed.
- 🕹 Start the game
- ⌨️ The cheat menu opens by pressing the HOME key.
🎉 Enjoy the game!
СпойлерIf you launched the program, but there is no menu, then you did not follow the instructions.
1. Check the system requirements for the software.
2. Check whether the software launched successfully.
3. Check the window mode requirements.
4. Check that all instructions have been followed.
5. Read the instructions, restart your PC and try again.If you follow everything written in the instructions, this is a 100% guarantee of successful launch of the software.
- The menu is not called up using the HOME key** try launching the on-screen keyboard (so that you have a different key combination).
IF YOU HAVE SOMETHING THAT DOES NOT START, CONTACT YOUR SELLER FOR HELP.
[Русский] Инструкция по запуску
Напоминаем что вы должны понимать на что идете играя с софтом!!!
- Софт вы приобретаете и используете на свой страх и риск.
- Статус Undetected не гарантирует 100% защиту от блокировок(с любым читом в любой игре возможен бан).
- Если обновление в игре дождитесь обновления софта.
- Покупая данное ПО, вы соглашаетесь с правилом, что при детекте или полном закрытии проекта вы не получите возврат денежных средств!
- Покупая данное ПО, вы соглашаетесь с правилом, что при блокировке игрового аккаунта вы не получите возврат денежных средства!
Данное ПО использует уникальные идентификаторы вашего "железа"
- 1 учетка =1 пк ( Пример: при первом запуске программы ваша учетная запись привязывается к текущему ПК, дальнейшее использование той же учетной записи на другом ПК не возможно)
- Если вы используете спуфер отключите его и перезапустите компьютер
- Если вы всё-таки используете спуфер.. сначала авторизовываетесь в лаунчере, а потом запускаете спуфер( требуется перед этим перезагрузка пк)
- Ошибка "Hardware component has changed"
Требования к системе:
Поддерживаемые процессоры: Intel, AMD
Поддерживаемые ОС: Windows 10-11 х64
Поддерживаемые сборки: 1903(18362), 1909(18363), 2004(19041), 20H2(19042), 21H1(19043), 21H2(19044), 22H2(19045), 21H2(22000), 22H2(22621), 23H2(22631), 24H2(26100), 25H2(26200)**Как ее узнать.... Нажимаем сочетание клавиш Win+R, вставляем в поле команду WINVER , и нажимаем Ok.
Дополнительная информация
Тип проекта: External
Режим игры: Оконный*
*Как запустить в полном экране — читайте здесь
Масштаб в системе и игре: 100%
Формат экрана: Авто
Поддерживаемые версии игры: Steam
Поддержка невидимости на видео/скриншотах/при демонстрации экрана: Да
Необходимо: Включить виртуализацию в BIOS (SVM, VT-x, VT-d)
Необходимо: Отключить Hyper-V — читайте здесь
Запуск с флешки: ДаВажно!
-
HWID Spoofer в комплект не входит — приобретается отдельно.
-
Совместимость софта с другими спуфферами не гарантируется.
Для корректной работы софт необходимо установить и удалить ряд программ
СпойлерРекомендуется установить
- Распространяемые пакеты Visual C++ 2008-2019
- DirectX
ОТКЛЮЧИТЬ или УДАЛИТЬ ОБЯЗАТЕЛЬНО
-
Отключить антивирус (Удалить!!!)
-
Отключить SmartScreen
-
Отключить защитник Windows
Дополнительно
- Удалить FaceIt и Vanguard подробнее
FaceIt - это отдельный античит игры CS:GO Vanguard - это античит игры ValorantДополнительно (при возникновении ошибки)
- Включить VT-x , SVM в BIOS
- Отключить Hyper-V
ИНСТРУКЦИЯ ПО ЗАПУСКУ
ВАЖНО Пренебрежение данных действий может привести к бану!!!
- Перед запуском чита закройте Игру и лаунчер игры!
- Если вы ранее запускали какие-либо читы, перезагрузите свой компьютер!(перезагрузите компьютер перед использованием другого чита)
- В случае пренебрежения одного из действий вы можете получить бан!
- Закрыть лаунчер софта перед запуском игры!
- Запуск софта с флешки (виртуальной или физической)
- **удалите старый лаунчер софта с ПК(в случаи выхода нового)
Внимательно прочтите всю инструкцию перед началом!
🔽 Шаг 1. Скачивание и подготовка лаунчера
-
💾 Поместите лаунчер на флешку (мы настоятельно рекомендуем запускать именно с флешки — это важно для вашей безопасности).
Если лаунчер не запускается
-
Или при запуске лаунчера создаётся error log, включите VPN и запустите лаунчер повторно.
Шаг 2. Запуск лаунчера и регистрация
-
▶️ Запустите лаунчер с флешки.
-
📝 Зарегистрируйтесь в лаунчере.
-
🔑 Активируйте свой ключ.
🎮Шаг 3. Запуск приобретённого проекта
-
▶️ Запустите лаунчер с флешки.
-
🕹 Выберите проект (на который у вас есть купленный ключ) и нажмите Launch.
-
✅ Если запуск прошёл успешно, появится кнопка Launched и ниже сообщение Successfully launched ( ориентируйтесь на кнопку Launched )
⚠️ Важное!
-
❌ Если возникнет ошибка — софт не загрузится!
-
❎ В этом случае закройте лаунчер и ознакомьтесь с разделом «Популярные ошибки и их решения» [читайте здесь]. Там вы сможете найти свою ошибку и пошаговое решение.
🔒 Шаг 4. Завершение подготовки
-
❌ Закройте Launcher софта
-
🔌 Отсоедините флешку и убедитесь, что она отключена.
-
🕹 Запустите игру
-
⌨️ Меню чита откроется нажатием клавиши HOME.
🎉 Приятной игры!
СпойлерЕсли вы запустили программу, но меню нет, то вы не следовали инструкции.
1. Проверьте системные требования для ПО.
2. Проверить успешность запуска ПО.
3. Проверить требования к режиму окна.
4. Проверить все ли инструкции соблюдены.
5. Прочтите инструкцию, перезапустите ПК и повторите запуск.
При соблюдении всего, что написано в инструкции, это гарантия успешного запуска ПО на 100%.- Меню не вызывается по клавише HOME** попробуйте запустить экранную клавиатуру (чтобы у вас была другая комбинация клавиш).
ЕСЛИ У ВАС, ЧТО-ТО НЕ ЗАПУСКАЕТСЯ, ОБРАТИТЕСЬ К СВОЕМУ ПРОДАВЦУ ЗА ПОМОЩЬЮ.
Еrror | Ошибки
- Hardware component has changed
- Ошибки и их решения /Errors and their solutions
- Your IP address has beens blocked
- Failed to launch #2
- Restart your system and try again Hyper-V
-
Functional
in Scum
Функции чита: Functional
Players
Only visible ( только видимые)
Draw zombie/sentry ( зомби)
Name ( имена )
Category ( категория)
Item in hands (Players) (предмет в руках (игрок))
Line ( линии)
Health (Zombie)
Box 2D ( 2д бокс)
Distance ( дистанция)
Skeleton ( скелет)
Size line skeleton: ( размер скелета)
Skeleton draw distance: ( дистанция прорисовки скелета)
Backlight distance: ( дальность подсветки)
Drone ( дрон)
Corpses: (трупы)
Player ( игрок )
Zombie ( зомби)
Animals (животные)
Corpses distance: (дальность подсветки трупа)
Animals: (животные)
Vehicle: (транспорт)
RadarEnable radar/compass
Backlight distance:
Position by X:
Position by Y:
Size:
Alpha:
LootOpen loot list ( открыть лут лист)
Weapon (оружие)
Equipment (экипировка)
Chest (ящики)
Attachment (модули)
Ammunition (Боеприпасы)
Medication ( медицина)
Drink (питье)
Food (еда)
Clothes (одежда)
Explosive ( взрывчатка)
Other ( предметы без категории)
Selected ( выбранные предметы)
Airdrops (аirdrops )
Weapon (оружие)
Equipment (экипировка)
Chest (ящики)
Attachment (модули)
Ammunition (Боеприпасы)
Medication ( медицина)
Drink (питье)
Food (еда)
Clothes (одежда)
Explosive ( взрывчатка)
Unknown (неизвестный)
Weed out spoiled food/drink (отсеять испорченную еду / напитки)
Rarity loot (редкость добычи)
Quality loot (качество добычи)Aim
Enable aimbot) (включить аим)
Do not aim at zombie ( не наводить на зомби)
Do not aim at friends ( не наводить на друзей)
Visibility check (проверка видимости)
Aim priority:
Distance ( приоритет по дистанции)
Crosshair ( приоритет ближайшего прицела)
Draw fov circle ( рисовать кружок Fov)
Smooth (more > faster): (Сглаживание)
Draw fov circle (Отключение визуального круга FoV)
Fov: (настройка Fov)
Distance: (дистанция)
Enable prediction
Draw aim prediction
Bones selection: ( выбор кости . вы можете выбрать 1 кость или несколько костей)
Head ( голова)
Neck ( шея)
Left elbow ( Левый локоть)
Right elbow ( Правый локоть)
Body ( тело)
Pelvis ( пах)
Left knee ( левое колено)
Right knee ( правое колено)Bone change time: ( частота смены костей)
Key selection:( выбор клавиши для работы аима)Misc
No recoil (Danger) (отключение отдачи)
No spread (Danger) (отключение разброса)
Always day (Danger) (всегда день)
Unlimited ammo (Danger) (бесконечные патроны)
Unlimited weapon stamina drain (Danger) (неограниченный расход выносливости оружия)
Draw wires for bomb defuse (показывать провода для обезвреживания бомбы)
Draw picking locks point ( рисовать положение отмычки для взлома замка)
Automatic picking of locks (Danger) (взлом замков)
Key selection:( назначить клавишу)
Draw crosshair (рисовать перекрестие прицела)
Crosshair color (цвет перекрестия)Colors
Visible players color
Invisible players color
Target player color
Friendly player color
Zombie color
Zombie kamikaze color
Sentry color
Animals color
Corpses color
Drone color
Vehicles color
Compass color
Clothes color
Medication color
Food color
Drink color
Container color
Ammunition color
Attachment color
Equipment color
Weapon color
Explosive color
Other color
Selected loot color
Setting
Key to disable loot: ( кнопка отключения подсветки лута)
Open menu key:( кнопка вызова меню)
Функционал может изменяться, как добавляться, так и удаляться/The functionality can be changed, added or removed...***
MеnuGame screenshotsСпойлер
-
Инструкция на двух языках (русская и английская) | Instructions in two languages (Russian and English)
Software price for Scum
1 day: 400 rubles 7 days: 1700 rubles 31 day: 3000 rubles Функционал | Functional (clickable)
System requirements:Supported Processors: AMD, INTEL
Supported OS: Windows 10–11 x64
Supported Builds:1903(18362), 1909(18363), 2004(19041), 20H2(19042), 21H1(19043), 21H2(19044), 22H2(19045), 21H2(22000), 22H2(22621), 23H2(22631), 24H2(26100), 25H2(26200)Check your Windows build: Press Win + R Type WINVER → Press OK
Additional Information:
Project type: External
Game mode: Windowed*
*How to run in fullscreen — read here
Compatibility: Works in games Scum
Scale in system and game: 100%
Screen format: Auto
Supported game versions: Steam
Support for invisibility in video/screenshots/screen sharing,demonstrations: Yes
Required: Enable virtualization in BIOS (SVM, VT-x, VT-d)
Required: Disable Hyper-V — read here
Run from flash drive: Yes
HWID Spoofer:-
❗ Not included, purchased separately.
-
⚠️ Performance with other spoofers is not guaranteed.
[Русский] Информация и технические требования
СпойлерТребования к системе:
Поддерживаемые процессоры: Intel, AMD
Поддерживаемые ОС: Windows 10-11 х64
Поддерживаемые сборки: 1903(18362), 1909(18363), 2004(19041), 20H2(19042), 21H1(19043), 21H2(19044), 22H2(19045), 21H2(22000), 22H2(22621), 23H2(22631), 24H2(26100), 25H2(26200)**Как ее узнать.... Нажимаем сочетание клавиш Win+R, вставляем в поле команду WINVER , и нажимаем Ok.
Дополнительная информация:
Тип проекта: External
Режим игры: Оконный*
*Как запустить в полноэкранном режиме — read here
Совместимость: Работает в игре Scum
Масштаб в системе и игре: 100%
Формат экрана: Авто
Поддерживаемые версии игры: Steam
Поддержка невидимости на видео или скриншотах, демонстрации экрана: Да
Требуется: Включить виртуализацию в BIOS (SVM, VT-x, VT-d)
Требуется: Отключить Hyper-V — read here
Запуск с флеш-накопителя: Да
Важно!
HWID SPOOFER - В софт не встроен! Покупается отдельно!
Совместимость данного ПО с другими спуферами не гарантируется.🛒 Наши магазины / Our Stores
Методы оплаты / Payment Methods:
-
FK, СБП, Карта, WebMoney, UnionPay, Alipay, Turkish Bank Card, PIX, BTC, Litecoin и множество других способов оплаты / and many other payment options
-
Методы оплаты / Payment Methods: BTC, Litecoin
⚠️ Если у вас возникнут вопросы по оплате или нужны другие варианты оплаты, не представленные на сайтах — обращайтесь к нам через создание тикета в канале.
⁉️ If you have any questions about payment or need other payment options not listed on the sites, please contact us by creating a ticket in the channel.Создайте тикет в discord в разделе ( 🎫-𝙎𝘼𝙇𝙀𝙎-𝙏𝙄𝘾𝙆𝙀𝙏𝙎) | Create a ticket in the discord section ( 🎫-𝙎𝘼𝙇𝙀𝙎-𝙏𝙄𝘾𝙆𝙀𝙏𝙎)
💬 Наш Discord / Our Discord: Войти в Discord / Join Discord
⁉️ После покупки вы получите ключ и ссылку на инструкцию, которая содержит все рекомендации и пошаговые инструкции.
⁉️ After purchase, you will receive a key and a link to the instructions, which include all recommendations and step-by-step guidance.
📞 По вопросам сотрудничества / For Partnership Inquiries
Telegram: lisi4ka138
-
-
Если вы столкнулись с этой ошибкой, это означает, что вы не прочитали инструкцию к софту
If you encounter this error, it means that you have not read the instructions for the software
[English]
You need to close the Launcher software before starting the game!
the error means that the Launcher software closes the game process
- because you have a software launcher open
- because it is impossible to launch the Launcher of the game when the Launcher of the software is open
**you cannot run the cheat launcher when the launcher and the game are open and running and when the game is open
[Русский]
СпойлерВам нужно закрыть Launcher софта перед запуском игры!
ошибка означает что Launcher софта закрывает процесс игры
- потому что у вас открыт Launcher софта
- потому что нельзя запускать Launcher игры при открытом Launcher софта
**нельзя запускать лаунчер чита при открытом и запущенном лаунчере игры и при открытой игре
-
Functional
in DayZ
Players
Friends list ( возможность добавить друзей в список)
Line ( линии)
Box 2D ( 2д бокс)
Name ( имена )
Item in hands ( предмет в руках)
Category ( категория)
Distance ( дистанция)
Skeleton ( скелет)
Size line skeleton: ( размер скелета)
Skeleton draw distance: ( дистанция прорисовки скелета)
Backlight distance: ( дальность подсветки)
Corpses distance: (дальность подсветки трупа)
Show all loot on hover: ( показывать лут при наведении )
alive( живой)
corpse( труп)Zombies
Name ( имена )
Line ( линии)
Box 2D ( 2д бокс)
Distance ( дистанция)
Skeleton ( скелет)
Size line skeleton: ( размер скелета)
Skeleton draw distance: ( дистанция прорисовки скелета)
Backlight distance: ( дальность подсветки)
Corpses distance: (дальность подсветки трупа)
Show all loot on hover: ( показывать лут при наведении )
alive( живой)
corpse( труп)Anim&Vehicle
Animals: (животные)
Animal corpses distance: (дальность подсветки трупа животного)
Vehicle: (транспорт)
Show all loot on hover: ( показывать лут при наведении )
Animal corpse (труп животного)
Vehicle (транспорт)
Radar
Enable radar/compass
Enable map markers (LB/RB)
Draw players on map
Draw zombie (radar, map)
Show current position ( показать свои текущие координаты)
Backlight distance:
Position by X:
Position by Y:
Size:
Alpha:
Loot
Open loot list:
Navigation ( навигация)
Clothes ( одежда)
Medical ( медицина)
Drink (питье)
Container ( контейнеры)
Ammo ( патроны)
Attachment (модули)
Tool ( инструменты)
Consumables ( расходные материалы)
Melee weapon ( оружие ближнего боя)
Weapon (оружие)
Camping (кемпинг)
Food ( еда)
Cooking ( кухонная принадлежность)
Crafting ( предметы крафта)
Optics ( бинокль, дальномер...)
Radio ( рация, радио)
Vehicle parts ( элементы транспорта)
Cultivation ( сельхоз предметы, семена)
Explosives ( взрывчатка)
Other ( предметы без категории)
Selected ( выбранные предметы)Navigation ( навигация)
Clothes ( одежда)
Medical ( медицина)
Drink (питье)
Container ( контейнеры)
Ammo ( патроны)
Attachment (модули)
Tool ( инструменты)
Consumables ( расходные материалы)
Melee weapon ( оружие ближнего боя)
Weapon (оружие)
Camping (кемпинг)
Food ( еда)
Cooking ( кухонная принадлежность)
Crafting ( предметы крафта)
Optics ( бинокль, дальномер...)
Radio ( рация, радио)
Vehicle parts ( элементы транспорта)
Cultivation ( сельхоз предметы, семена)
Explosives ( взрывчатка)
Other ( предметы без категории)
Selected ( выбранные предметы)
Loot count( отображение количества остатка объекта)
Loot quality ( состояние лута)
Show all loot on hover ( показывать весь лут при наведении курсора мыши)Aim
Enable aimbot (включить аим)Опасно!
Aim type:
Mouse movement
Silent movementAim at:
Zombie ( не наводить на зомби)
Friends ( не наводить на друзей)
Animal ( не наводить на животных)
Players ( не на водить на игроков для PVE server)
Aim priority:
Distance ( приоритет по дистанции)
Crosshair ( приоритет ближайшего прицела)
Draw fov circle ( рисовать кружок Fov)
Fov: (настройка Fov)
Distance: (максимальная дистанция до врага)
Draw aim point (кружок куда нацелен аим)
Enable prediction ( встроен)
Bones selection: ( выбор кости . вы можете выбрать 1 кость или несколько костей)
Head ( голова)
Neck ( шея)
Left elbow ( Левый локоть)
Right elbow ( Правый локоть)
Body ( тело)
Pelvis ( пах)
Left knee ( левое колено)
Right knee ( провое колено)
Bone change time ( частота смены костей)
Key selection ( выбор клавиши для работы аима)Misc
Always light (Danger) (всегда день)
Disable grass (Danger) (отключить траву)
Key selection: ( выбор клавиши для отключения травы)
Disable fog (Danger) (отключить туман)
Disable rain (Danger) (отключить дождь)
Enable 3d person (включить поддержку вида от 3 лица)
Disable overcast (Danger) (отключить облачность)
Draw crosshair ( рисовать перекрестие)Colors Широкий выбор цветовой палитры
Compass color
Player color
Friend color
Zombie color
Animal color
Vehicle color
Corpse color
Navigation color
Clothes color
Medical color
Drink color
Container color
Ammo color
Attachment color
Tool color
Consumables color
Melee weapon color
Weapon color
Camping color
Food color
Cooking color
Crafting color
Optics color
Radio color
Vehicles parts color
Cultivation color
Explosives color
Other color
Selected loot color
Setting
Key to disable loot: ( кнопка отключения подсветки лута)
Open menu key:( кнопка вызова меню)
Inside loot update time: ( время обновления лута)Спойлер
Спойлер
***Функционал может изменяться, как добавляться, так и удаляться
-
Инструкция на двух языках (русская и английская) | Instructions in two languages (Russian and English)
The video shows a demo view of the launch and so on
A more detailed launch is spelled out in the text instructions below the videoВ видеоролике продемонстрирован демонстрационный вид запуска и прочее Более детальный запуск прописан в текстовой инструкции ниже видеоВерсия 2
Спойлер[English] Launch Instructions
СпойлерWe remind you that you must understand what you are doing when playing with the software !!!
- You purchase and use the software at your own risk.
- The Undetected status does not guarantee 100% protection against blocking (with any cheat in any game, a ban is possible).
- If the update is in the game, wait for the software update.
- By purchasing this software, you agree with the rule that in case of a defect or complete closure of the project, you will not receive a refund!
- By purchasing this software, you agree to the rule that if you block the game account, you will not receive a refund!
This software uses unique identifiers of your " hardware"
- 1 account =1 PC ( Example: when you first start the program, your account is linked to the current PC, further use of the same account on another PC is not possible)
- if you do use a spuffer.. first log in to the launcher, and then launch the spoofer( you need to restart your PC before that)
- If you are using a spoofer, disable it and restart the computer
- Error "Hardware component has changed"
System requirements:
- Supported processors: Intel, AMD
- Supported OS: Windows 10- 11 x64
- Supported builds: 1903(18362), 1909(18363), 2004(19041), 20H2(19042), 21H1(19043), 21H2(19044), 22H2(19045), 21H2(22000), 22H2(22621), 23H2(22631), 24H2(26100), 25H2(26200)
** How to find it ... Press the key combination Win + R, insert the WINVER command into the field, and press Ok.
Additional Information:
Project type: External
Game mode: Windowed*
*How to run in fullscreen — read here
Scale in system and game: 100%
Screen format: Auto
Supported game versions: Steam
Support for invisibility in video/screenshots/screen sharing,demonstrations: Yes
Required: Enable virtualization in BIOS (SVM, VT-x, VT-d)
Required: Disable Hyper-V — read here
Run from flash drive: YesImportant!
HWID Spoofer is not included — must be purchased separately.
Compatibility of this software with other spoofers is not guaranteed.For the software to work correctly, you need to install and remove a number of programs
СпойлерIt is recommended to install
- Redistributable packages Visual C++ 2008-2019
- DirectX
DISABLE or REMOVE MANDATORY
- Disable antivirus( Remove!!! )
- Disable SmartScreen How to disable
- Disable Windows Defender How to disable
Additionally
- Remove FaceIt and Vanguard How to disable
FaceIt this is anti-cheat CS:GO Vanguard this is anti-cheat ValorantAdditionally (if an error occurs)
- Enable VT-x, SVM in BIOS
- Disable Hyper-V
LAUNCH INSTRUCTIONS
IMPORTANT ignoring these actions will lead to a ban!!!
- Before starting the cheat, close the Game and the game launcher!
- If you have previously run any cheats, restart your PC! (restart pc before using another cheat)
- Close the software launcher before launching the game!
- If you neglect one of the actions, you can get banned!
- Running the software, you need a flash drive (virtual or physical)
Please read this entire guide carefully before starting!
🔽 Step 1. Downloading and Preparing the Launcher
- 📥 Download Launcher
- 💾 Place the launcher on a USB flash drive (we strongly recommend running it from the USB drive — this is important for your safety).
If the launcher does not start
• If an error log is created when launching the launcher, enable a VPN and start the launcher again.
🚀 Step 2. Running the Launcher and Registration
- ▶️ Launch the launcher from the USB drive.
- 📝 Register in the launcher.
- 🔑 Activate your key.
🎮Step 3. Launching the Purchased Project
- ▶️ Launch the launcher from the USB drive.
- 🕹 Select the project (for which you have a purchased key) and click Launch.
- ✅ If the launch is successful, the Launched button will appear and you will see the message Successfully launched (focus on the “Launched” button).
⚠️ Important!
❌ If an error occurs — the software will not load!
❎ In this case, close the launcher and check the “Common Errors and Solutions” section [read here]. There you can find your specific error and step-by-step solution.
🔒 Step 4. Final Preparation
- ❌ Close the software Launcher
- 🔌 Disconnect the USB flash drive and make sure it is removed.
- 🕹 Start the game
- ⌨️ The cheat menu opens by pressing the HOME key.
🎉 Enjoy the game!
СпойлерIf you launched the program, but there is no menu, then you did not follow the instructions.
1. Check the system requirements for the software.
2. Check whether the software launched successfully.
3. Check the window mode requirements.
4. Check that all instructions have been followed.
5. Read the instructions, restart your PC and try again.If you follow everything written in the instructions, this is a 100% guarantee of successful launch of the software.
- The menu is not called up using the HOME key** try launching the on-screen keyboard (so that you have a different key combination).
IF YOU HAVE SOMETHING THAT DOES NOT START, CONTACT YOUR SELLER FOR HELP.
[Русский] Инструкция по запуску
Напоминаем что вы должны понимать на что идете играя с софтом!!!
- Софт вы приобретаете и используете на свой страх и риск.
- Статус Undetected не гарантирует 100% защиту от блокировок(с любым читом в любой игре возможен бан).
- Если обновление в игре дождитесь обновления софта.
- Покупая данное ПО, вы соглашаетесь с правилом, что при детекте или полном закрытии проекта вы не получите возврат денежных средств!
- Покупая данное ПО, вы соглашаетесь с правилом, что при блокировке игрового аккаунта вы не получите возврат денежных средства!
Данное ПО использует уникальные идентификаторы вашего "железа"
- 1 учетка =1 пк ( Пример: при первом запуске программы ваша учетная запись привязывается к текущему ПК, дальнейшее использование той же учетной записи на другом ПК не возможно)
- Если вы используете спуфер отключите его и перезапустите компьютер
- Если вы всё-таки используете спуфер.. сначала авторизовываетесь в лаунчере, а потом запускаете спуфер( требуется перед этим перезагрузка пк)
- Ошибка "Hardware component has changed"
Требования к системе:
Поддерживаемые процессоры: Intel, AMD
Поддерживаемые ОС: Windows 10-11 х64
Поддерживаемые сборки: 1903(18362), 1909(18363), 2004(19041), 20H2(19042), 21H1(19043), 21H2(19044), 22H2(19045), 21H2(22000), 22H2(22621), 23H2(22631), 24H2(26100), 25H2(26200)**Как ее узнать.... Нажимаем сочетание клавиш Win+R, вставляем в поле команду WINVER , и нажимаем Ok.
Дополнительная информация
Тип проекта: External
Режим игры: Оконный*
*Как запустить в полном экране — читайте здесь
Масштаб в системе и игре: 100%
Формат экрана: Авто
Поддерживаемые версии игры: Steam
Поддержка невидимости на видео/скриншотах/при демонстрации экрана: Да
Необходимо: Включить виртуализацию в BIOS (SVM, VT-x, VT-d)
Необходимо: Отключить Hyper-V — читайте здесь
Запуск с флешки: ДаВажно!
-
HWID Spoofer в комплект не входит — приобретается отдельно.
-
Совместимость софта с другими спуфферами не гарантируется.
Для корректной работы софт необходимо установить и удалить ряд программ
СпойлерРекомендуется установить
- Распространяемые пакеты Visual C++ 2008-2019
- DirectX
ОТКЛЮЧИТЬ или УДАЛИТЬ ОБЯЗАТЕЛЬНО
-
Отключить антивирус (Удалить!!!)
-
Отключить SmartScreen
-
Отключить защитник Windows
Дополнительно
- Удалить FaceIt и Vanguard подробнее
FaceIt - это отдельный античит игры CS:GO Vanguard - это античит игры ValorantДополнительно (при возникновении ошибки)
- Включить VT-x , SVM в BIOS
- Отключить Hyper-V
ИНСТРУКЦИЯ ПО ЗАПУСКУ
ВАЖНО Пренебрежение данных действий может привести к бану!!!
- Перед запуском чита закройте Игру и лаунчер игры!
- Если вы ранее запускали какие-либо читы, перезагрузите свой компьютер!(перезагрузите компьютер перед использованием другого чита)
- В случае пренебрежения одного из действий вы можете получить бан!
- Закрыть лаунчер софта перед запуском игры!
- Запуск софта с флешки (виртуальной или физической)
- **удалите старый лаунчер софта с ПК(в случаи выхода нового)
Внимательно прочтите всю инструкцию перед началом!
🔽 Шаг 1. Скачивание и подготовка лаунчера
-
💾 Поместите лаунчер на флешку (мы настоятельно рекомендуем запускать именно с флешки — это важно для вашей безопасности).
Если лаунчер не запускается
-
Или при запуске лаунчера создаётся error log, включите VPN и запустите лаунчер повторно.
Шаг 2. Запуск лаунчера и регистрация
-
▶️ Запустите лаунчер с флешки.
-
📝 Зарегистрируйтесь в лаунчере.
-
🔑 Активируйте свой ключ.
🎮Шаг 3. Запуск приобретённого проекта
-
▶️ Запустите лаунчер с флешки.
-
🕹 Выберите проект (на который у вас есть купленный ключ) и нажмите Launch.
-
✅ Если запуск прошёл успешно, появится кнопка Launched и ниже сообщение Successfully launched ( ориентируйтесь на кнопку Launched )
⚠️ Важное!
-
❌ Если возникнет ошибка — софт не загрузится!
-
❎ В этом случае закройте лаунчер и ознакомьтесь с разделом «Популярные ошибки и их решения» [читайте здесь]. Там вы сможете найти свою ошибку и пошаговое решение.
🔒 Шаг 4. Завершение подготовки
-
❌ Закройте Launcher софта
-
🔌 Отсоедините флешку и убедитесь, что она отключена.
-
🕹 Запустите игру
-
⌨️ Меню чита откроется нажатием клавиши HOME.
🎉 Приятной игры!
СпойлерЕсли вы запустили программу, но меню нет, то вы не следовали инструкции.
1. Проверьте системные требования для ПО.
2. Проверить успешность запуска ПО.
3. Проверить требования к режиму окна.
4. Проверить все ли инструкции соблюдены.
5. Прочтите инструкцию, перезапустите ПК и повторите запуск.
При соблюдении всего, что написано в инструкции, это гарантия успешного запуска ПО на 100%.- Меню не вызывается по клавише HOME** попробуйте запустить экранную клавиатуру (чтобы у вас была другая комбинация клавиш).
ЕСЛИ У ВАС, ЧТО-ТО НЕ ЗАПУСКАЕТСЯ, ОБРАТИТЕСЬ К СВОЕМУ ПРОДАВЦУ ЗА ПОМОЩЬЮ.
Еrror | Ошибки
- Hardware component has changed
- Ошибки и их решения /Errors and their solutions
- Your IP address has beens blocked
- Failed to launch #2
- Restart your system and try again Hyper-V
-
Инструкция на двух языках (русская и английская) | Instructions in two languages (Russian and English)
для русской версии прокрутите вниз | for the Russian version, scroll down
[English]
If you encounter this error, it means that your OS version is not supported
In each section with the game and in the store there are written assemblies on which the software runs
** How to find it ... Press the key combination Win + R, insert the WINVER command into the field, and press Ok.
Error Solution
- Reinstall Windows
- If an update is available, upgrade to the appropriate version
[Русский]
СпойлерЕсли вы столкнулись с этой ошибкой, это означает, что ваша версия OS не поддерживается
В каждом разделе с игрой и в магазине написаны сборки на которых работает софт
**Как ее узнать.... Нажимаем сочетание клавиш Win+R, вставляем в поле команду WINVER , и нажимаем Ok.
Решение ошибки
- Переустановить Windows
- Если доступно обновление, обновитесь до соответствующей версии
-
Инструкция на двух языках (русская и английская) | Instructions in two languages (Russian and English)
для русской версии прокрутите вниз | for the Russian version, scroll down
If you encounter this error, which means that your original key has changed
This software uses the unique identifiers of your hardware
Hardware component has changed
[English]
The error appears if you:
- Added PC components
- Removed PC components
- Rearranged PC components in places
- Used a spoofer
СпойлерThis software uses unique identifiers of your hardware
- 1 account = 1 pc (Example: when you first start the program, your account is linked to the current PC, further use of the same account on another PC is not possible)
- If you use a spoofer, disable it and restart the computer
- If you do use a spoofer.. first log in to the launcher, and then launch the spoofer (you need to restart the PC before that)
- This all changes your original binding.
*If you add, change, rearrange something, it all changes your original binding.
No need to say I didn't touch anything, my HWID flew off (this can't be!!! if there are no changes, this error will not appear)
If you need to reset the HWID, then provide all the information to the Administration :
You need to provide the following:
- Login (email), the key is required!!!
- Reason for resetting HWID;
- If the reason is a change in components, then write what exactly has changed. The more correct data you write, the more likely it is to be reset.
- Expect a response (no need to spam everywhere)
Provide information about the HWID reset to one of the listed people:In the message, you must specify all the data.
If you do not provide the information (there will be no response to the message!!we will not waste time and drag out every word from you!!!)
- Telegram: lisi4ka138
- Discord: Lisi4ka#5565
IF YOU HAVE A MISCONFORMITY IN THE APPLICATION WITH THE PC'S CHARACTERISTICS, THEN THE ADMINISTRATION IS RIGHT TO REFUSE TO RESET HWID
- If you did not pass the test, then further reset is paid 100 rubles
- If you need to reset more often in 2 weeks, the reset is paid 100 rubles
- If you changed your PC the reset is paid 100 rubles
ATTENTION: AFTER YOU WRITE A PERSON FROM TECHNICAL SUPPORT, WAIT FOR AN ANSWER FROM HIM, YOU DO NOT NEED TO DUPLICATE YOUR INQUIRIES TO OTHER PEOPLE, BY THESE ACTIONS YOU WILL NON-HELP THROUGH THE PROCESS. YOU CAN WRITE TO ANOTHER PERSON IF YOU DO NOT ANSWER THE FIRST WITHIN 24 HOURS FROM THE MOMENT OF CALLING! WE USUALLY MAKE A DISCHARGE DECISION ASAP.
Time spent on resetting HWID will not be replenished (added)
ALSO PAY ATTENTION THAT HWID RESET CAN BE PERFORMED AT LEAST TWO WEEKS, WITH AN ACCEPTABLE RESET REASON.
[Русский]
SpoilerЕсли вы столкнулись с данной ошибкой, которая означает что у вас изменился первоначальный ключ
Данное ПО использует уникальные идентификаторы вашего "железа"
Ошибка появляется если Вы:
- Добавили комплектующие ПК
- Убрали комплектующие ПК
- Переставили комплектующие ПК местами
- Использовали спуфер**
СпойлерДанное ПО использует уникальные идентификаторы вашего "железа"
- 1 учетка =1 пк ( Пример: при первом запуске программы ваша учетная запись привязывается к текущему ПК, дальнейшее использование той же учетной записи на другом ПК не возможно)
- Если вы используете спуфер отключите его и перезапустите компьютер
- Если вы всё-таки используете спуфер.. сначала авторизовываетесь в лаунчере, а потом запускаете спуфер( требуется перед этим перезагрузка пк)
*Если вы что то добавляете, меняете, переставляете это все меняет вашу первоначально привязку.
Не нужно говорить я ничего не трогал у меня слетел HWID (такого не может быть!!! если нет изменений данная ошибка не появится)Если вам нужен сброс HWID, то предоставьте всю информацию Администрации :
Вам необходимо предоставить следующее:
- Логин (почта) , ключ обязательно!!!
- Причину сброса HWID;
- Если причиной является смена комплектующих, то пишите что конкретно изменилось . Чем больше правильных данных Вы напишите, тем больше вероятность сброса.
Ожидайте ответа (не нужно спамить везде)
Сообщите информацию по поводу сброса HWID одному из перечисленных людей:
В сообщении вы должны указать все данные.
Если вы не укажите информацию ( на сообщение ответа не будет!!тратить время и вытягивать у вас каждое слово мы не будем!!!)
- Telegram: lisi4ka138
- Discord: Lisi4ka#5565
ЕСЛИ У ВАС В ЗАЯВКЕ БУДЕТ НЕСООТВЕТСТВИЕ ХАРАКТЕРИСТИК ПК , ТО АДМИНИСТРАЦИЯ ВПРАВЕ ОТКАЗАТЬ В СБРОСЕ HWID
- Если вы не прошли проверку то дальнейший сброс платный 100р
- Если сброс нужно выполнить чаще за 2 недели сброс платный 100р
- Если вы поменяли ПК сброс платный 100р
ВНИМАНИЕ:
ПОСЛЕ ТОГО КАК ВЫ НАПИШИТЕ ЧЕЛОВЕКУ ИЗ ТЕХНИЧЕСКОЙ ПОДДЕРЖКИ, ЖДИТЕ ОТВЕТА ИМЕННО ОТ НЕГО, НЕ НУЖНО ДУБЛИРОВАТЬ ВАШИ ЗАПРОСЫ ДРУГИМ ЛЮДЯМ, ДАННЫМИ ДЕЙСТВИЯМИ ВЫ БУДЕТЕ ЗАМЕДЛЯТЬ ПРОЦЕСС ПОМОЩИ НЕПОСРЕДСТВЕННО СЕБЕ ЖЕ. НАПИСАТЬ ДРУГОМУ ЧЕЛОВЕКУ ВЫ МОЖЕТЕ ЕСЛИ ВАМ НЕ ОТВЕТИТ ПЕРВЫЙ В ТЕЧЕНИИ 24 ЧАСОВ С МОМЕНТА ОБРАЩЕНИЯ! ОБЫЧНО МЫ ПРИНИМАЕМ РЕШЕНИЕ ПО ПОВОДУ СБРОСА В КРАТЧАЙШИЕ СРОКИ.
Время затраченное на сброс HWID не будет восполнено (добавлено)
ТАКЖЕ ОБРАЩАЕМ ВНИМАНИЕ НА ТО, ЧТО СБРОС HWID МОЖНО ВЫПОЛНЯТЬ НЕ ЧАЩЕ РАЗА В ДВЕ НЕДЕЛИ, С ПРИЕМЛЕМОЙ ПРИЧИНОЙ СБРОСА. -
Инструкция на двух языках (русская и английская) | Instructions in two languages (Russian and English)
Software price for DayZ
1 day: 550 rubles 7 days: 2000 rubles 31 day: 4000 rublesSystem requirements:
Supported Processors: AMD, INTEL
Supported OS: Windows 10–11 x64
Supported Builds:1903(18362), 1909(18363), 2004(19041), 20H2(19042), 21H1(19043), 21H2(19044), 22H2(19045), 21H2(22000), 22H2(22621), 23H2(22631), 24H2(26100), 25H2(26200)Check your Windows build: Press Win + R Type WINVER → Press OK
Additional Information:
Project type: External
Game mode: Windowed*
*How to run in fullscreen — read here
Compatibility: Works in games DayZ
Scale in system and game: 100%
Screen format: Auto
Supported game versions: Steam
Support for invisibility in video/screenshots/screen sharing,demonstrations: Yes
Required: Enable virtualization in BIOS (SVM, VT-x, VT-d)
Required: Disable Hyper-V — read here
Run from flash drive: Yes
HWID Spoofer:-
❗ Not included, purchased separately.
-
⚠️ Performance with other spoofers is not guaranteed.
[Русский] Информация и технические требования
СпойлерТребования к системе:
Поддерживаемые процессоры: Intel, AMD
Поддерживаемые ОС: Windows 10-11 х64
Поддерживаемые сборки: 1903(18362), 1909(18363), 2004(19041), 20H2(19042), 21H1(19043), 21H2(19044), 22H2(19045), 21H2(22000), 22H2(22621), 23H2(22631), 24H2(26100), 25H2(26200)**Как ее узнать.... Нажимаем сочетание клавиш Win+R, вставляем в поле команду WINVER , и нажимаем Ok.
Дополнительная информация:
Тип проекта: External
Режим игры: Оконный*
*Как запустить в полноэкранном режиме — read here
Совместимость: Работает в игре DayZ
Масштаб в системе и игре: 100%
Формат экрана: Авто
Поддерживаемые версии игры: Steam
Поддержка невидимости на видео или скриншотах, демонстрации экрана: Да
Требуется: Включить виртуализацию в BIOS (SVM, VT-x, VT-d)
Требуется: Отключить Hyper-V — read here
Запуск с флеш-накопителя: Да
Важно!
HWID SPOOFER - В софт не встроен! Покупается отдельно!
Совместимость данного ПО с другими спуферами не гарантируется.
🛒 Наши магазины / Our Stores
Методы оплаты / Payment Methods:
-
FK, СБП, Карта, WebMoney, UnionPay, Alipay, Turkish Bank Card, PIX, BTC, Litecoin и множество других способов оплаты / and many other payment options
-
Методы оплаты / Payment Methods: BTC, Litecoin
⚠️ Если у вас возникнут вопросы по оплате или нужны другие варианты оплаты, не представленные на сайтах — обращайтесь к нам через создание тикета в канале.
⁉️ If you have any questions about payment or need other payment options not listed on the sites, please contact us by creating a ticket in the channel.Создайте тикет в discord в разделе ( 🎫-𝙎𝘼𝙇𝙀𝙎-𝙏𝙄𝘾𝙆𝙀𝙏𝙎) | Create a ticket in the discord section ( 🎫-𝙎𝘼𝙇𝙀𝙎-𝙏𝙄𝘾𝙆𝙀𝙏𝙎)
💬 Наш Discord / Our Discord: Войти в Discord / Join Discord
⁉️ После покупки вы получите ключ и ссылку на инструкцию, которая содержит все рекомендации и пошаговые инструкции.
⁉️ After purchase, you will receive a key and a link to the instructions, which include all recommendations and step-by-step guidance.
📞 По вопросам сотрудничества / For Partnership Inquiries
Telegram: lisi4ka138
-
-
Поздравляем с днем защитника отечества!
и дарим вам скидку 23% на весь софт при покупке в наших магазинах
✔️ https://crooked-arms.shop
✔️ https://sellix.io/CrookedArms🔑 промокод: February 23
примените его при оплате и получите скидку
🕛 действует до 24.02.2022 23.59 МСК
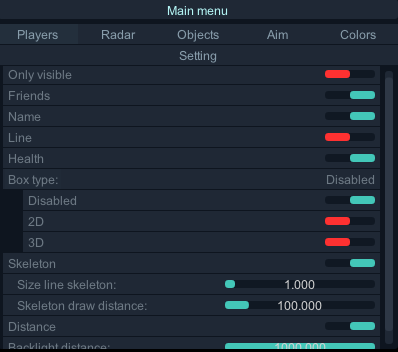
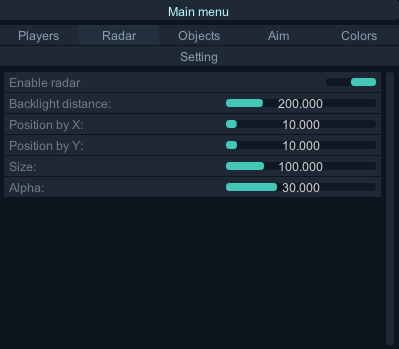
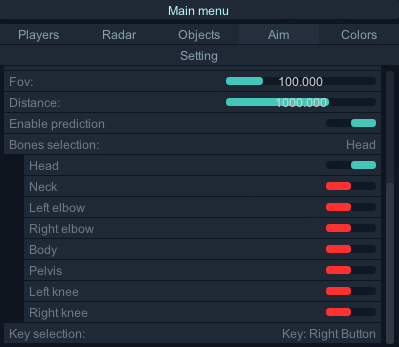
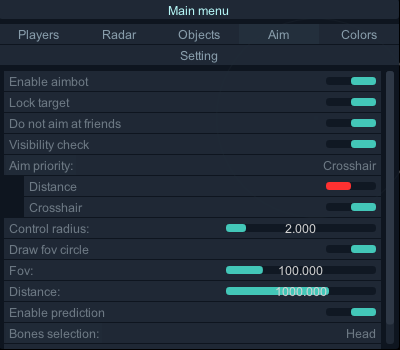
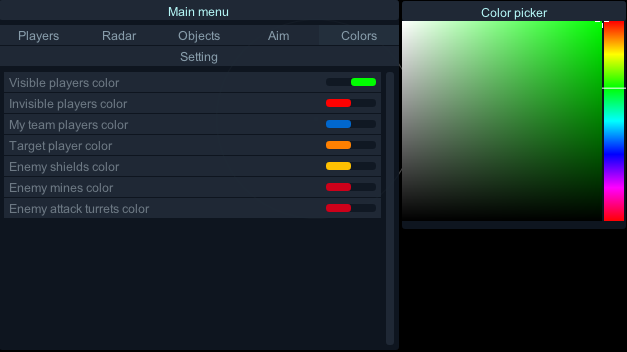
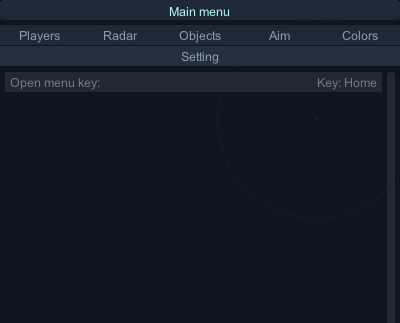
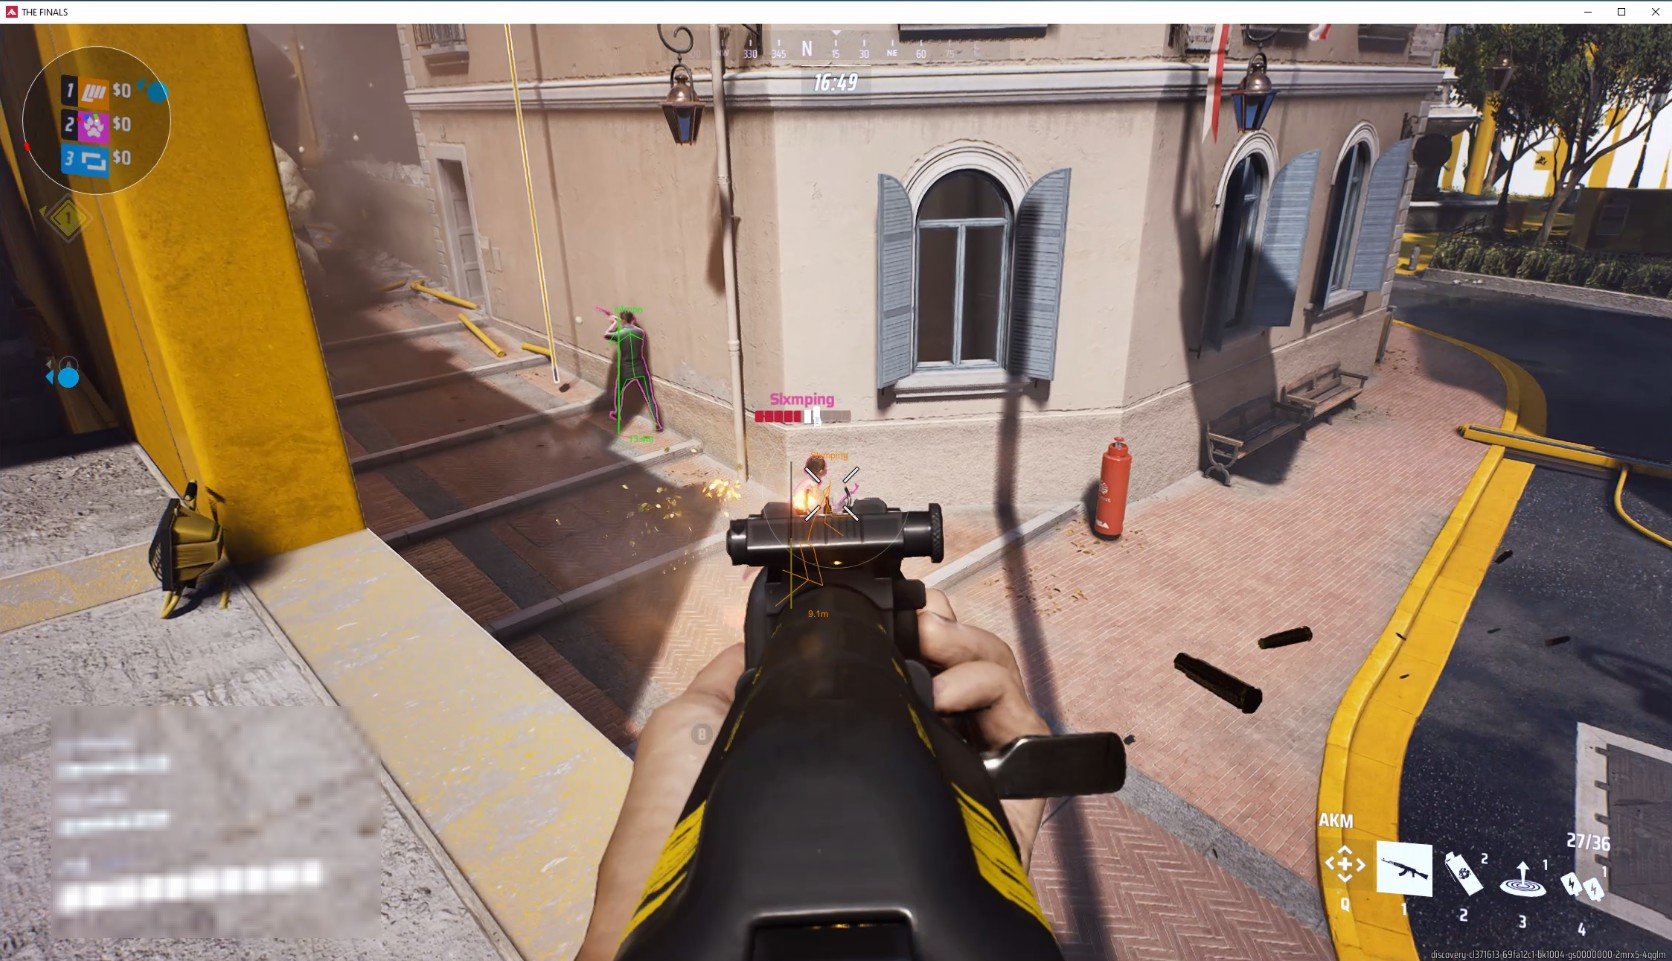
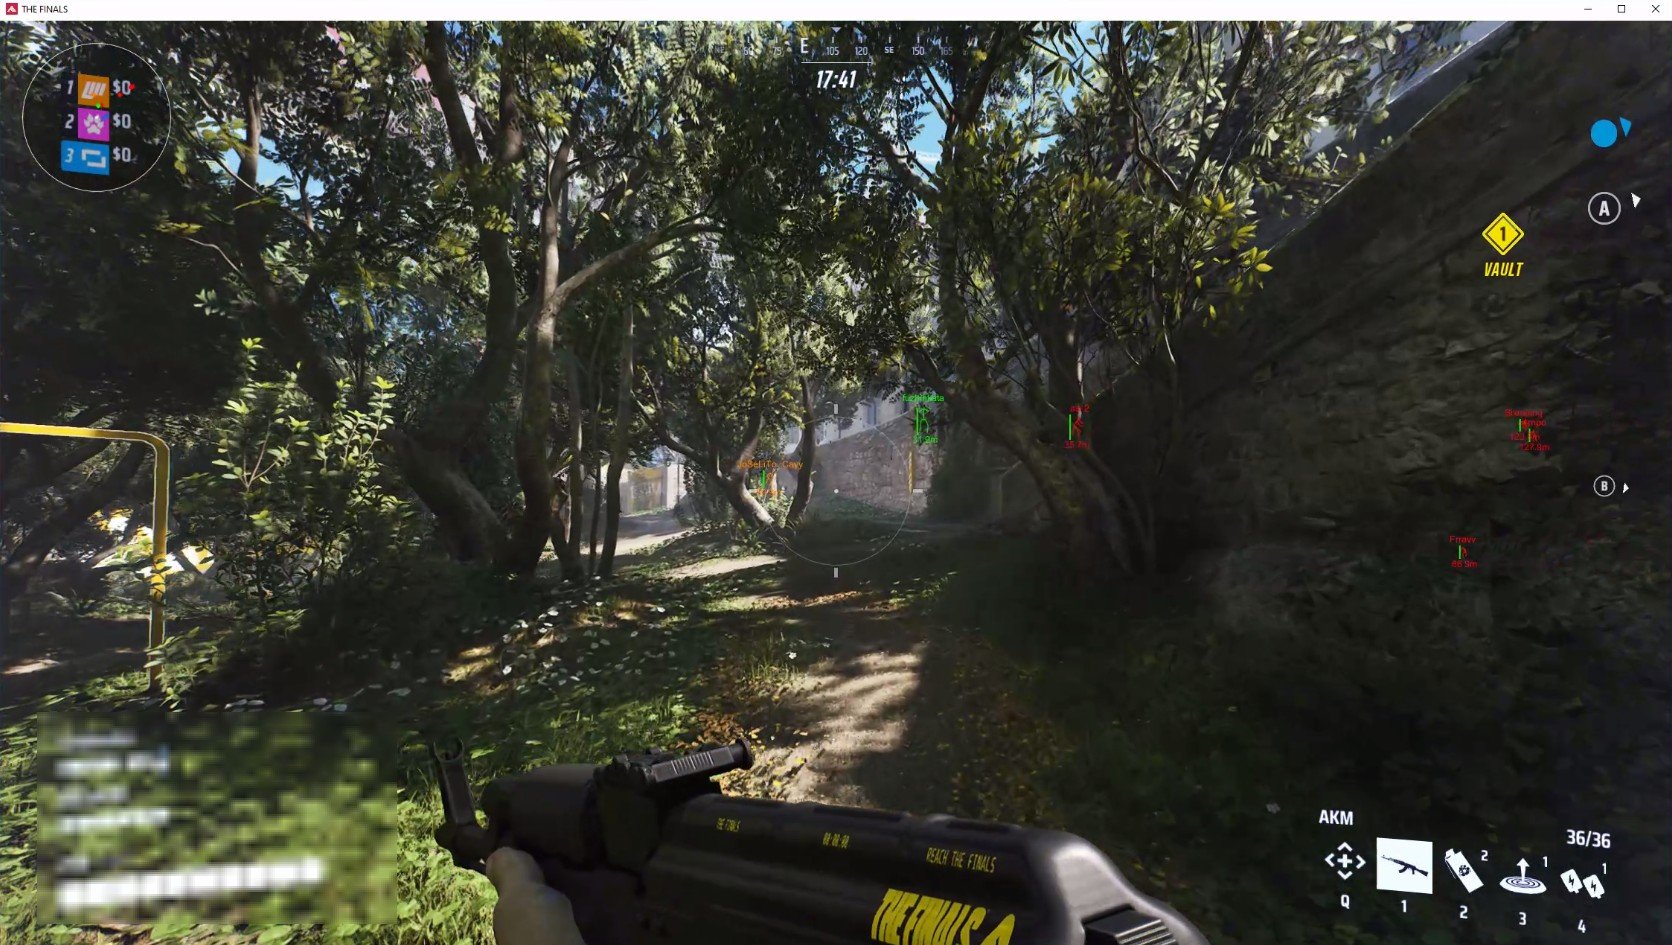
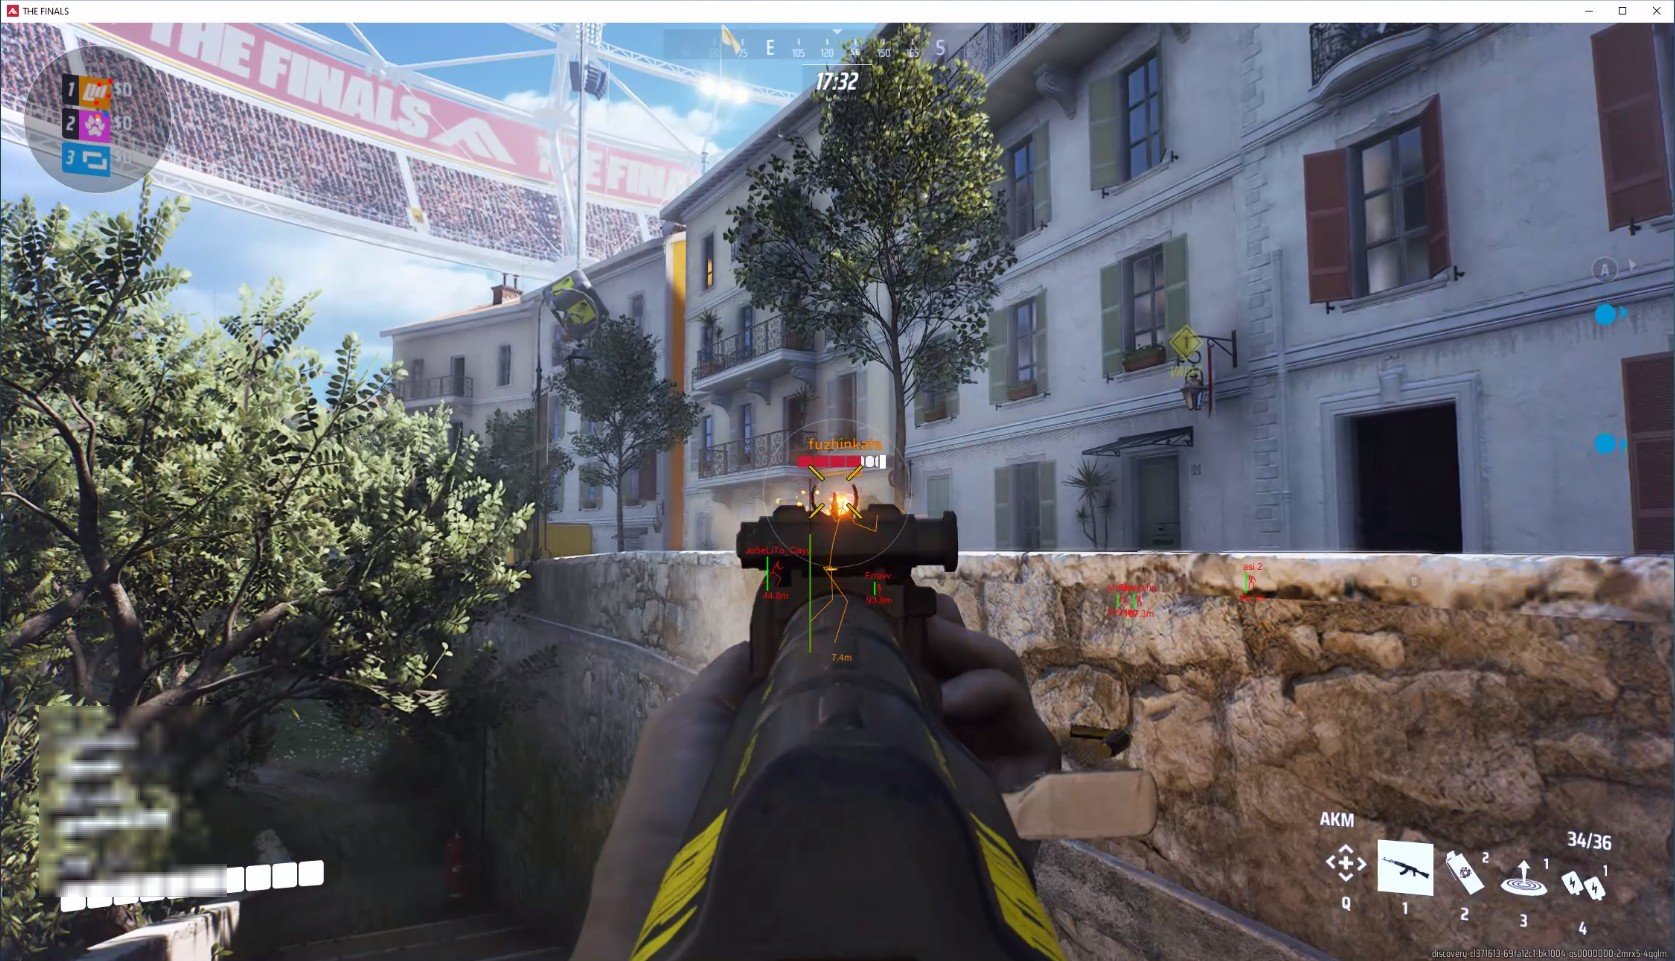
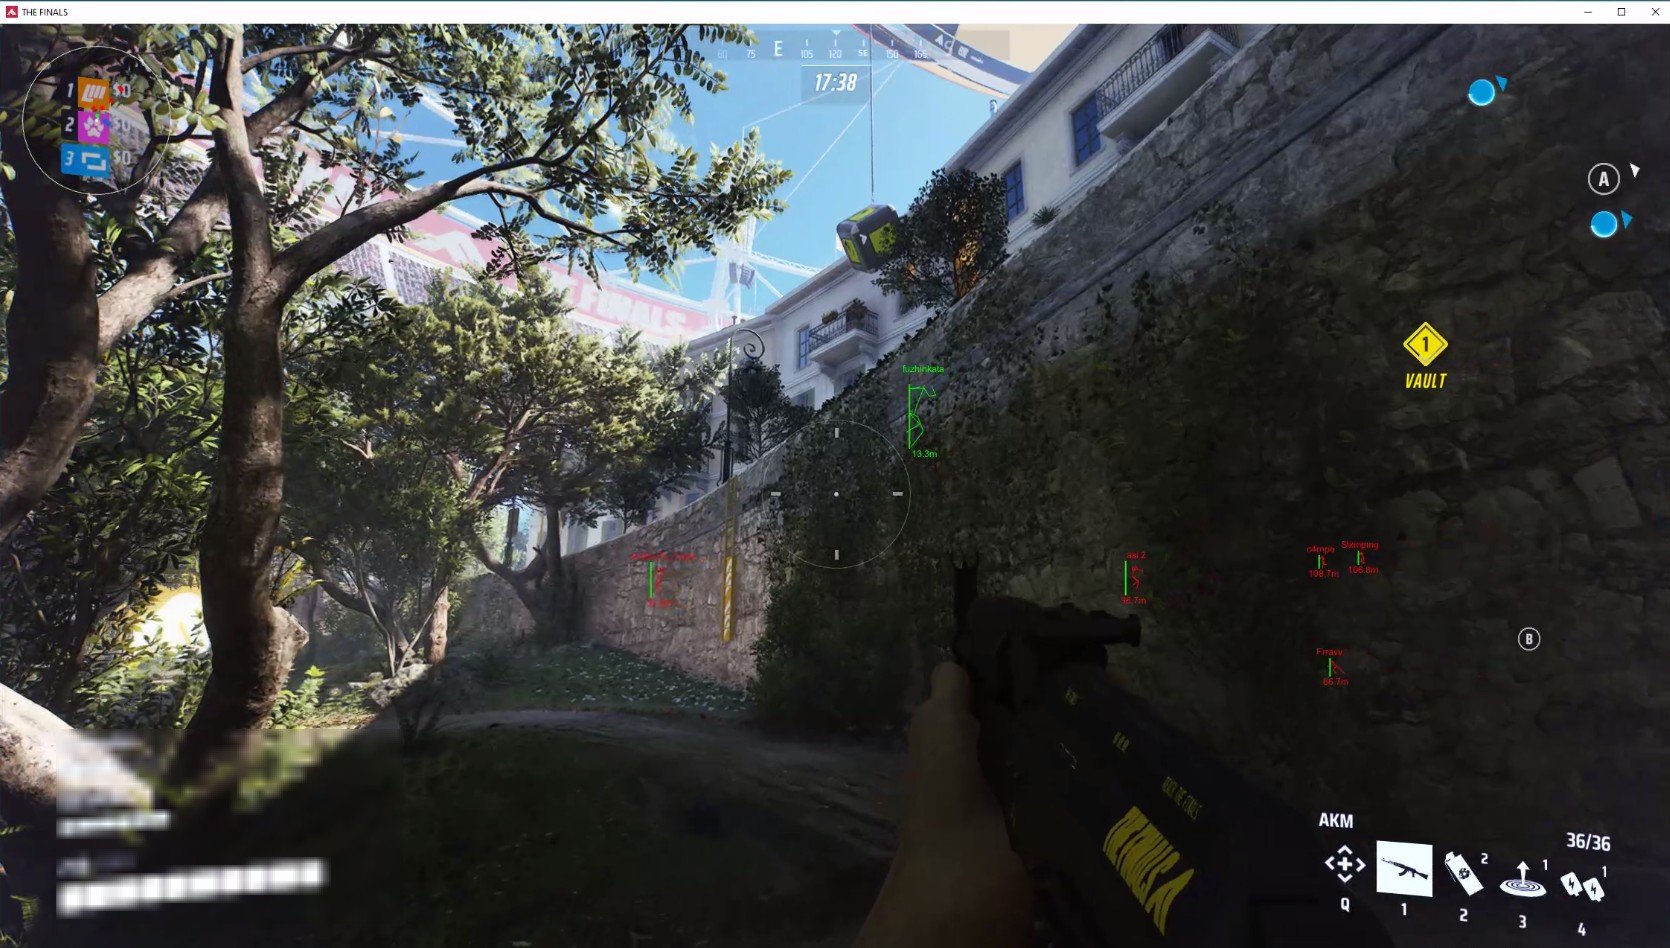
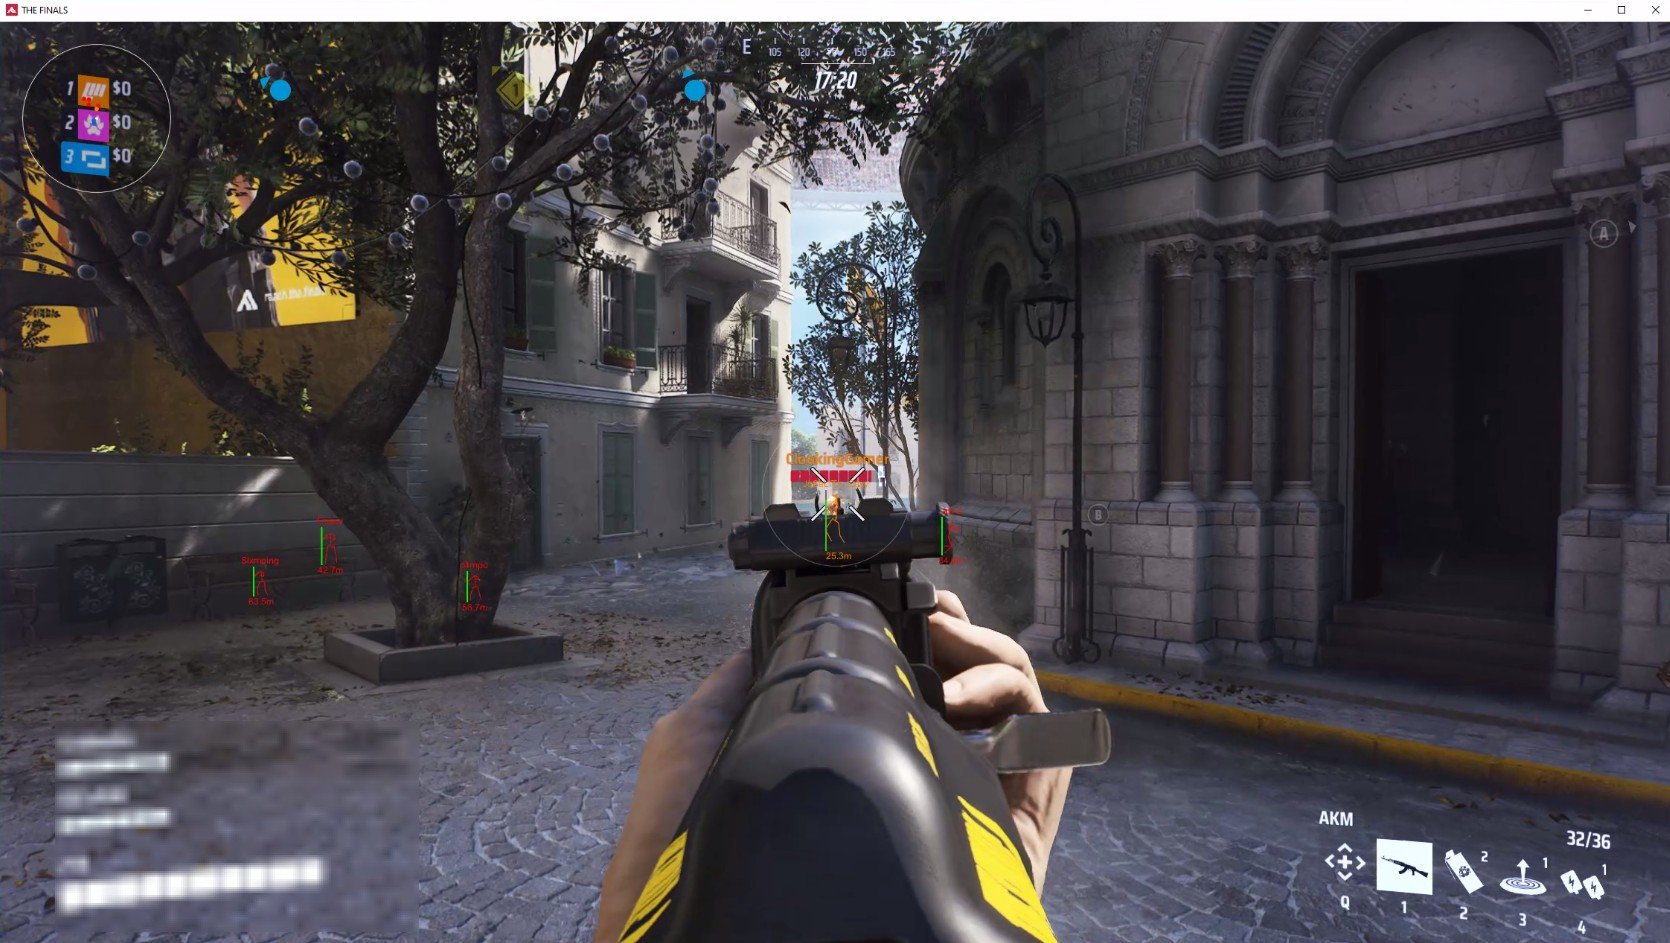
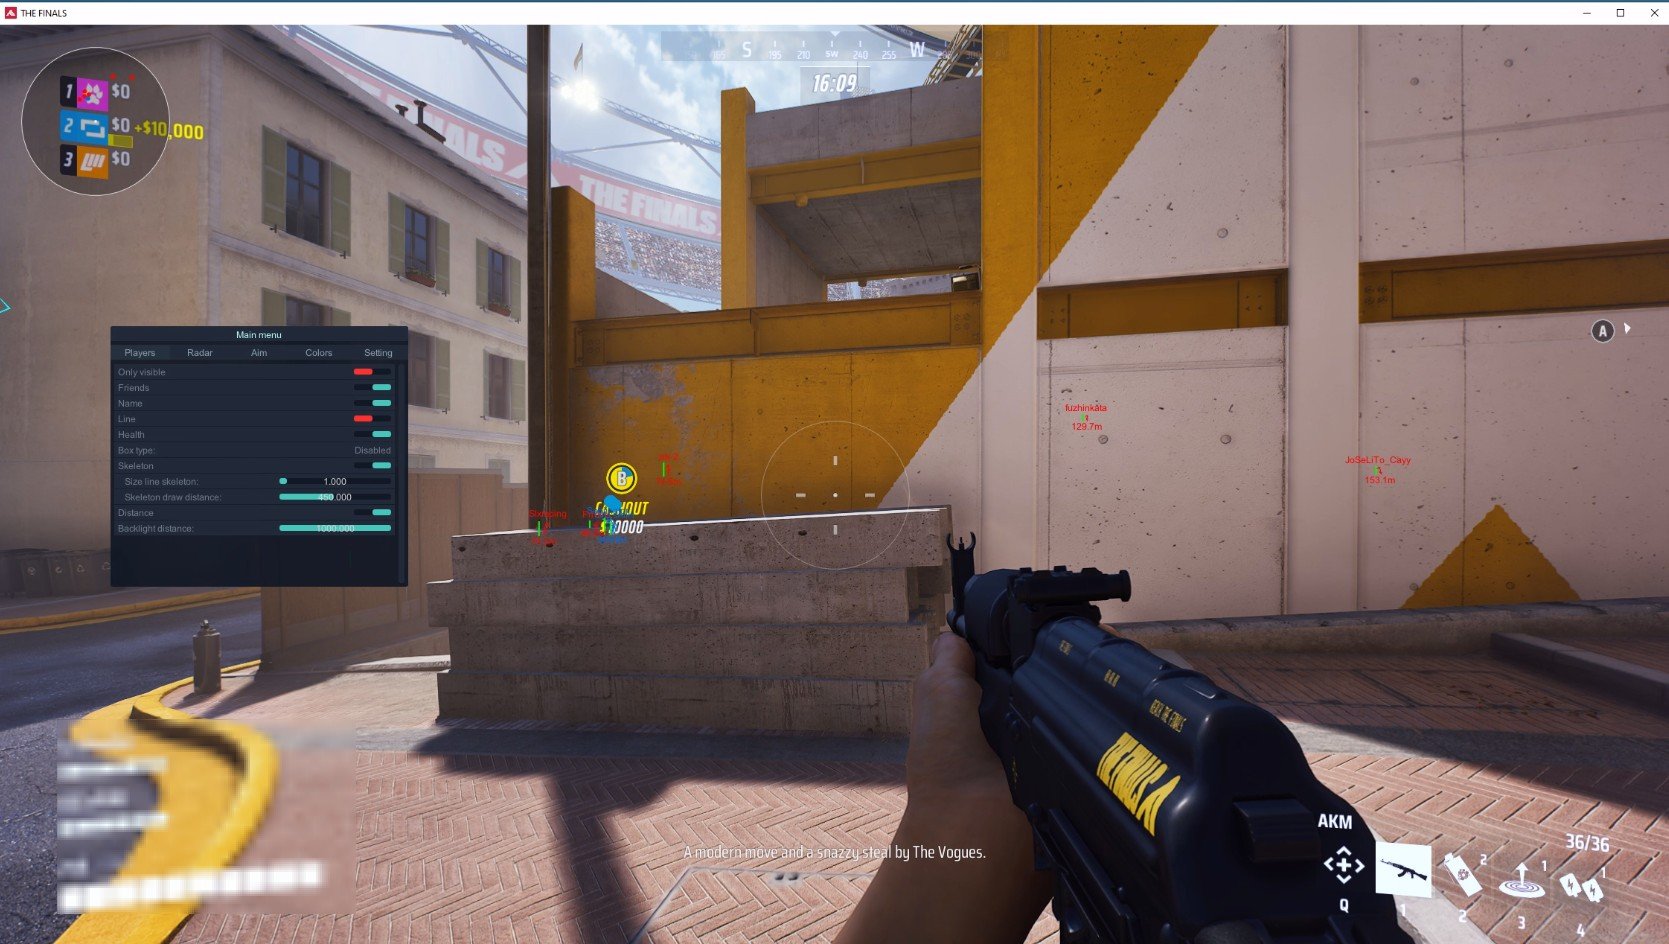
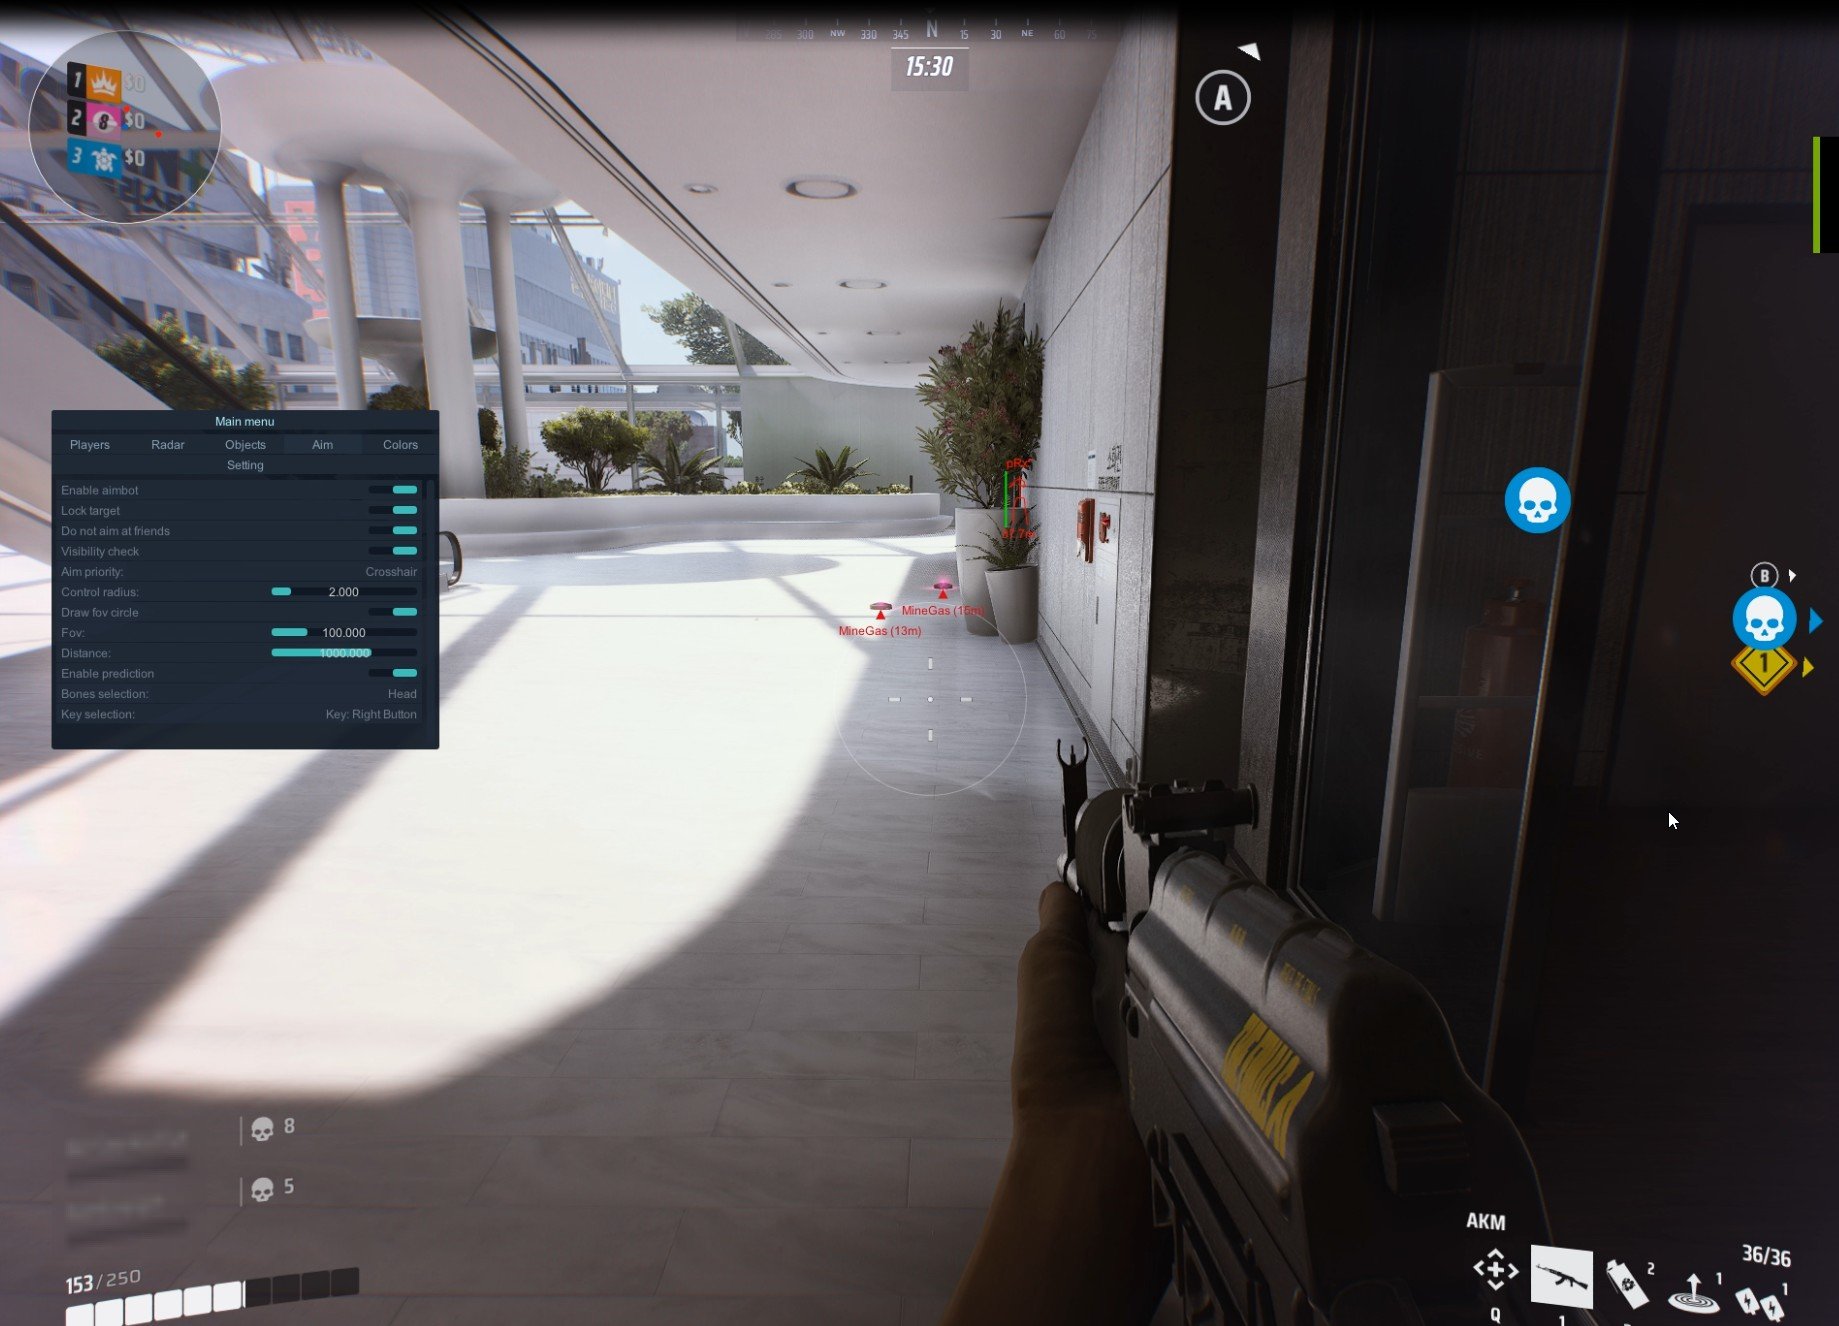
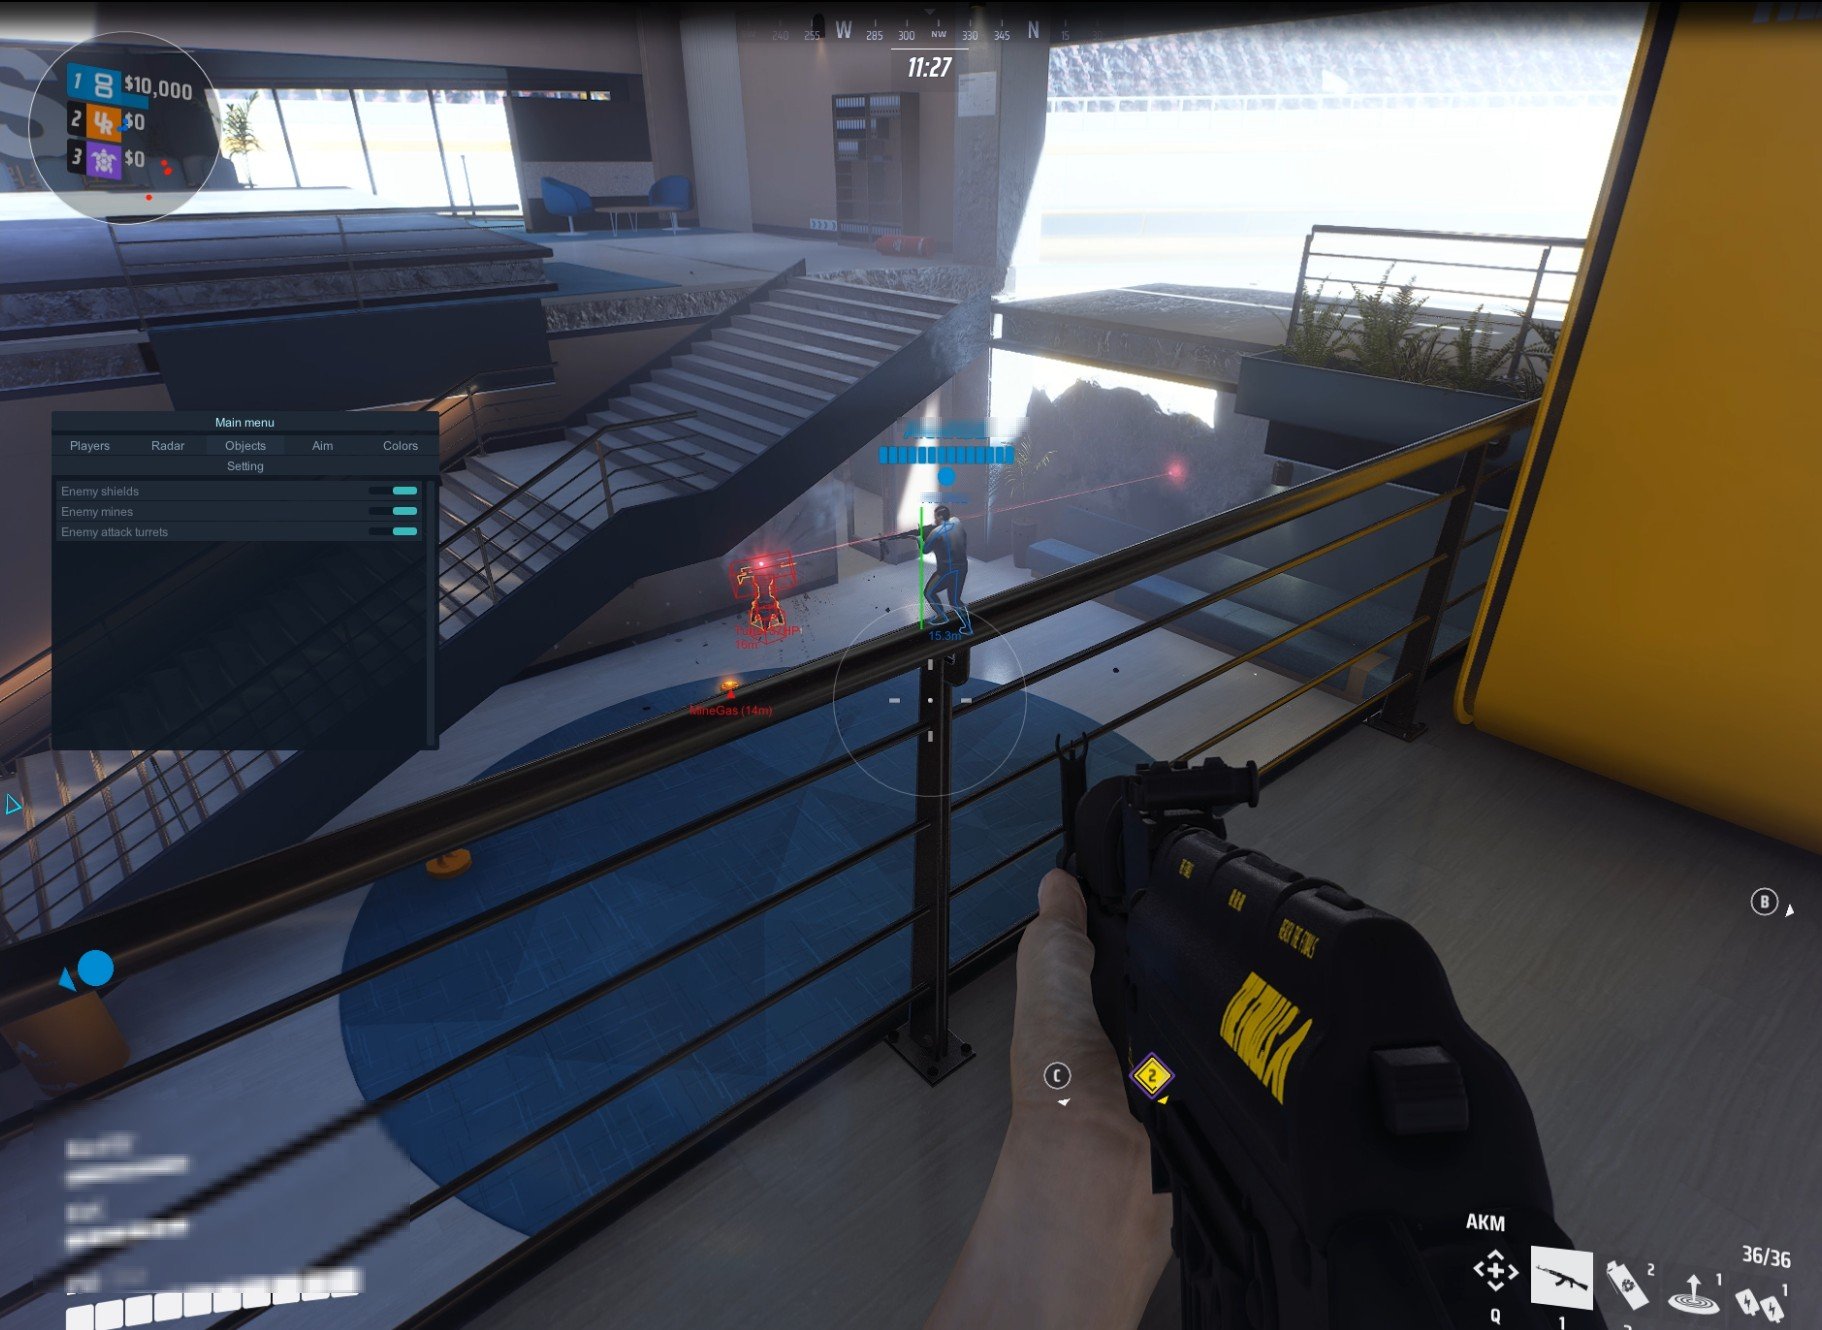
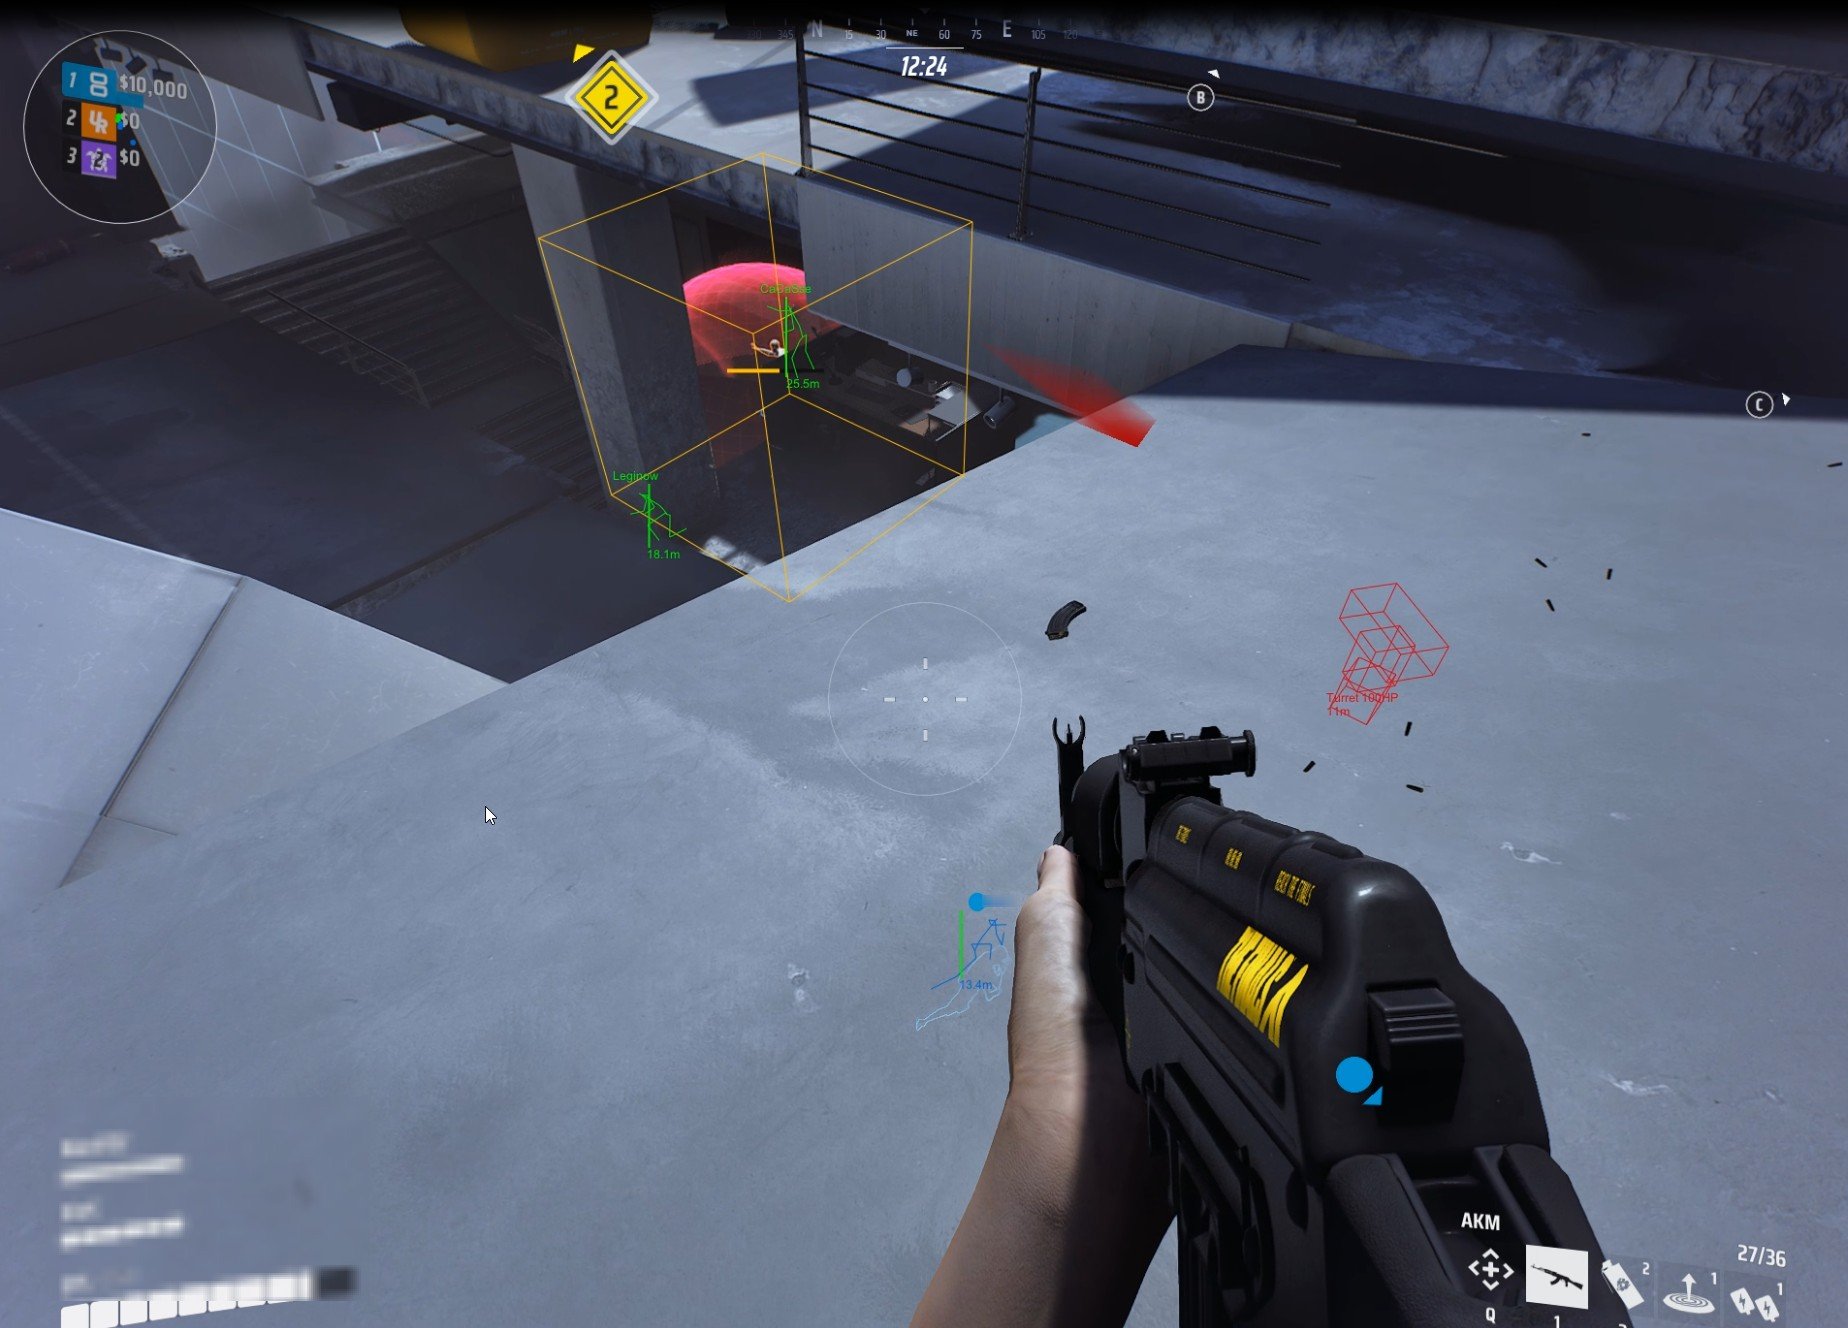


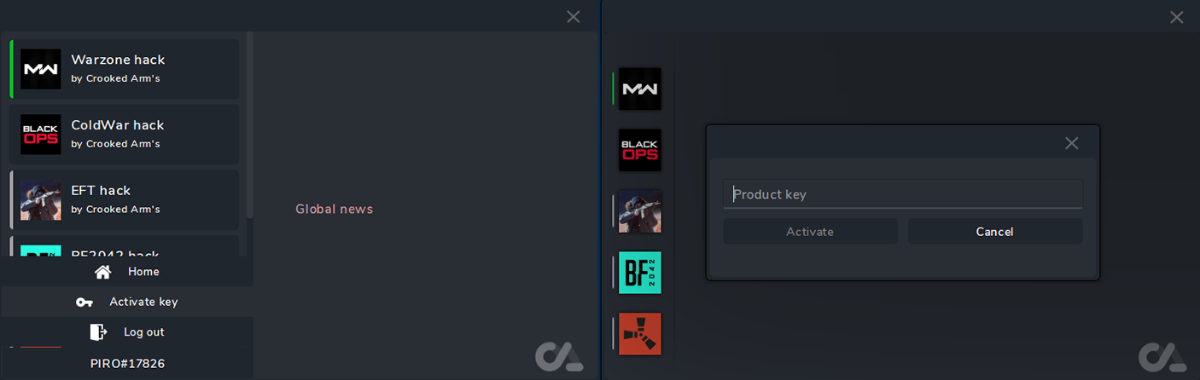
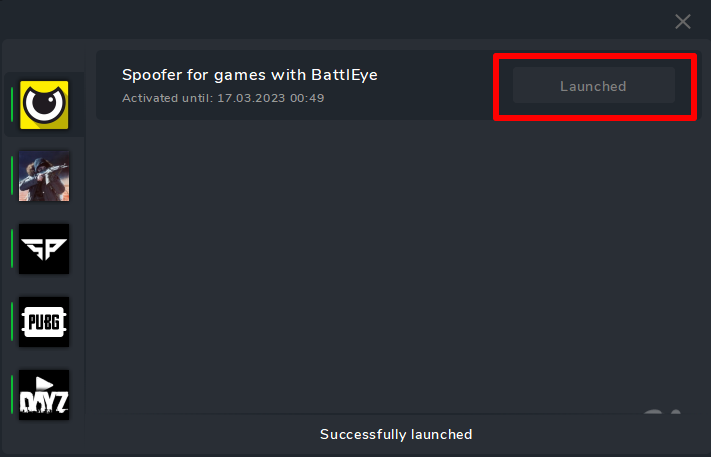
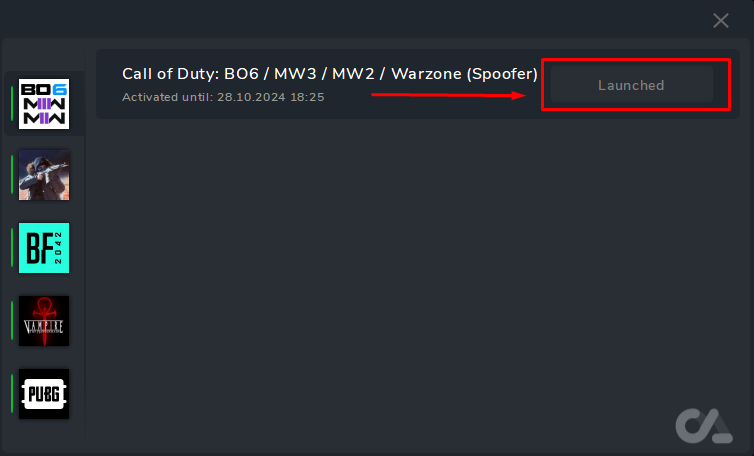
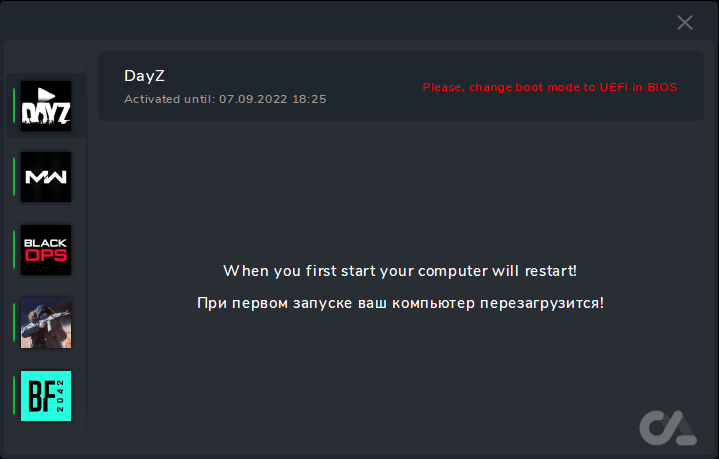

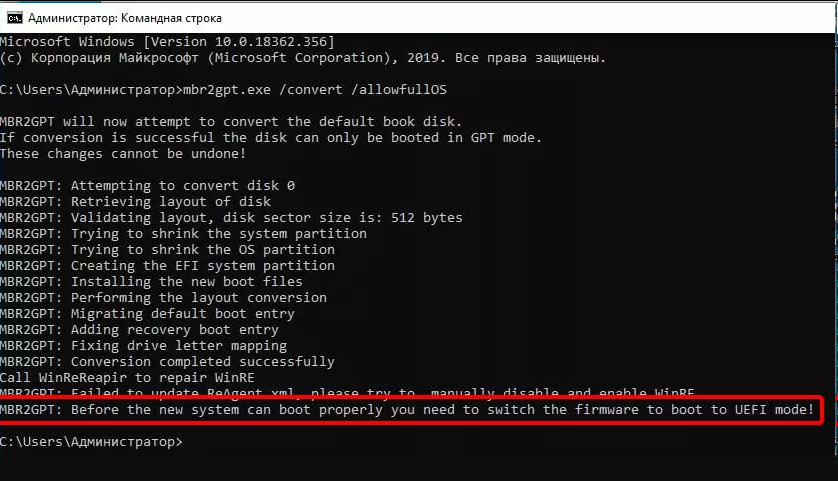

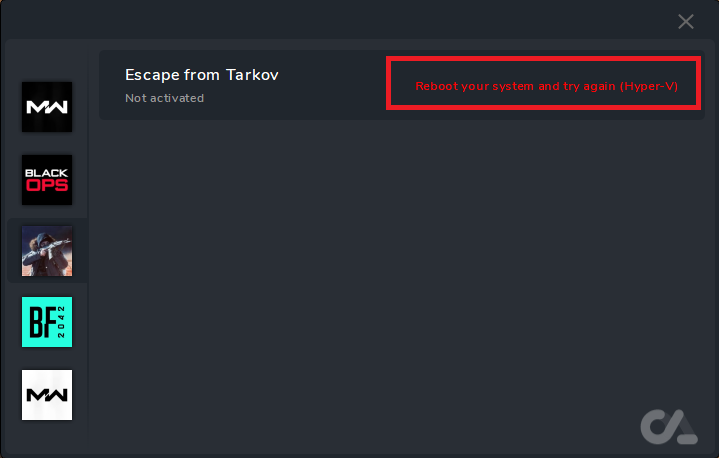
 ия могут оставаться их следы в системе.

 We recommend temporarily disabling them before launch.
 Run
Run 


 During boot, Windows may ask for confirmation (e.g., press F3 to proceed)—follow the on-screen instructions.
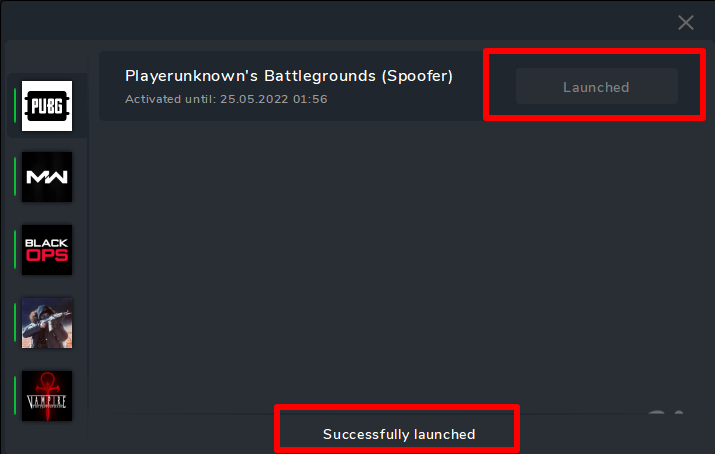
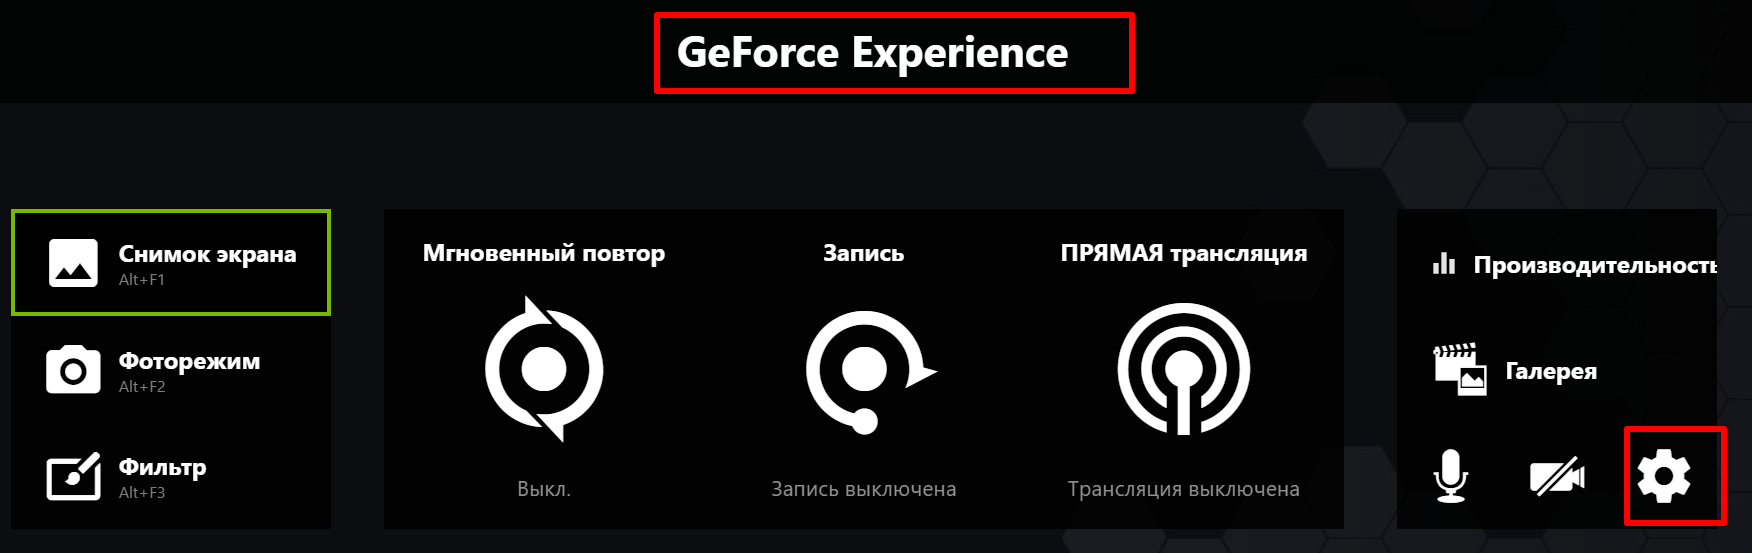
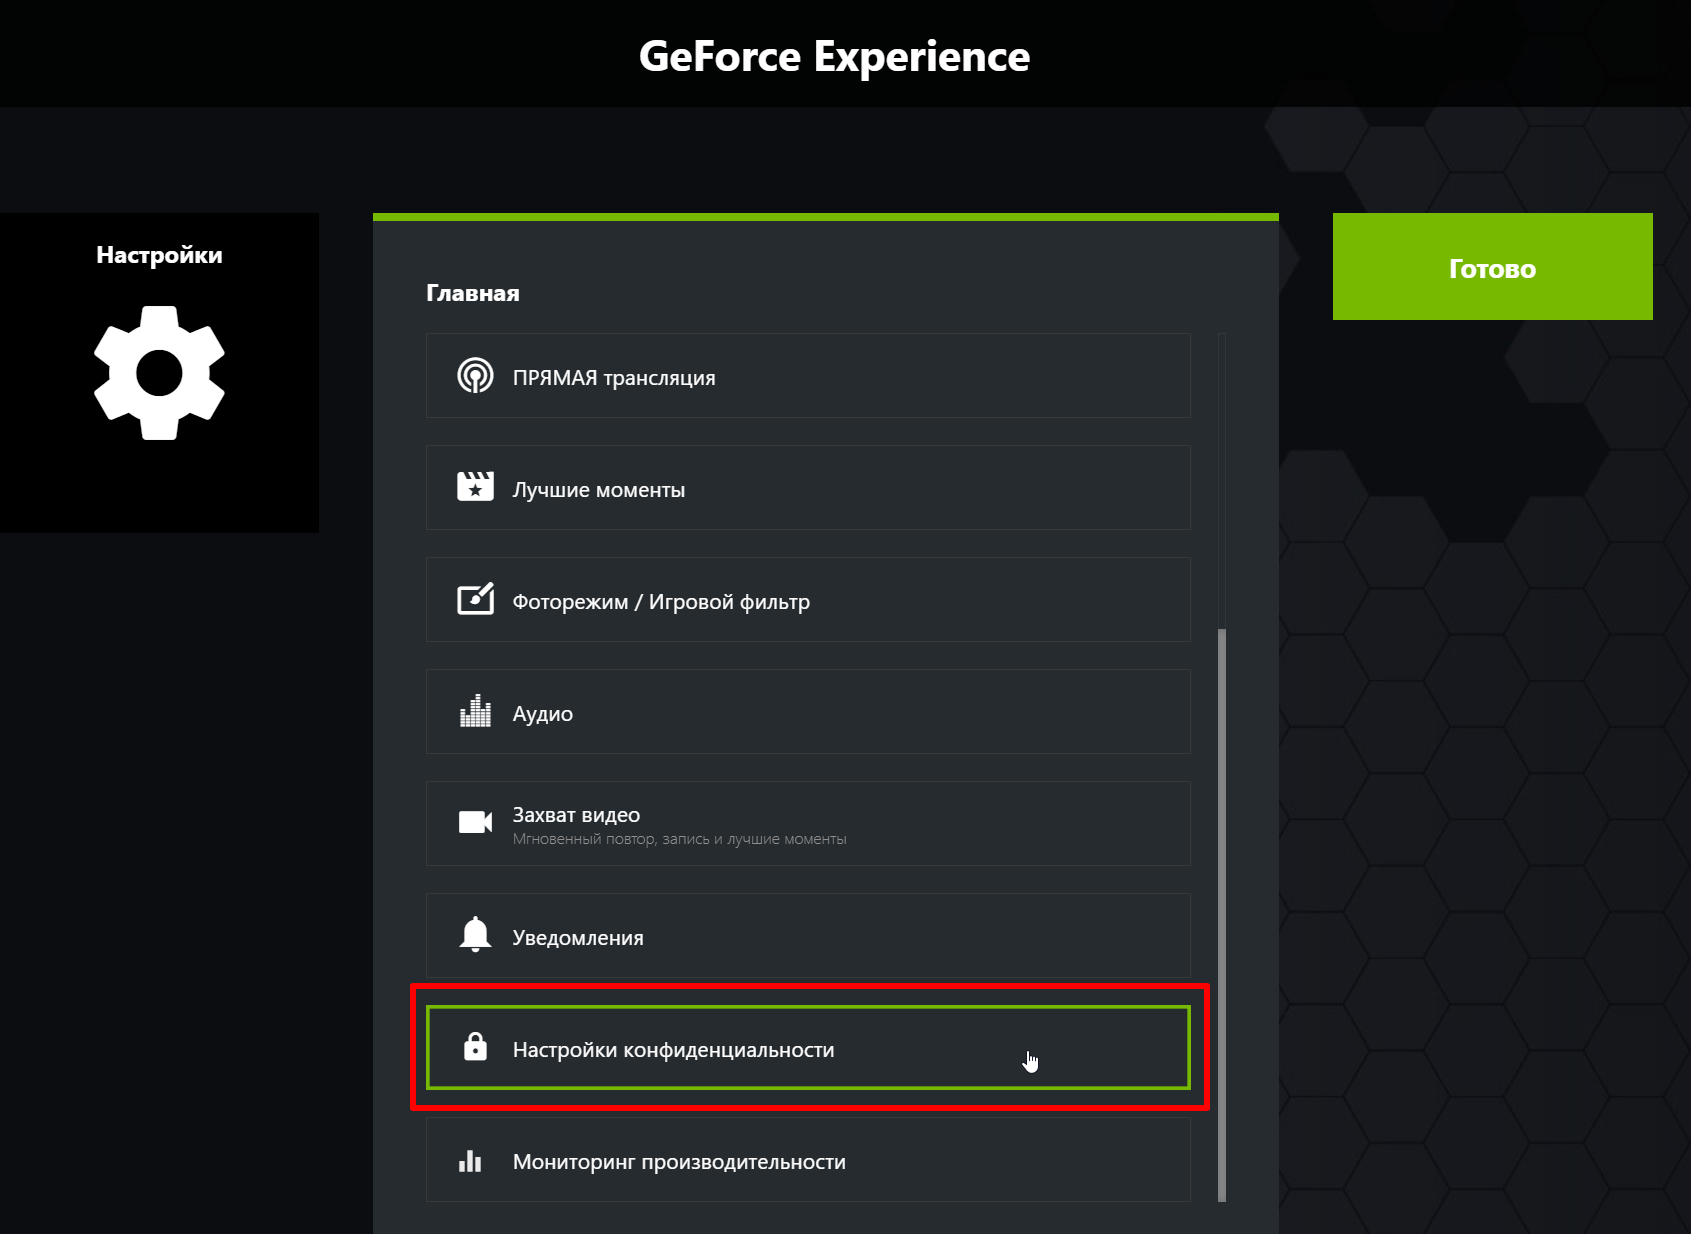
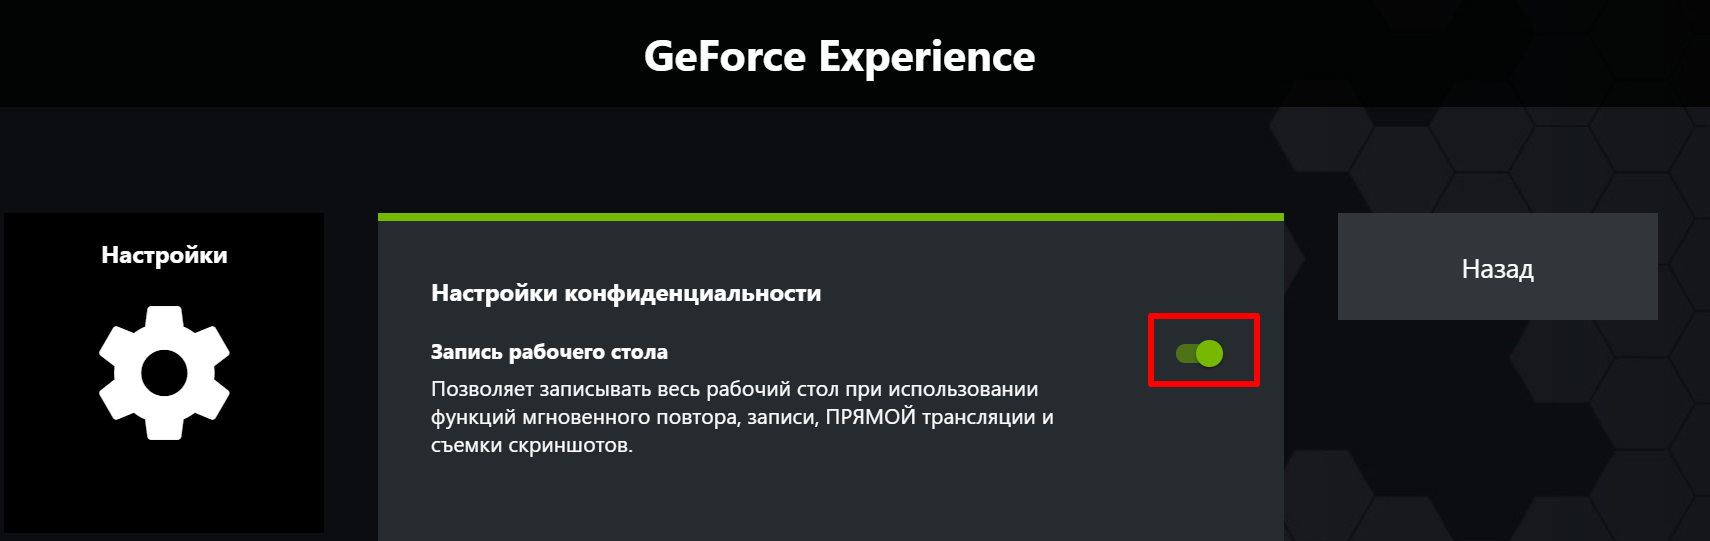


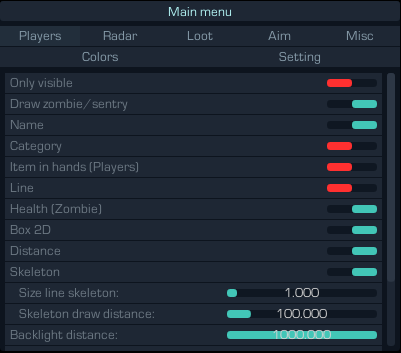
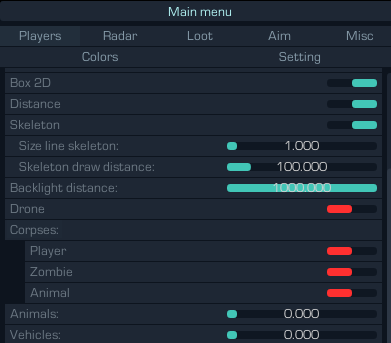
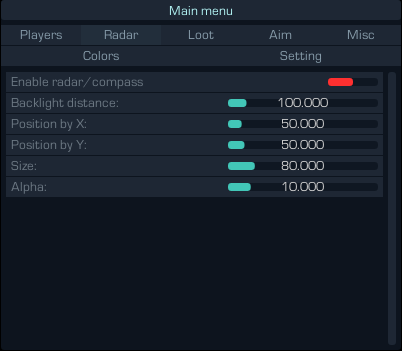
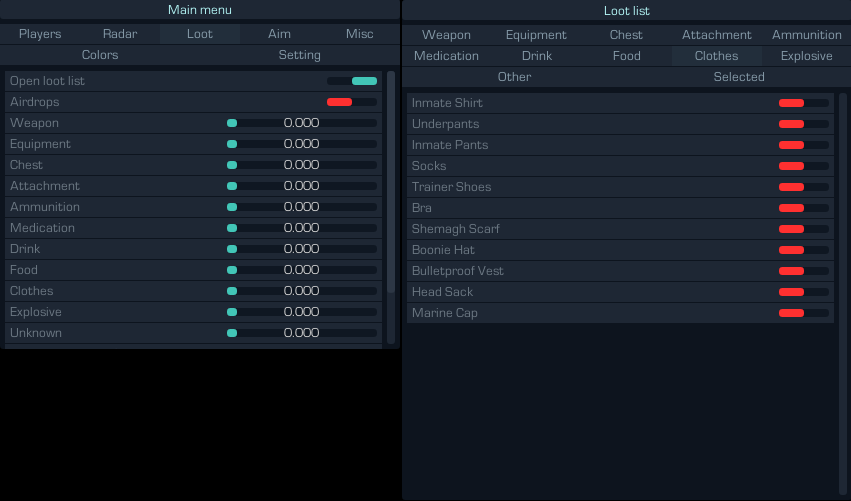
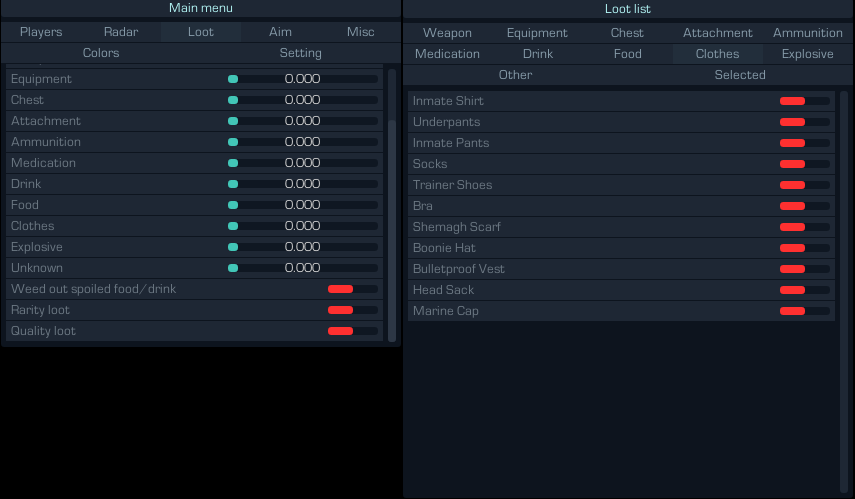
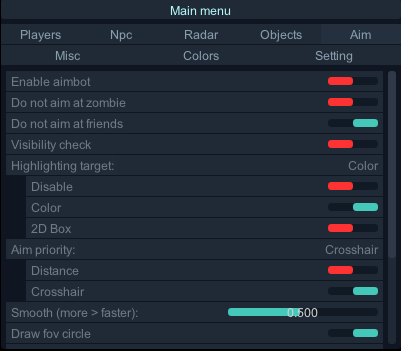
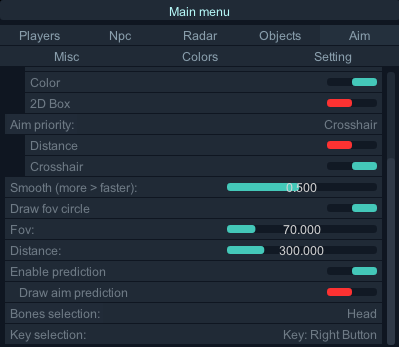

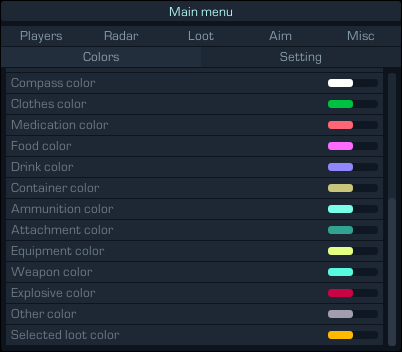
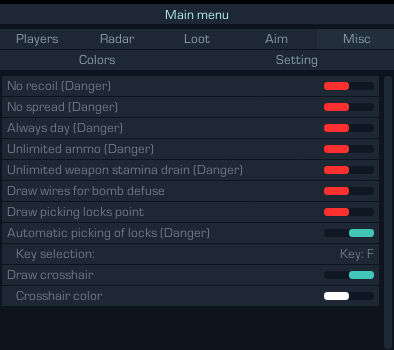
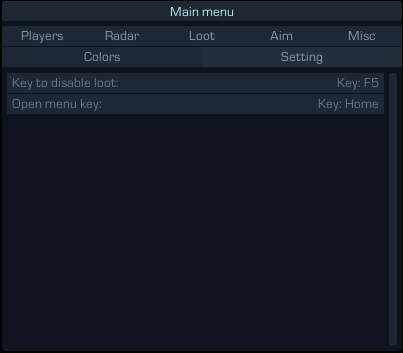


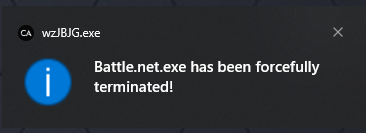


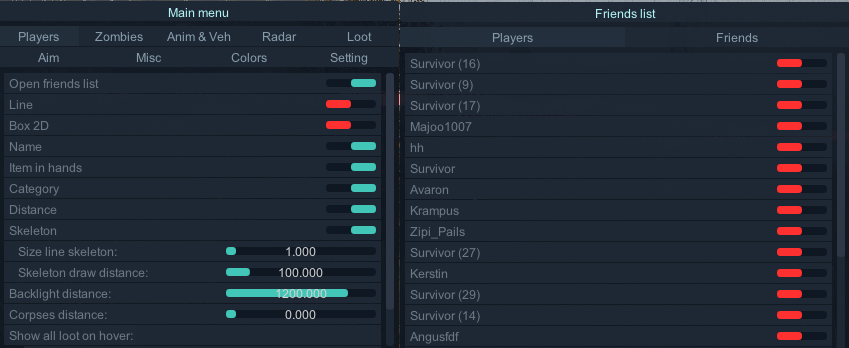
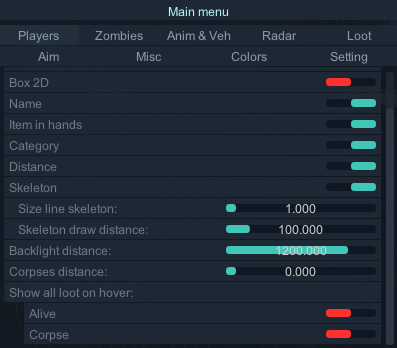
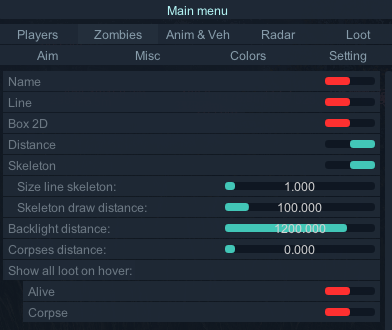
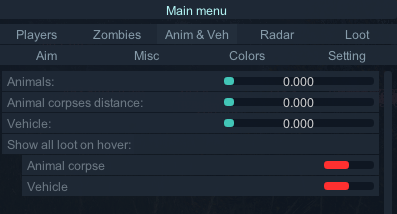
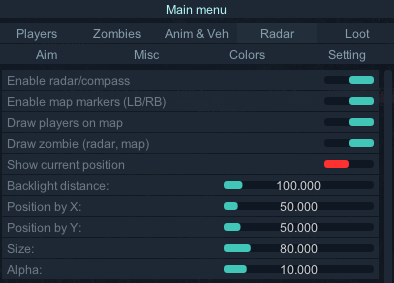
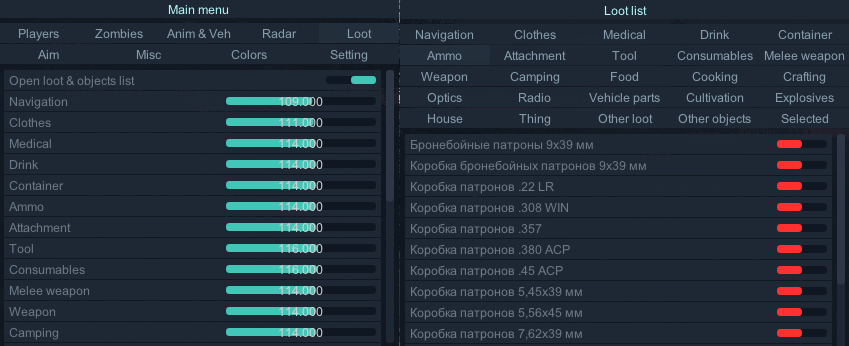
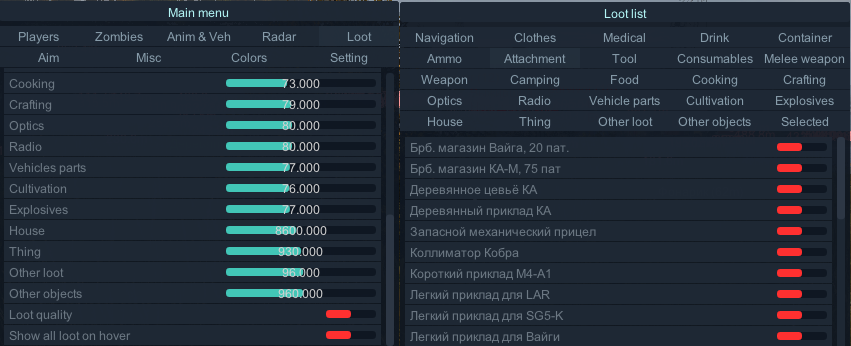
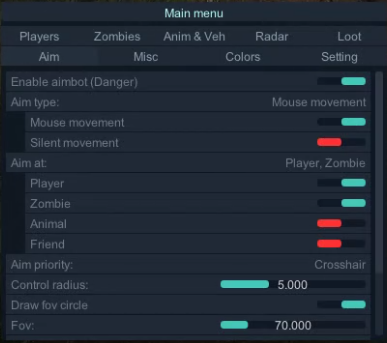
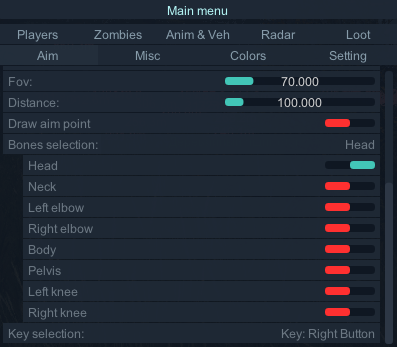
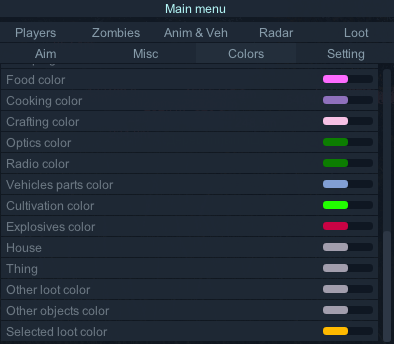
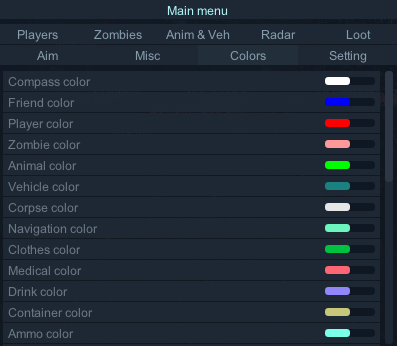
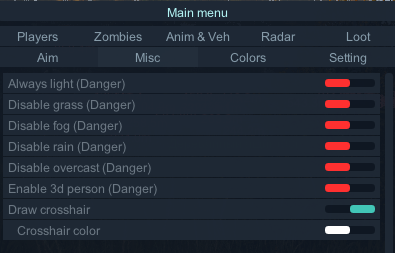
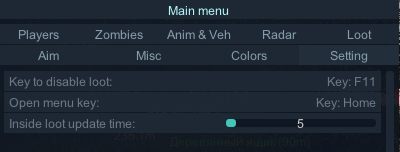
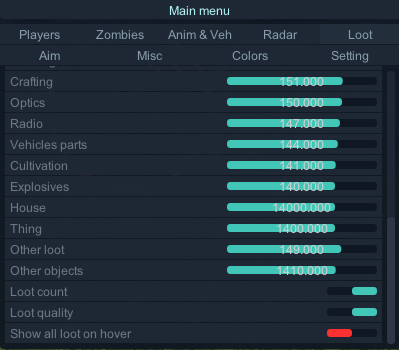

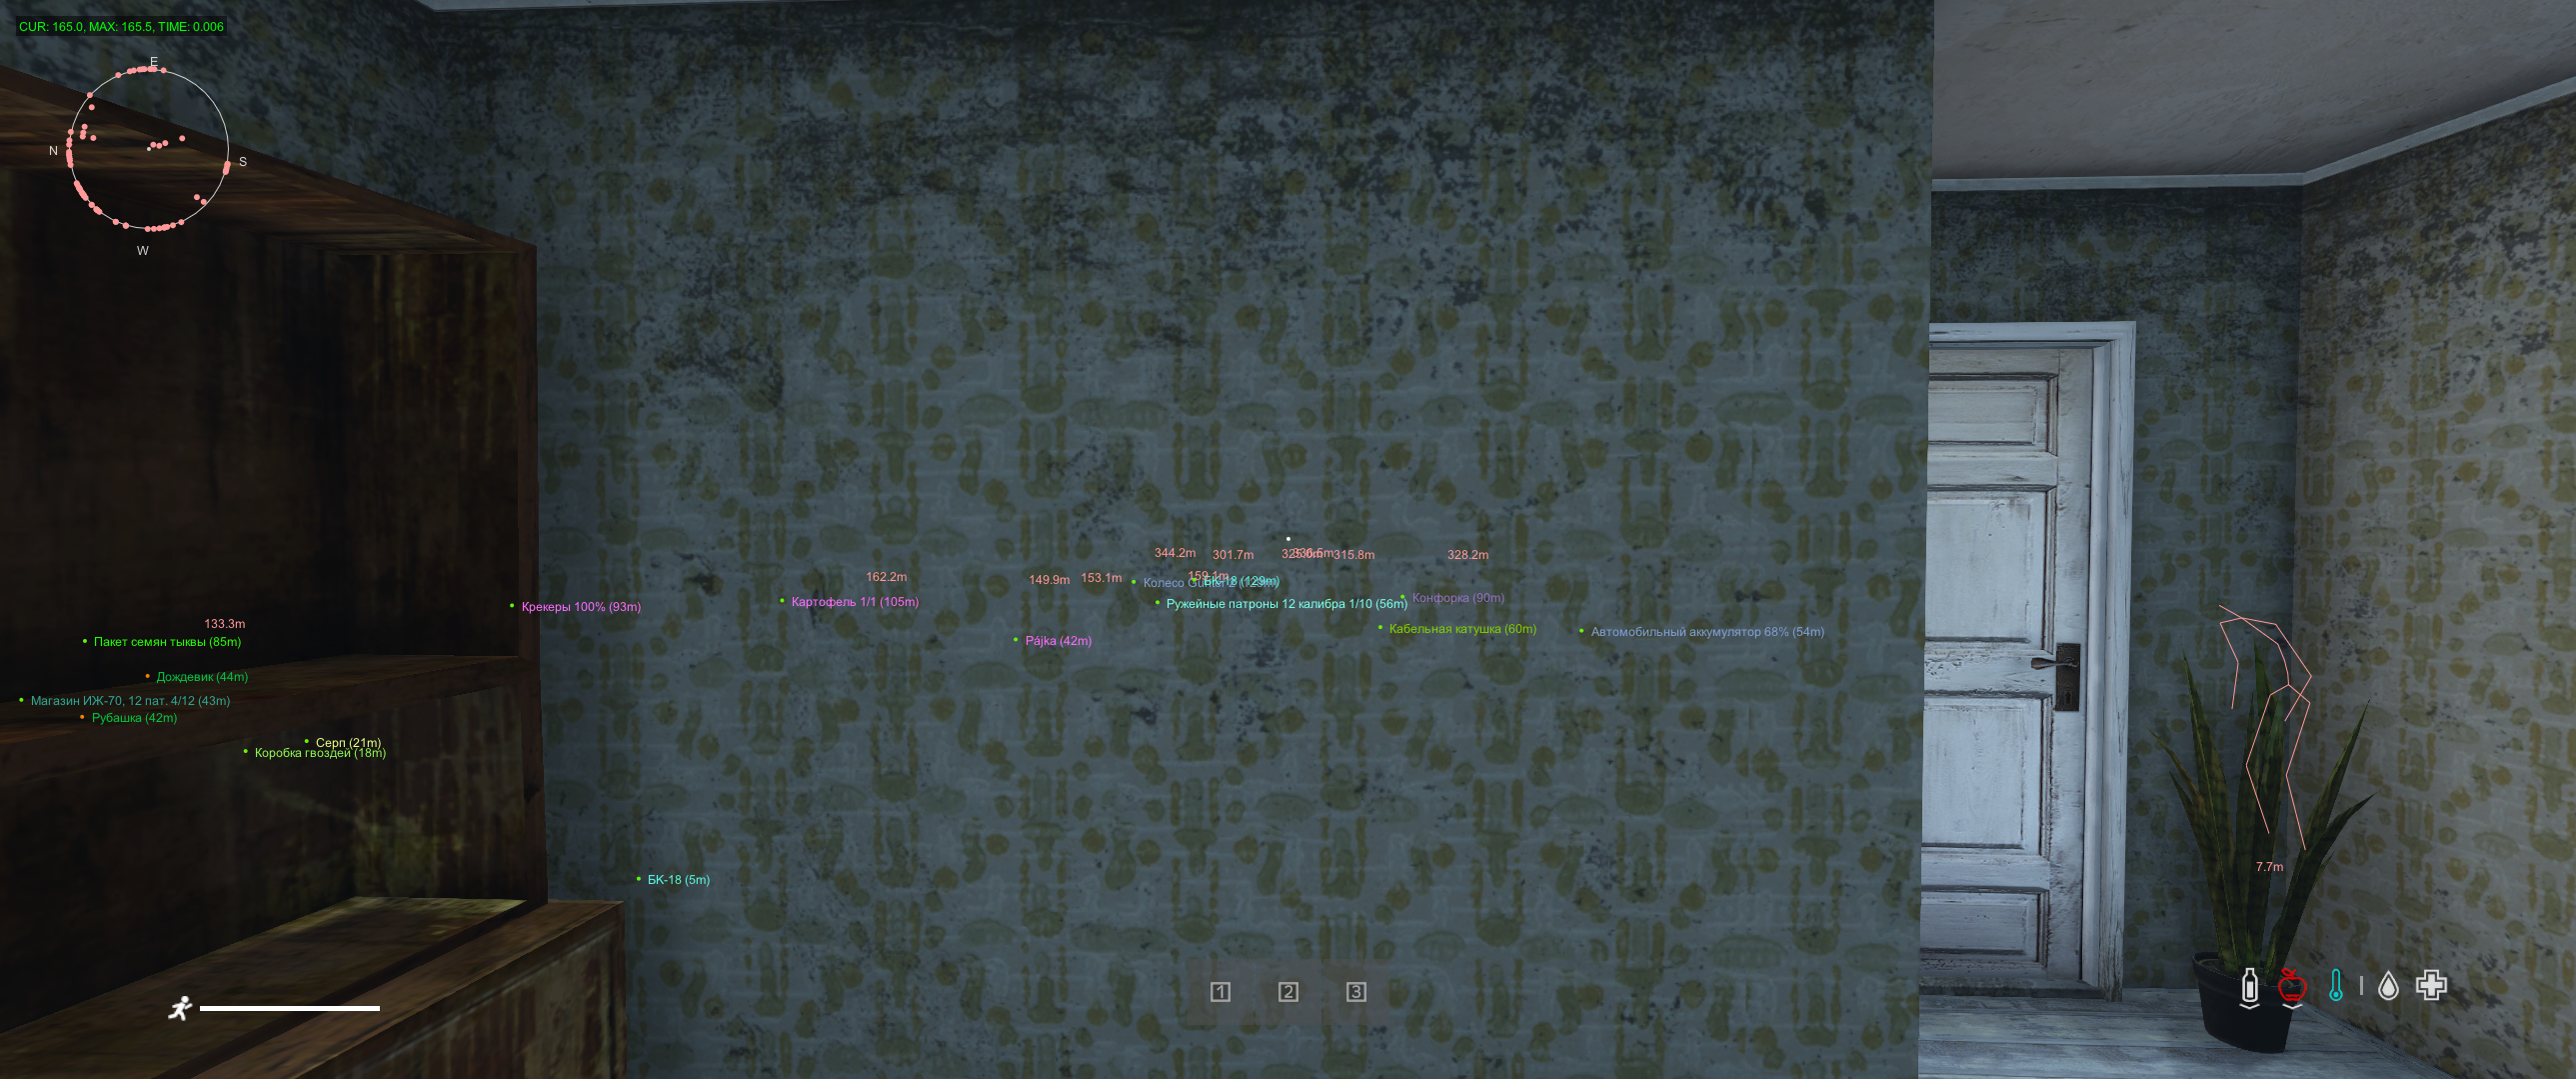
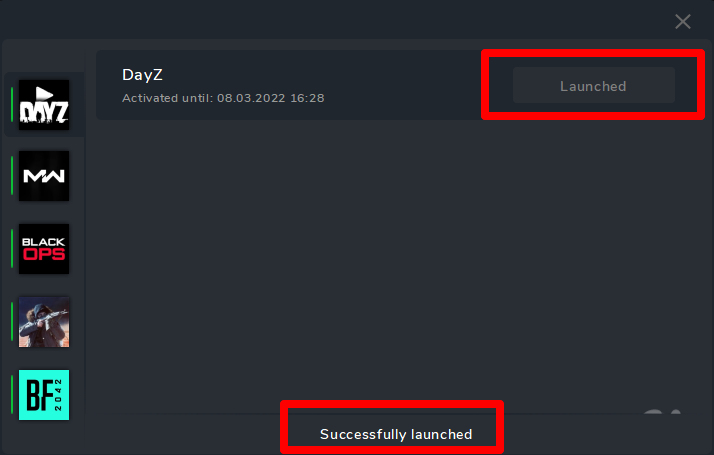
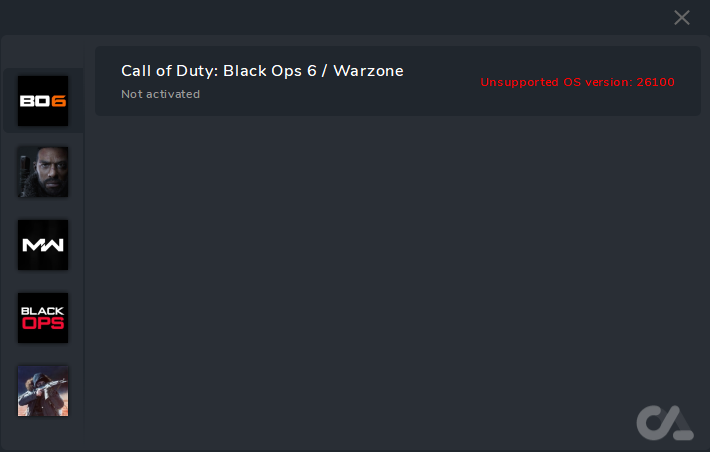
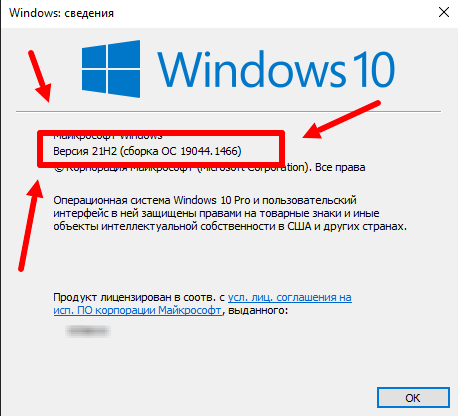
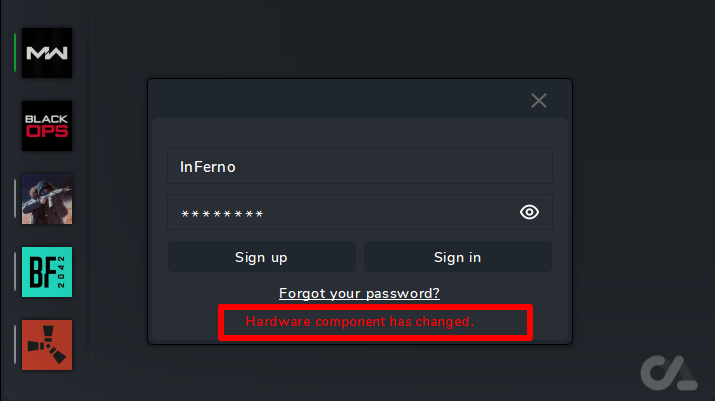

Instructions for launching The Finals
in THE FINALS
Posted
Инструкция на двух языках (русская и английская) | Instructions in two languages (Russian and English)
The video shows a demo view of the launch and so on
A more detailed launch is spelled out in the text instructions below the video
В видеоролике продемонстрирован демонстрационный вид запуска и прочее
Более детальный запуск прописан в текстовой инструкции ниже видео
Версия 2
[English] Launch Instructions
We remind you that you must understand what you are doing when playing with the software !!!
This software uses unique identifiers of your " hardware"
SYSTEM REQUIREMENTS:
Additional Information:
Project Type: External
Game Mode: Windowed*
How to run in full screen? Read here: Read more
Supported game version: Steam
Support for invisibility on videos or screenshots, screen demonstrations: Yes
Scale in the system and in the game : 100%
Launch you need a USB flash drive (virtual or physical)
*Running the software, you need a flash drive (virtual or physical)
HWID SPOOFER - Not built into the software! Purchased separately!
* The performance of the cheat with other SPOOFER is not guaranteed!!!
For the software to work correctly, you need to install and remove a number of programs
It is recommended to install
DISABLE or REMOVE MANDATORY
Additionally
FaceIt this is anti-cheat CS:GO
Vanguard this is anti-cheat Valorant
Additionally (if an error occurs)
** Links are clickabl
Launch Instructions
IMPORTANT ignoring these actions will lead to a ban!!!
Read the instructions carefully!
**remove the old software launcher from the PC
Launcher The Finals:
1. Launch the Launcher (from a flash drive!)
2. Select software The Finals and click Launch
3. In case of successful completion, the successfully launched message and the Launched button will appear
* If something goes wrong, you will receive an error and the cheat will not be loaded into the system!
4.Close Launcher
**disconnect the flash drive (make sure it is disconnected!!!)
5. Start the game
6. The cheat menu opens with the "HOME" key
7. Enjoy your game.
Note
If you launched the program, but there is no menu, then you did not follow the instructions.
1. Check the system requirements for the software.
2. Check whether the software launched successfully.
3. Check the window mode requirements.
4. Check that all instructions have been followed.
5. Read the instructions, restart your PC and try again.
If you follow everything written in the instructions, this is a 100% guarantee of successful launch of the software.
IF YOU HAVE SOMETHING THAT DOES NOT START, CONTACT YOUR SELLER FOR HELP.
[Русский] Инструкция по запуску
Напоминаем что вы должны понимать на что идете играя с софтом!!!
Данное ПО использует уникальные идентификаторы вашего "железа"
Требования к системе:
Поддерживаемые процессоры: Intel, AMD
Поддерживаемые ОС: Windows 10-11 х64
Поддерживаемые сборки: 1903(18362), 1909(18363), 2004(19041), 20H2(19042), 21H1(19043), 21H2(19044), 22H2(19045), 21H2(22000), 22H2(22621), 23H2(22631), 24H2(26100), 25H2(26200)
Дополнительная информация:
Тип проекта: External
Режим игры: Оконный*
Как запустить в полном экране? Читаем тут Подробнее
Поддерживаемая версия игры: Steam
Поддержка невидимости на видео или скриншотах, демонстрации экрана: Да
Масштаб в системе и в игре: 100%
Для запуска софта нужна флешка (виртуальная или физическая)
*Запуск софта только с флешки (виртуальной или физической)
HWID SPOOFER - В софт не встроен! Покупается отдельно!
*Работоспособность чита с другими спуфферами не гарантируется!!!
Для корректной работы софт необходимо установить и удалить ряд программ
Рекомендуется установить
ОТКЛЮЧИТЬ или УДАЛИТЬ ОБЯЗАТЕЛЬНО
Отключить антивирус ( Удалить!!! )
Отключить SmartScreen
Отключить защитник Windows
Дополнительно
FaceIt - это отдельный античит игры CS:GO
Vanguard - это античит игры Valorant
Дополнительно (при возникновении ошибки)
**Ссылки кликабельны
Инструкция по запуску
ВАЖНО Пренебрежение данных действий может привести к бану!!!
Прочтите внимательно инструкцию!!
**удалите старый лаунчер софта с ПКЗапуск The Finals
1. Запустите Launcher (с флешки!!!)
2. Выберите софт The Finals и нажмите Launch
3. В случае успешного выполнения появится сообщение successfully launched и кнопка Launched
* Если что то пойдет не так вам выдаст ошибку и чит не будет загружен в систему!
4. Закроейте Launcher
отсоединить флешку (убедиться что она отключена!!!)
5. Запустите игру
6. Меню чита открывается клавишей "HOME"
7. Приятной игры.
Примечание
Если у вас инжект удачный, но нет меню то :
Если вы запустили программу, но меню нет, то вы не следовали инструкции.
1. Проверьте системные требования для ПО.
2. Проверить успешность запуска ПО.
3. Проверить требования к режиму окна.
4. Проверить все ли инструкции соблюдены.
5. Прочтите инструкцию, перезапустите ПК и повторите запуск.
При соблюдении всего, что написано в инструкции, это гарантия успешного запуска ПО на 100%.
ЕСЛИ У ВАС, ЧТО-ТО НЕ ЗАПУСКАЕТСЯ, ОБРАТИТЕСЬ К СВОЕМУ ПРОДАВЦУ ЗА ПОМОЩЬЮ.
Еrror | Ошибки